Wabunka’s private geisha dinner at Ryotei Maki is one of the most impressive cultural experiences in Japan that I have attended. I recommend it if meeting geisha in a private room is something you have genuinely dreamed about and you can comfortably afford a very expensive evening.
The private meal, conversation, dance, live music, and games give you much more time with the performers than a short public show. The price is also high enough that I would not recommend it for casual curiosity. A shorter group or stage experience may be a better use of your money if you mainly want an introduction to geisha culture.
Some links on YavaJapan are affiliate links. If you book or buy through them, I may earn a small commission at no extra cost to you. It helps support the site, and I only link to places, stays, and experiences I genuinely think are worth recommending.
A Short Note on Geisha in Tokyo
Kyoto is much more famous for geisha, but Tokyo has its own active tradition. The city’s six historic geisha districts are Shimbashi, Akasaka, Kagurazaka, Asakusa, Yoshicho, and Mukojima. Kagurazaka once had a large geisha community and still has a small number of working geisha and traditional restaurants. Ryotei Maki is a ryotei (traditional high-end Japanese restaurant) in this part of Tokyo, established about 50 years ago.
My Visit Was a Video Shoot, Not a Normal Booking
I work with Wabunka as part of my job in the Japan travel industry, and I attended this dinner free of charge while helping to produce a promotional video for Wabunka. I was there primarily for the shoot. We repeated some scenes for the camera, so the evening did not follow the uninterrupted pace that a normal guest would experience. You can watch the video here:
I can describe the room I entered, the food I ate, the performance I watched, the conversation, and the games we played. I cannot review the exact timing or order of a standard booking from personal experience. I have used Wabunka’s current itinerary for those practical details below and kept it separate from my own account.
Wabunka is a Japan-based website for international travelers booking private cultural experiences and experiential stays. Its experiences are for your own party rather than a mixed group, and an interpreter joins when language support is needed. This dinner shows why that format can work so well: conversation is a central part of the evening, not a brief extra after a performance.
At a Glance
Detail
What to Know
Location
Ryotei Maki, Kagurazaka, Tokyo
Duration
120 min
Group
Private for 1-8 guests; a two-person minimum charge applies
Dinner
Seasonal multi-course kaiseki meal included; drinks cost extra
Entertainment
Hangyoku dance, jikata shamisen and singing, conversation, games, and photos
Language
English-speaking interpreter included
Price
Very high; check the current quote because it varies by date, group size, and options
Best for
A serious interest in geisha culture, a special occasion, or a comfortable premium budget
For a standard booking, you meet the interpreter outside Ryotei Maki 15 minutes before the start and enter together. The 120-minute experience is completely private for your party. Bookings can be made for one to eight guests, although a solo guest still pays the minimum charge for two people.
During the evening, you have a seasonal kaiseki dinner, conversation with the performers, dance by a hangyoku, and live shamisen music and singing from a jikata. Traditional banquet games and commemorative photos are also included. The order can change, and the individual performers may differ from the people in my video.
The meal and interpreter are included, while drinks cost extra. Wabunka asks guests to wear business-casual clothes and socks, and to avoid shorts, T-shirts, and revealing clothing. You can send dietary restrictions when making the booking.
Our visit was organized around filming, so several moments were repeated for the camera.
Entering Ryotei Maki
After years living in Tokyo, I had often passed traditional buildings and wondered what happened behind their doors. Entering Ryotei Maki answered some of that curiosity. The interior was unmistakably Japanese, but what stayed with me was how the room was actually used rather than any decorative detail.
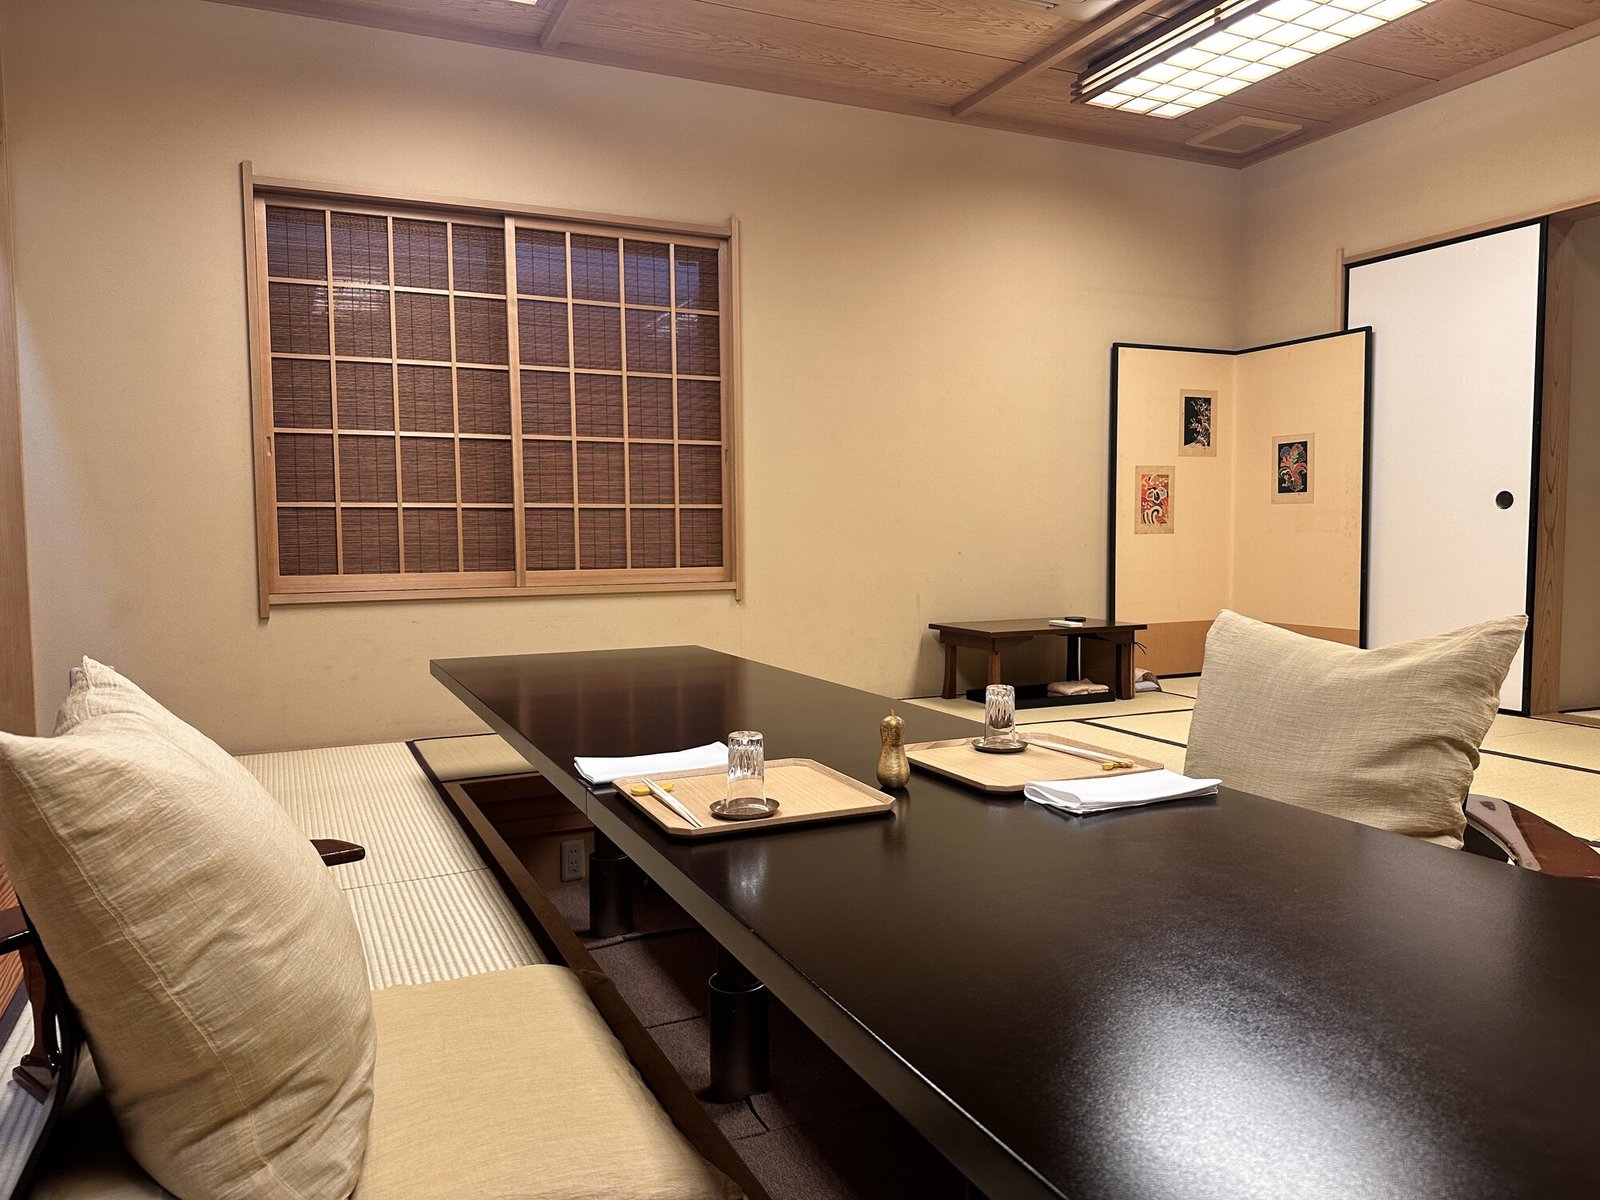
We sat in a large tatami room with a long table and a broad open area beside it. At first, the empty floor looked almost oversized. Once the dance and games began, its purpose was obvious: the performers could move properly, and everyone could gather for the games without changing rooms.
The way everyone spoke, moved, served the meal, and guided us through the evening showed a great deal of training. The manners were formal, but the people hosting us knew how to keep the room comfortable. That combination made it easier to settle in even though the surroundings were unfamiliar.
The long table uses only part of the tatami room; the open floor is needed for the performance and games.
The Performance and Conversation
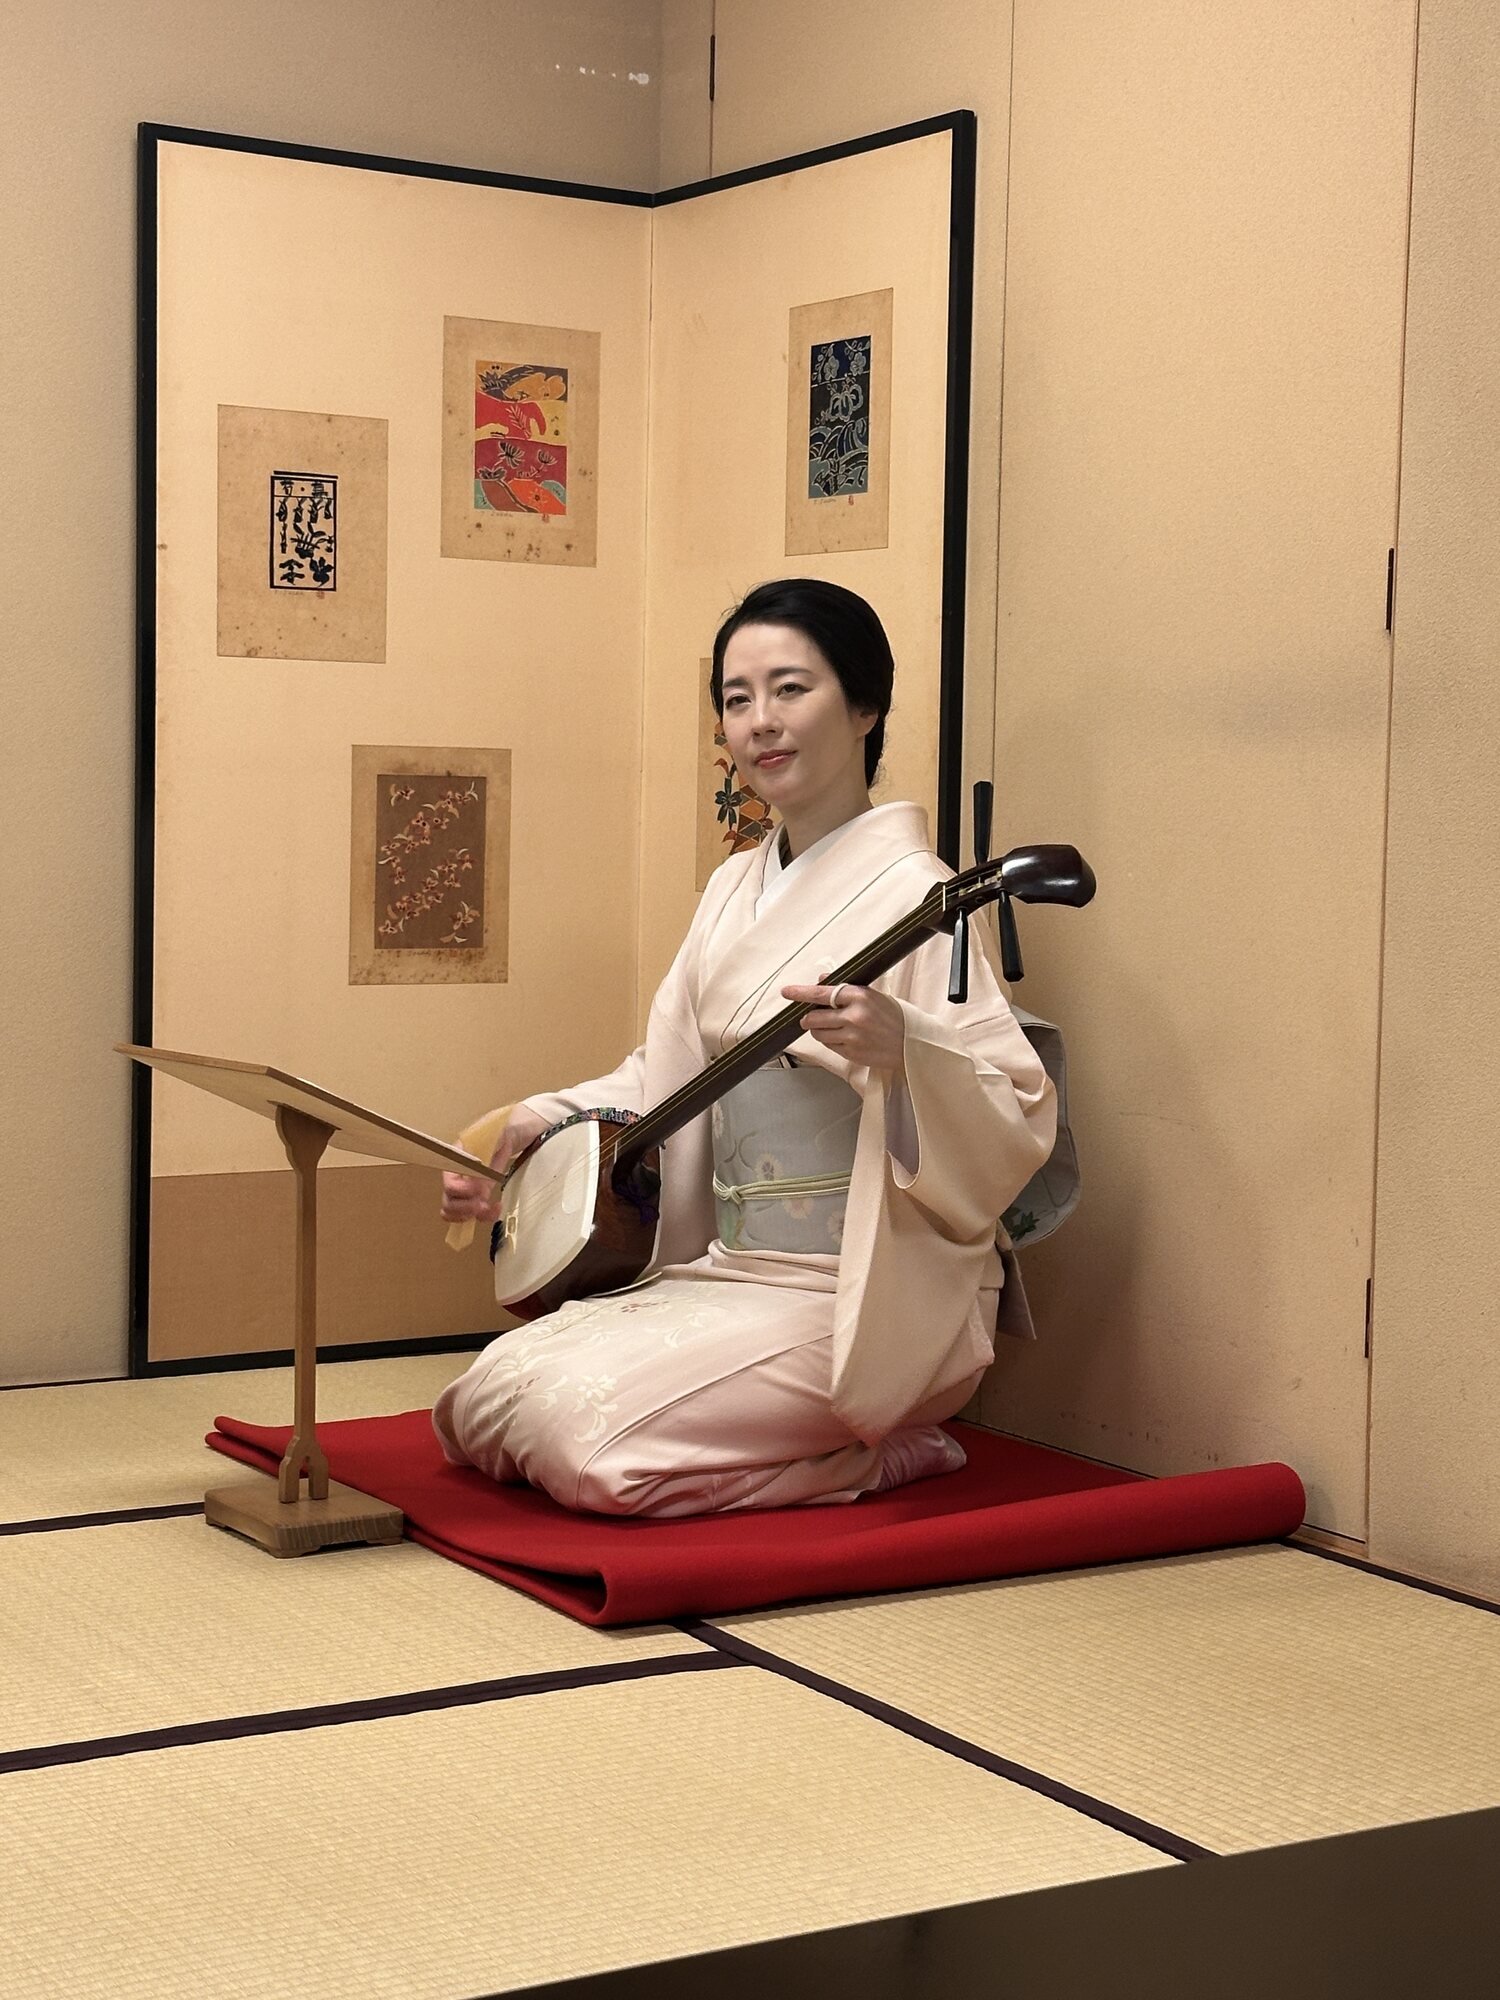
A hangyoku is an apprentice geisha in Tokyo, roughly the Tokyo counterpart to a maiko in Kyoto. A jikata is the geisha responsible for the musical accompaniment, including shamisen and singing. These are the terms to expect in Tokyo; Kyoto geisha dinners use different local terminology.
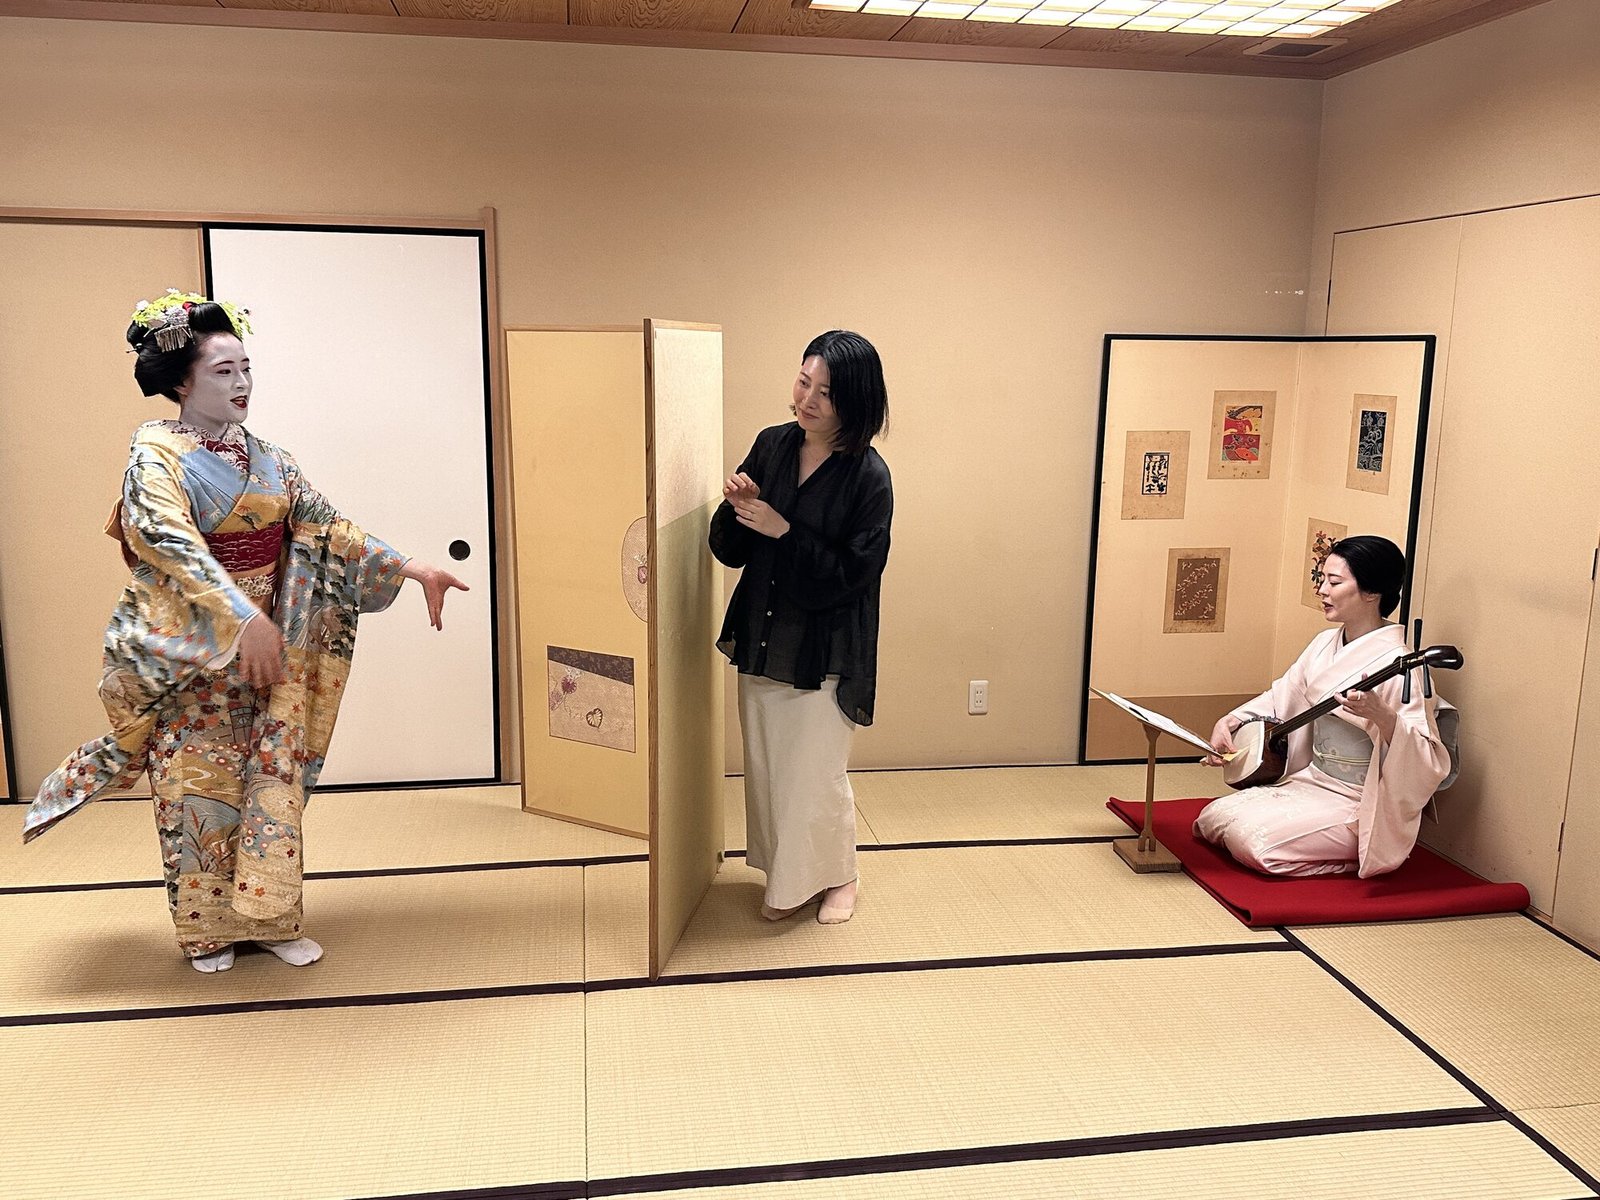
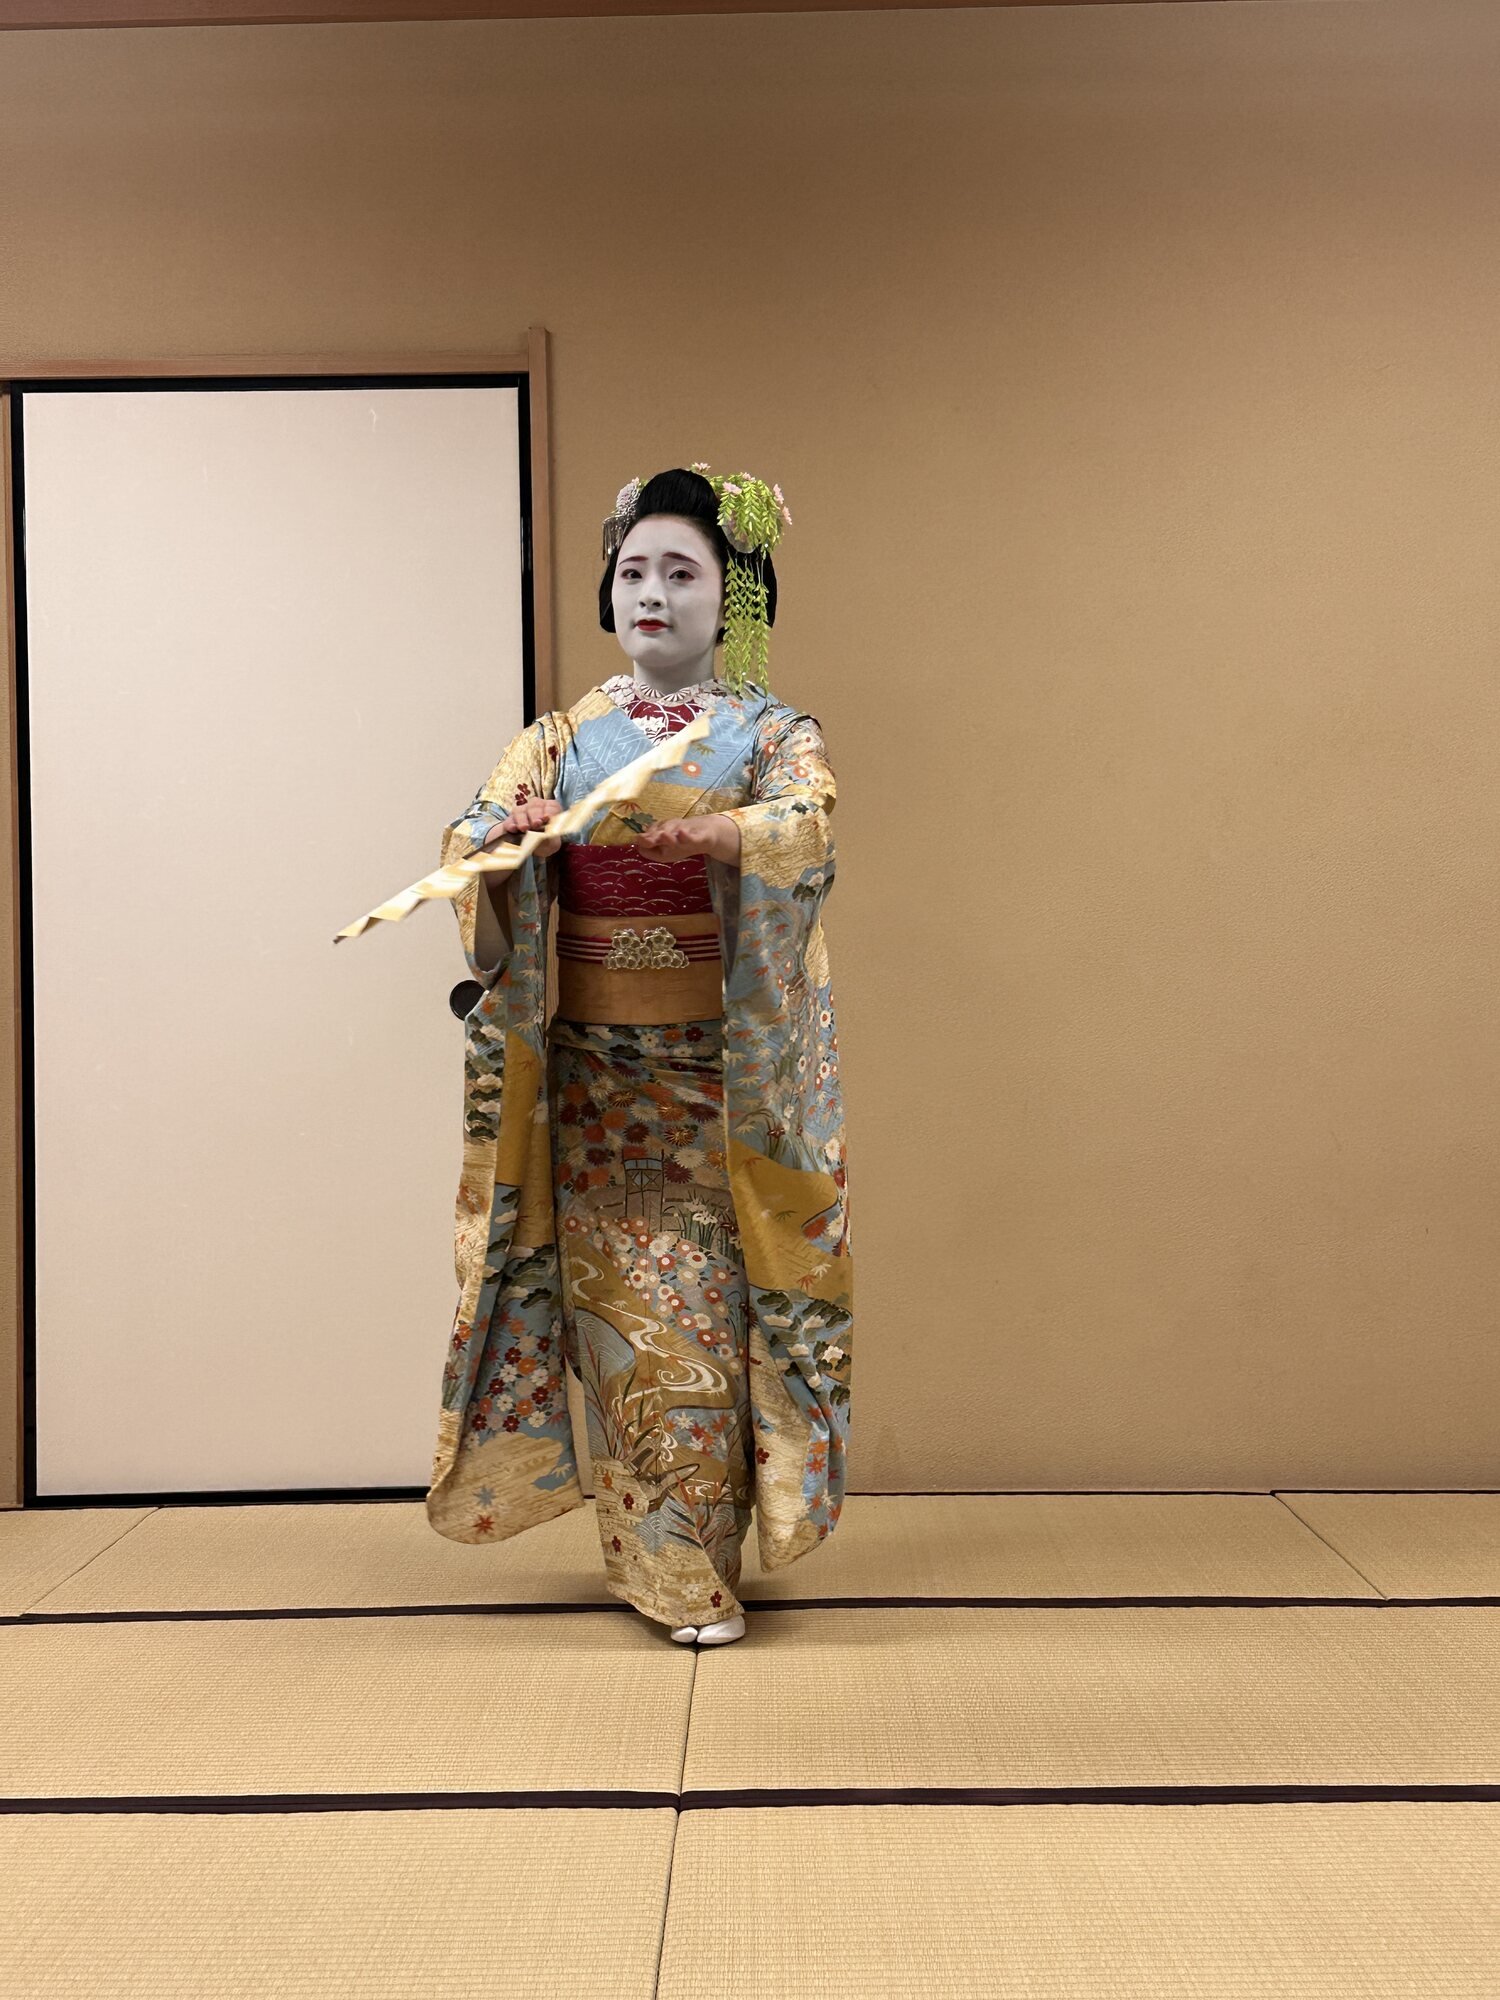
Watching the dance from only a few steps away was completely different from seeing the same art on a stage. I could follow the small changes in expression and movement, while the live shamisen and singing filled the room without amplification. The performance was elegant and highly controlled, but the private distance was what made it hold my attention.
The jikata provided shamisen and singing while the hangyoku danced only a few steps away.
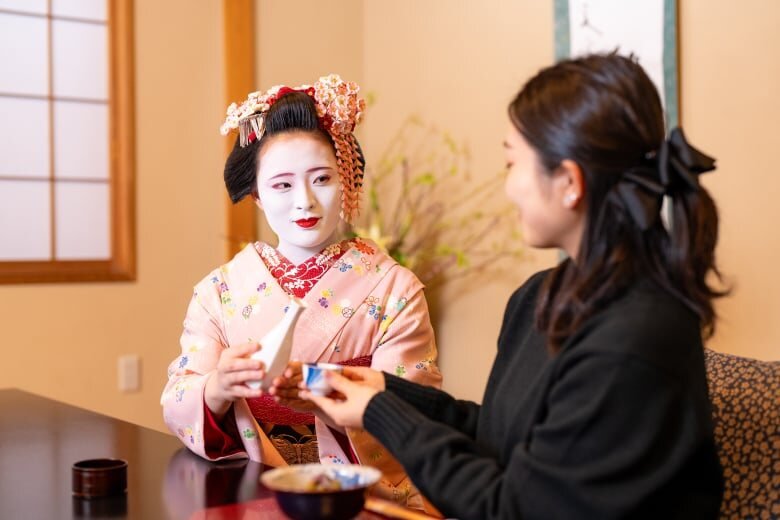
Conversation added just as much as the performance. Before the visit, I wondered whether sitting together in such a formal place might become awkward when we ran out of questions. The interpreter translated detailed questions and responses, helped both sides understand each other, and kept the conversation moving naturally. We could ask about the performers’ work and daily lives instead of relying on a short prepared explanation.
This direct exchange is one of the main reasons to consider the private format. You are spending a full evening in the same room, so you have enough time to become comfortable before the games begin.
Conversation is part of the private dinner rather than a short exchange after a stage performance. Image via Wabunka.
The Kaiseki Dinner and Ozashiki Games
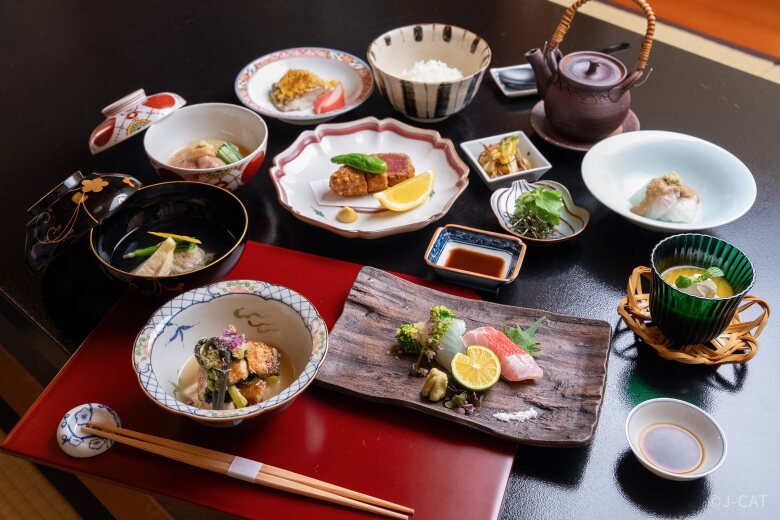
The meal during my visit was very good. It was seasonal, carefully prepared, and high quality, but it was also relatively light. I could enjoy several courses without reaching the games feeling too full. The exact dishes change with the ingredients available, so your meal will probably differ from the one shown in the video.
The seasonal kaiseki meal changes, but dinner is a substantial part of the evening rather than an accompaniment. Image via Wabunka.
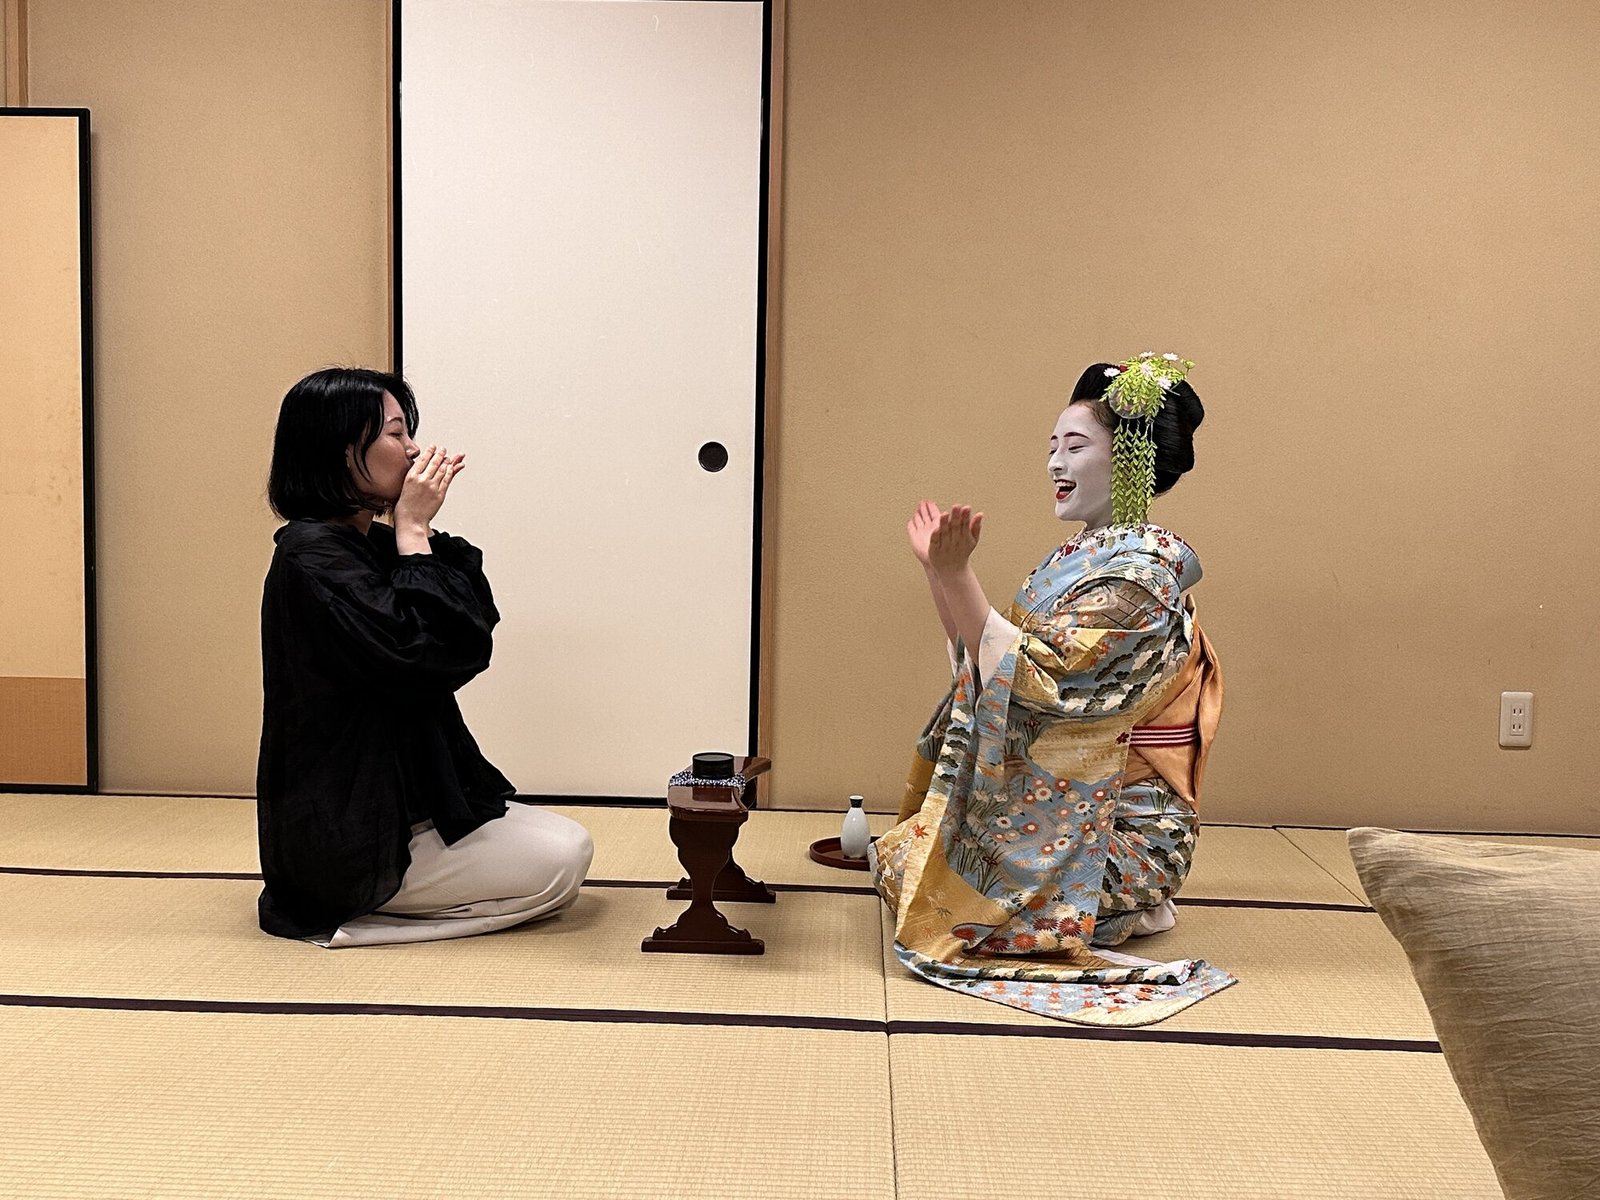
After dinner and conversation, we played ozashiki-asobi (traditional banquet games), which are often played as drinking games. The best-known was Konpira Fune Fune. Two players move in time with a song, using a small cup-shaped prop placed between them. When the prop is on the table, you use an open palm. When the other player removes it, you answer with a closed fist. Using the wrong hand shape or falling behind the song costs you the round, and traditionally, the loser takes a drink.
I do think the drinking forfeit makes the game even more fun once everyone has eaten and started talking. If you do not drink alcohol, you can use a non-alcoholic drink and still join in. The rules sound easy until the song speeds up and the other player changes the prop before you have time to think.
I learned very quickly that geisha are extremely difficult to beat. They have played these games so many times that the movements appear effortless, while I was concentrating hard just to choose between an open hand and a fist. The difference was funny rather than intimidating. Because we had already eaten and talked together, the games gave everyone permission to laugh and made the formal room much more relaxed.
Traditional ozashiki games bring guests and performers together after the meal.
Is the Ryotei Maki Geisha Dinner Worth It?
Yes. If meeting geisha in a private setting is something you have dreamed about, I honestly do not think you can do much better than this. You have the room to your own group, watch the arts from only a few steps away, speak directly through an interpreter, share a full meal, and play games together inside a working ryotei.
I have joined dozens of cultural experiences in Japan, and very few have given me this level of private access and personal interaction. I cannot judge the normal pacing because our filming interrupted the flow, but every part I did experience—the room, food, performance, conversation, and games—was excellent. I came away understanding why an evening like this costs so much.
The standard booking follows the broad format that local patrons experience at a ryotei, with interpreter support and photos added for international guests. This gives international travelers access to the full evening while making sure they can take part in the conversation rather than watching from the side.
The price remains very high, of course. A shorter stage or group format makes more sense if you only have a general interest in geisha culture. The Ryotei Maki dinner is for someone who wants the full evening and is ready to make it one of the major experiences of the trip.
If this is something you have wanted to do for years and your budget allows it, I recommend it without hesitation. Check the current Wabunka quote before deciding because the price varies by group size, date, and options.
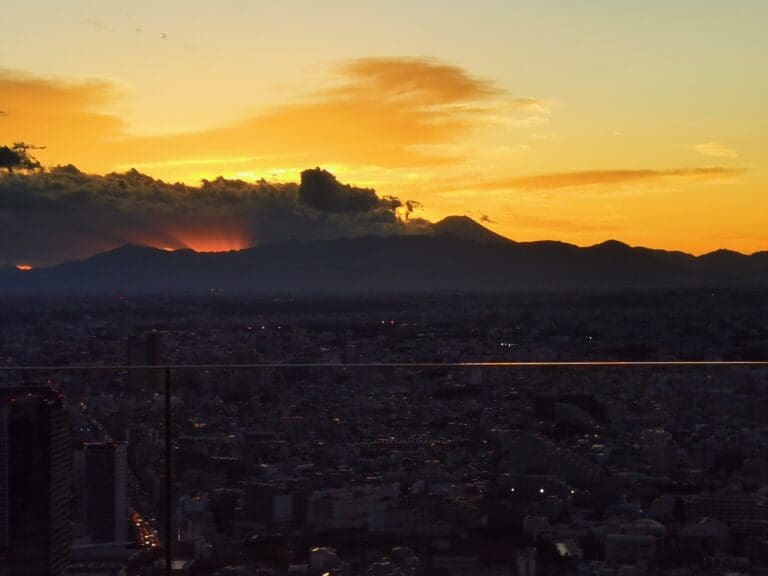
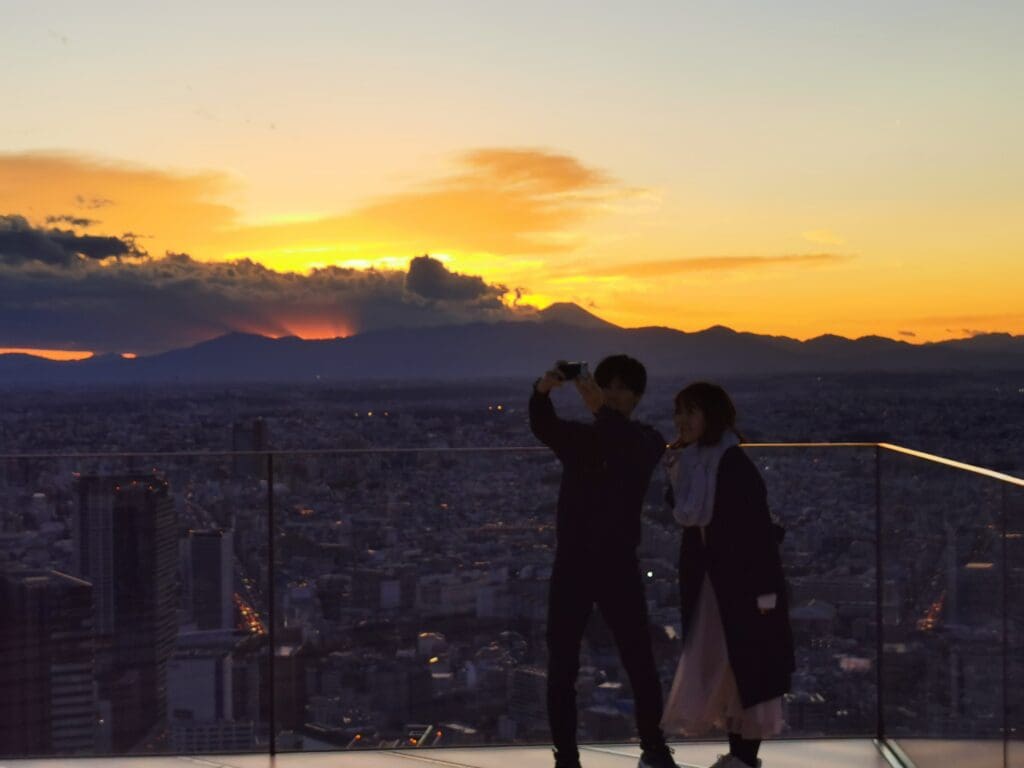
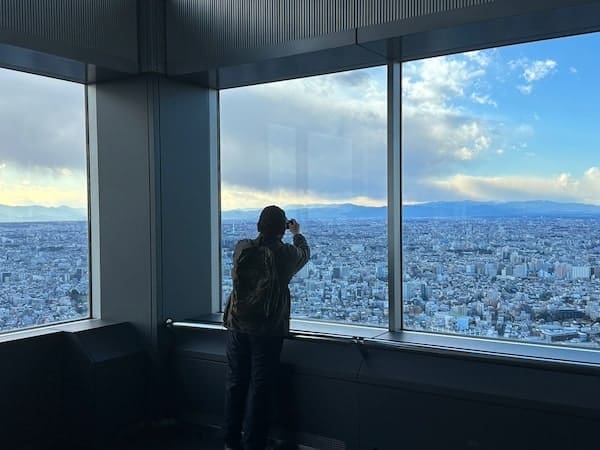
For a first visit to Tokyo, I recommend Shibuya Sky around sunset. You can walk around the outdoor rooftop while it’s still light, then stay to watch the city lights come on. It’s my favorite of Tokyo’s observation decks, especially on a clear evening when Mount Fuji is visible beyond the buildings. I suggest giving yourself time for that change from day to night rather than making it a quick photo stop.
The outdoor setting is a large part of the appeal, but it also means the roof can close in bad weather. If you’d prefer an indoor deck, Tokyo City View at Roppongi Hills is a good alternative, particularly for photos with Tokyo Tower in the skyline. And if you’d rather save the admission money for something else, the Tokyo Metropolitan Government Building gives you a wide view over the city for free.
Some links on YavaJapan are affiliate links. If you book or buy through them, I may earn a small commission at no extra cost to you. It helps support the site, and I only link to places, stays, and experiences I genuinely think are worth recommending.
At a Glance
My favorite overall:Shibuya Sky for the outdoor rooftop and sunset. Reserve a timed ticket in advance.
For an indoor visit with children:Sunshine 60 Tenbou-Park, with space to sit and other things to do in Sunshine City.
Access limits: Roppongi’s rooftop is closed to the public. Bunkyo Civic Center’s observation lounge is closed for renovation, with reopening planned for early December 2026.
Compare Tokyo's main observation decks, skyline viewpoints, hotel views, and quieter alternatives on one map.
Which Tokyo Observation Deck Should You Choose?
Height changes what you’ll see quite a lot. From Skytree, you can follow the rivers across a huge area of Tokyo, but individual streets look distant. Tokyo Tower and Tokyo City View keep you closer to the buildings below, so I recommend them if you want to make out more of the city after dark.
If Shibuya Sky tickets are sold out, I recommend Tokyo City View for an evening visit. You still get a high view over central Tokyo, with Tokyo Tower illuminated nearby. Sunshine 60 is another option if you’ll be spending time in Ikebukuro, the district around Sunshine City.
If you’d prefer to stay in Shibuya, you could stop at Hikarie’s Sky Lobby for a free view over the station area, or sit down for food or drinks at CÉ LA VI. They’re much lower than Shibuya Sky, so you’ll be looking across the surrounding buildings rather than over such a large part of Tokyo.
The Main Tokyo Observation Decks
Shibuya Sky
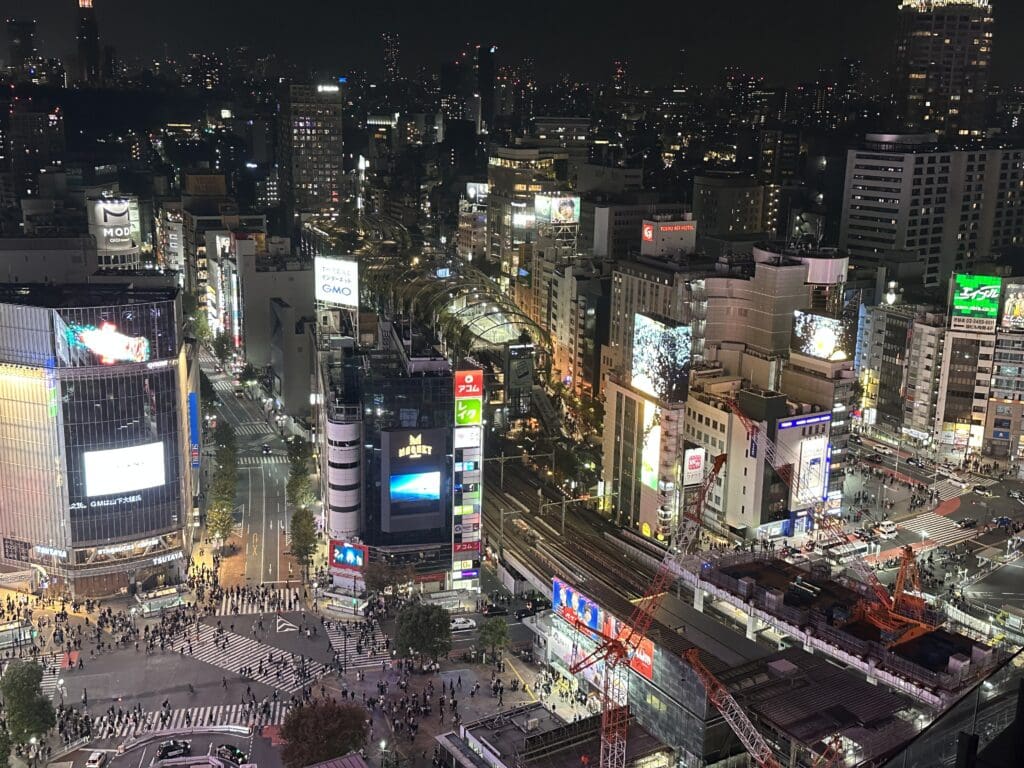
Shibuya Sky is above Shibuya Scramble Square, directly connected to Shibuya Station. The rooftop is 229 m above ground, with views toward Shinjuku’s towers, central Tokyo, and Mount Fuji when visibility allows. You can also look down toward Shibuya Crossing, although people are tiny from this height.
I recommend booking an entry time 60 to 90 minutes before sunset. You’ll have time for the entrance checks and lockers before walking around in daylight, then you can stay for the city lights. Your ticket time is when you can enter, so allow enough time to reach the entrance even though the building is connected to the station.
You can buy tickets through the official ticket page or compare availability on Klook. The usual hours are 10:00 to 22:30, but the available entry times vary. If sunset is the reason you’re going, check the time on the ticket before buying, as some offers are for earlier daytime visits.
Because you’re outside at this height, there are strict rules on bags and loose items. You’ll need to put your bag in a locker on the 46th floor before going onto the roof. Phones are allowed, while larger cameras need a neck strap, and tripods and selfie sticks aren’t allowed. I suggest leaving large luggage at your hotel or in a station locker so you only have a small bag to deal with here.
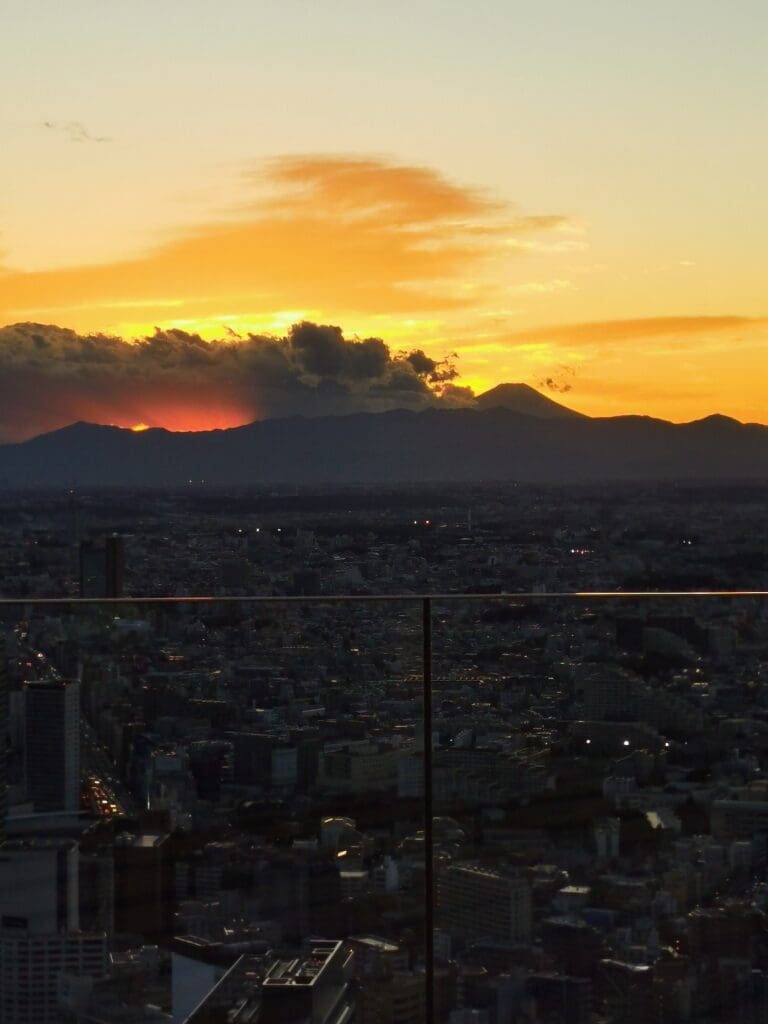
Sunset at Shibuya Sky, with Mount Fuji in the background
Wind, rain, and other weather conditions can close the rooftop. You can still use the indoor viewing area, but if being outside is the reason you’re booking, check how your seller handles rooftop closures before paying. If you’d like reserved seating on the roof, look for a plan that includes it, as it’s sold separately when available.
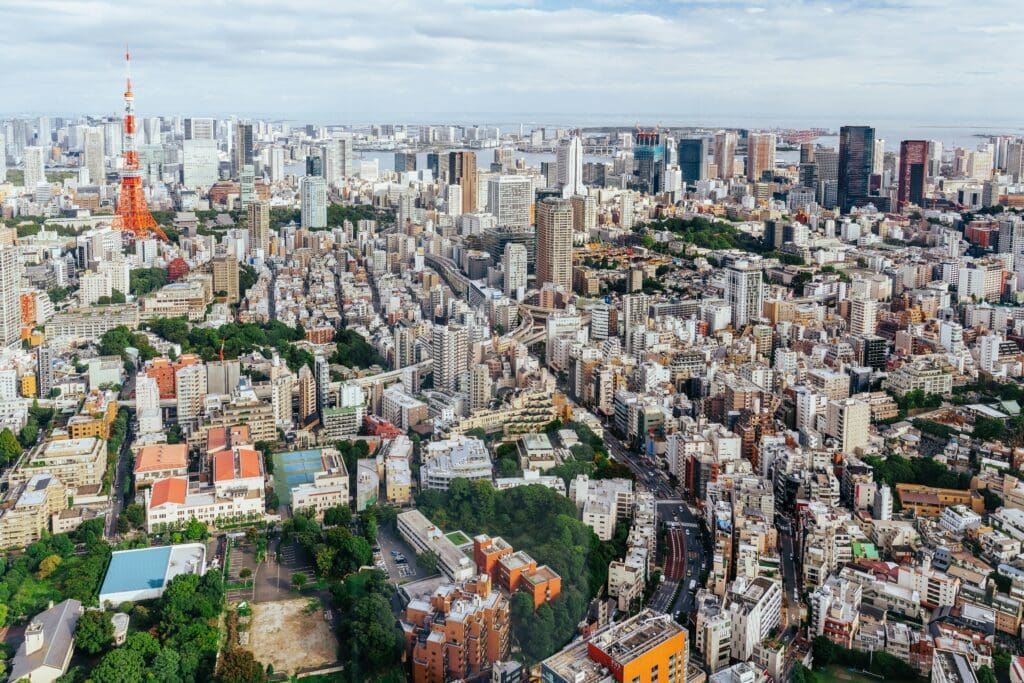
For a skyline photo with Tokyo Tower clearly in the frame, I recommend Tokyo City View. The indoor observatory is on the 52nd floor of Roppongi Hills Mori Tower, with large windows looking over central Tokyo.
I’ve often found it more relaxed than Shibuya Sky or Skytree, particularly on weekdays or later in the evening. I recommend coming after dark, when you can see Tokyo Tower illuminated while still making out individual buildings and roads below.
Tokyo Tower from Roppongi Hills Mori Tower
The usual hours are 10:00 to 22:00, with last admission at 21:30. You can compare tickets on GetYourGuide and Klook, though it’s also worth checking what’s on at the observatory for your date. Exhibitions and events can change the admission price or limit access to parts of the floor.
The rooftop Sky Deck is closed to the public, so the visit is indoors. That means you’ll be taking photos through glass, with reflections to work around after dark. A large tripod isn’t suitable here, and I suggest reading the equipment rules if you’re planning to bring more than a camera.
If the exhibition at the Mori Art Museum interests you, the two make a good afternoon and evening together. Visit the museum first, then head to the observatory after sunset. They have separate admission, so you’ll need to check that your tickets cover both.
Tokyo Skytree has the highest observation decks of these options: the Tembo Deck at 350 m and Tembo Galleria at 450 m. From there, you can see the Sumida River and a huge area of Tokyo, with Mount Fuji in the distance on clear days. The Galleria includes a sloping glass corridor that takes you farther up the tower.
Choose Skytree if you’re excited about the height or want to see how far Tokyo extends. I recommend a daytime visit because it’s easier to follow the rivers and recognize neighborhoods. At night, the streets are so far below that I find the view less interesting than the closer perspective from Roppongi or Shibuya.
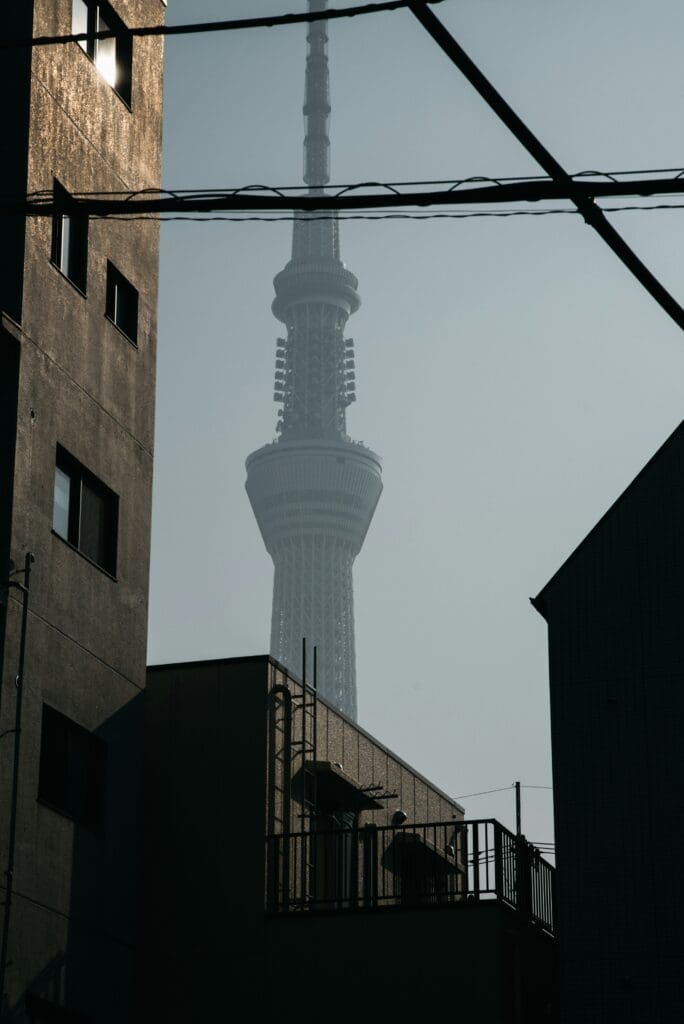
Personally, Skytree is probably my least favorite of the main observatories, even though I think the tower itself is the most impressive structure. I can see it from the balcony of my four-story building about 10 km away. I’ve spotted it from so many streets that I’ve thought about making my own version of the artist Hokusai’s print series Thirty-six Views of Mount Fuji, with Skytree instead.
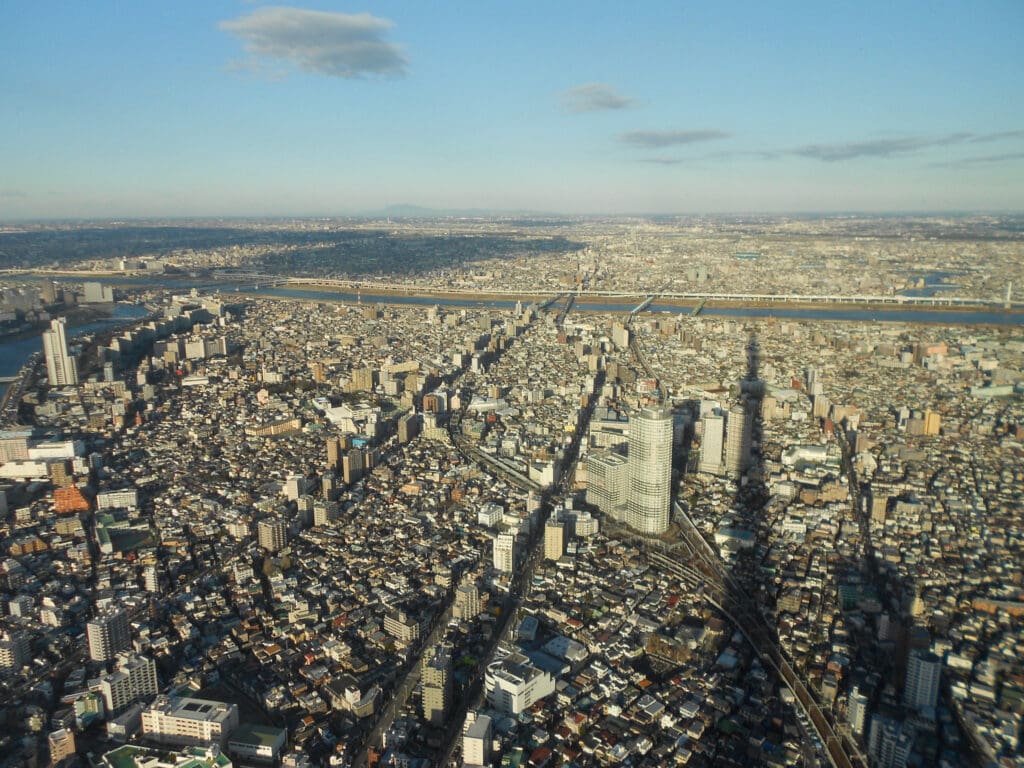
The city and Sumida River from Skytree’s observation deck
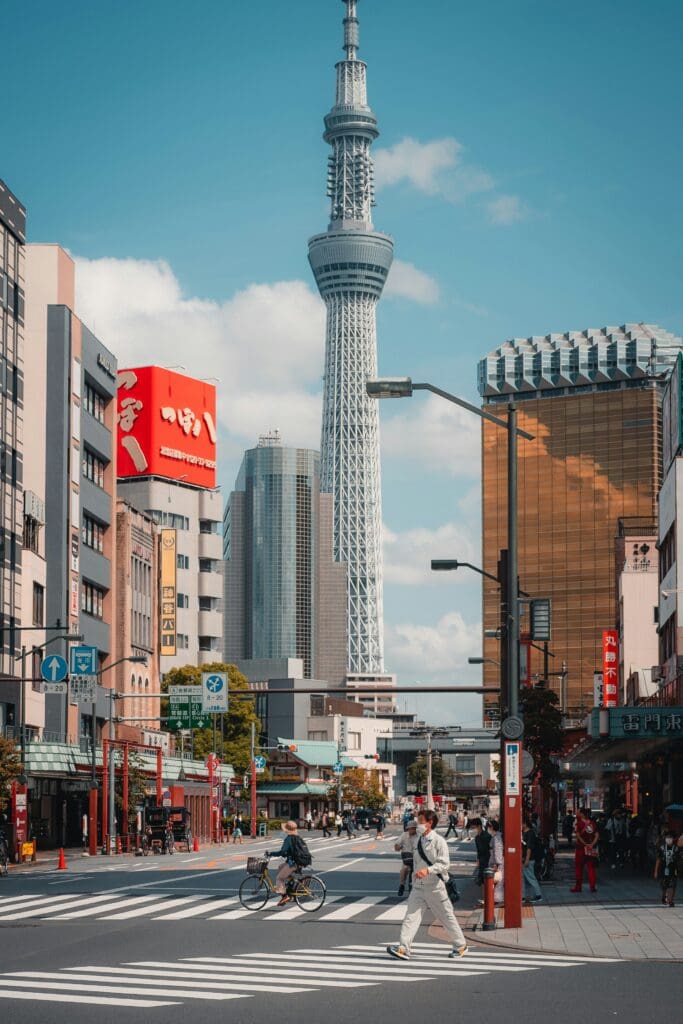
From inside, I found the view almost like looking at a drone photograph. For photos of the tower itself, I recommend the streets of Asakusa or the banks of the Sumida River, where you can see its full shape above the city.
Ticket prices vary by date, and you can choose the Tembo Deck alone or a combined ticket for both decks. Compare those options on Klook or Viator for the day you plan to go. The official ticket FAQ explains the booking arrangements if you’re buying directly.
Skytree fits well into a day around Asakusa, the neighborhood around Sensoji Temple. You could visit the temple in the morning, then head toward the tower. If clouds hide the view, Solamachi’s shops and restaurants are nearby, along with Sumida Aquarium and the Tenku Planetarium. The aquarium and planetarium require separate tickets.
Tokyo Tower is a good choice if visiting the red-and-white tower itself is something you’ve been looking forward to. Its Main Deck is at 150 m, and the Top Deck is at 250 m. From inside, you’re surrounded by central Tokyo, with Zojoji Temple below.
The view from inside is good, but personally, I think the tower is more impressive when you can see its full shape and color in the skyline. For that, I recommend Tokyo City View, Yebisu Garden Place, or the streets around Shiba Park, especially after the tower lights up at night.
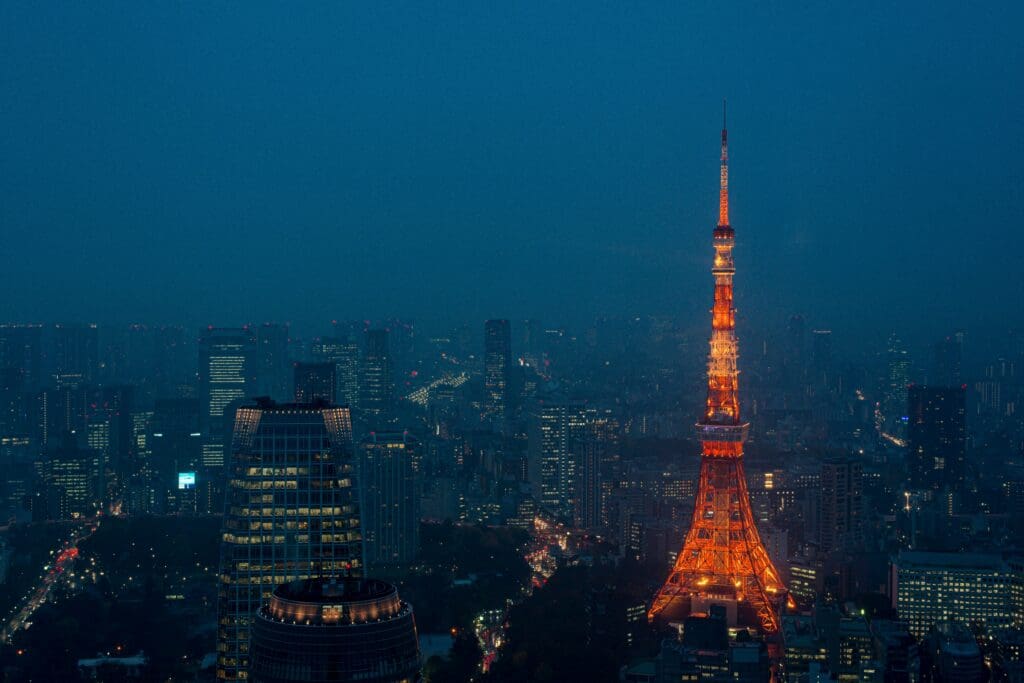
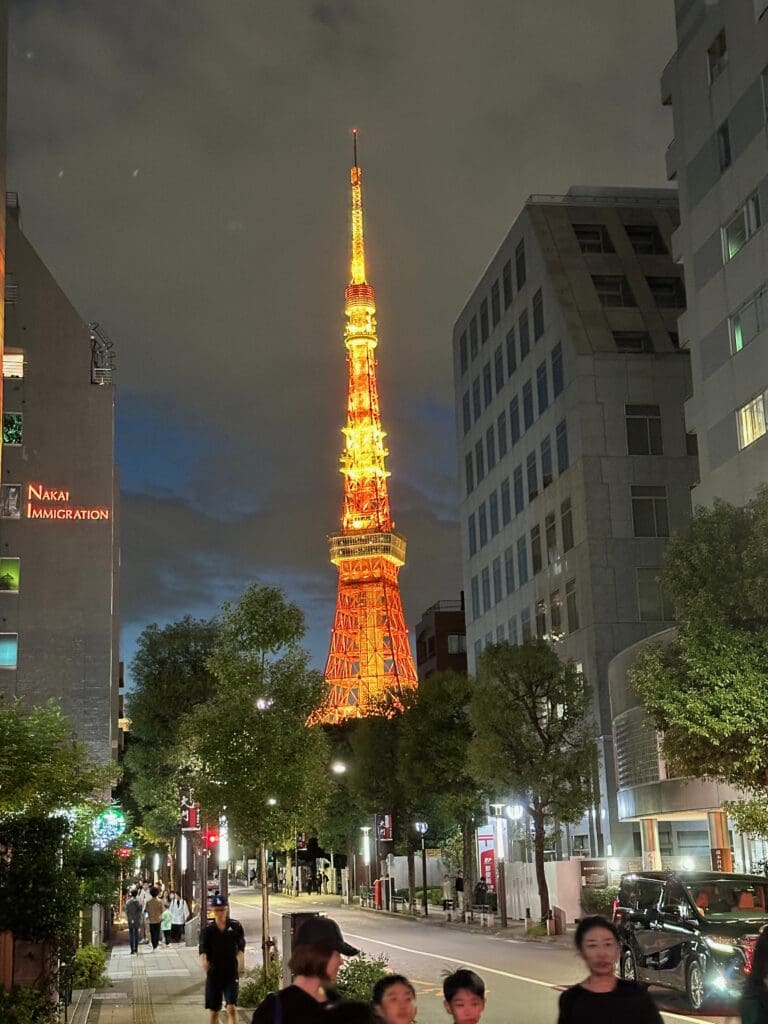
Tokyo Tower illuminated at night
Choose between the Main Deck ticket and Top Deck Tour based on how high you want to go. The Top Deck Tour includes both observatories. The more expensive Tokyo Diamond Tour adds a dedicated lounge and extra service.
The Main Deck usually opens from 9:00 to 23:00, with last admission at 22:30, so you have plenty of time for an evening visit. The Top Deck Tour has timed entry, and I suggest reserving it if you want a particular slot. If you’re happy with the Main Deck, it’s easier to decide once you’ve seen the weather forecast.
There are shops and places to eat in the building at the base. For an afternoon nearby, combine the tower with Zojoji Temple and Shiba Park, then stay in the area to see the tower illuminated.
I suggest it for a visit with young children or if you’d like somewhere to sit between looking out of the windows. You can combine it with Sunshine City’s shops, character stores, and restaurants without traveling to another district.
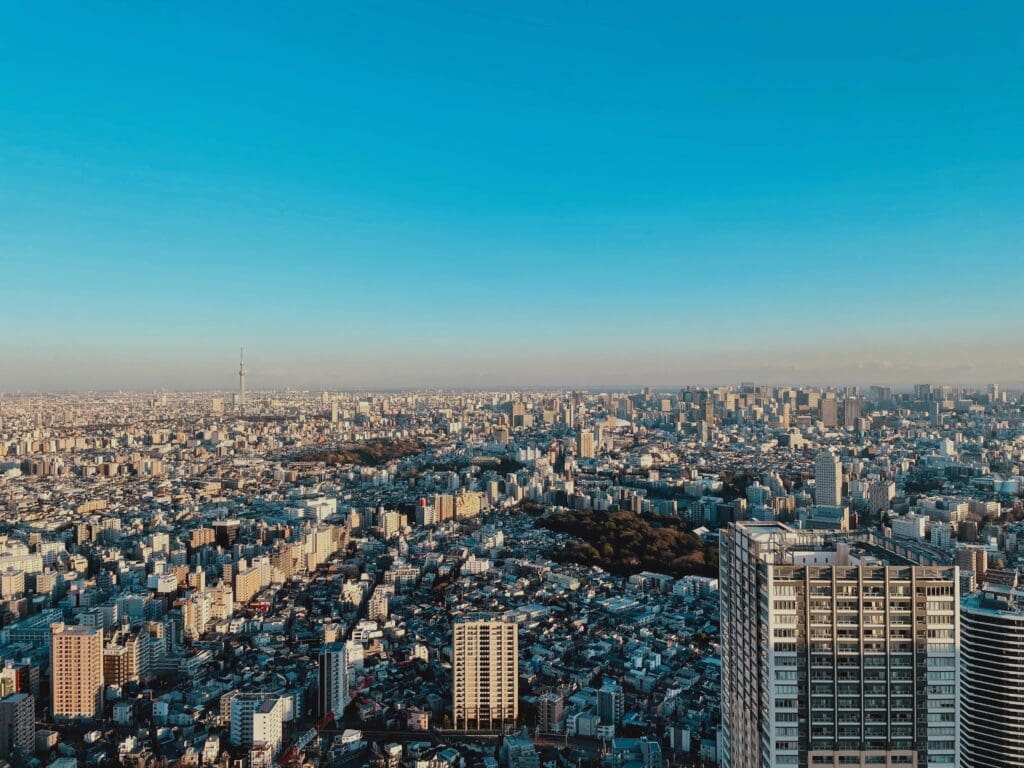
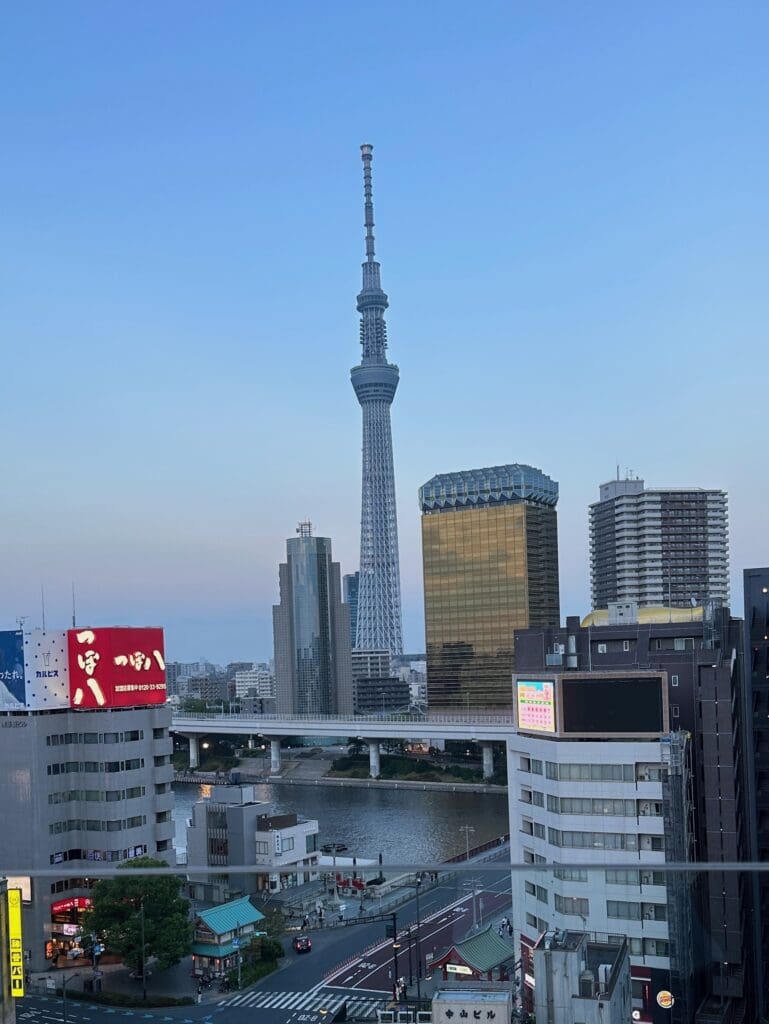
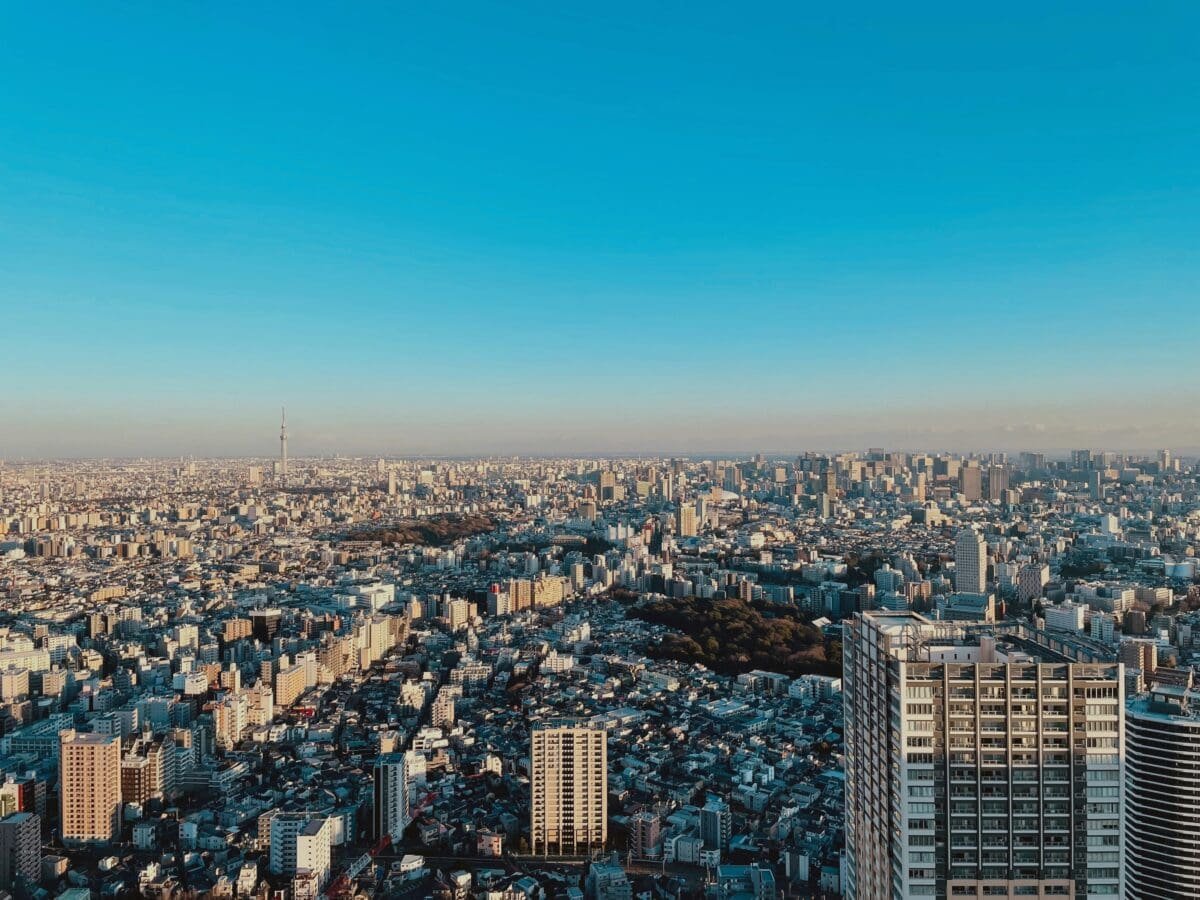
Tokyo skyline with Skytree in the distance
The usual hours are 11:00 to 21:00, which leaves time for both shopping and a late-afternoon visit to the observatory. Since prices and final entry times can vary, check the day’s visiting information before making plans for the evening.
If you want to take long-exposure photos at night, Sunshine 60 is worth considering because folding tripods are allowed under certain conditions. The photography rules require you to leave space for others, and staff may restrict tripod use when it’s busy. Bring something compact and be prepared to move after taking your photos.
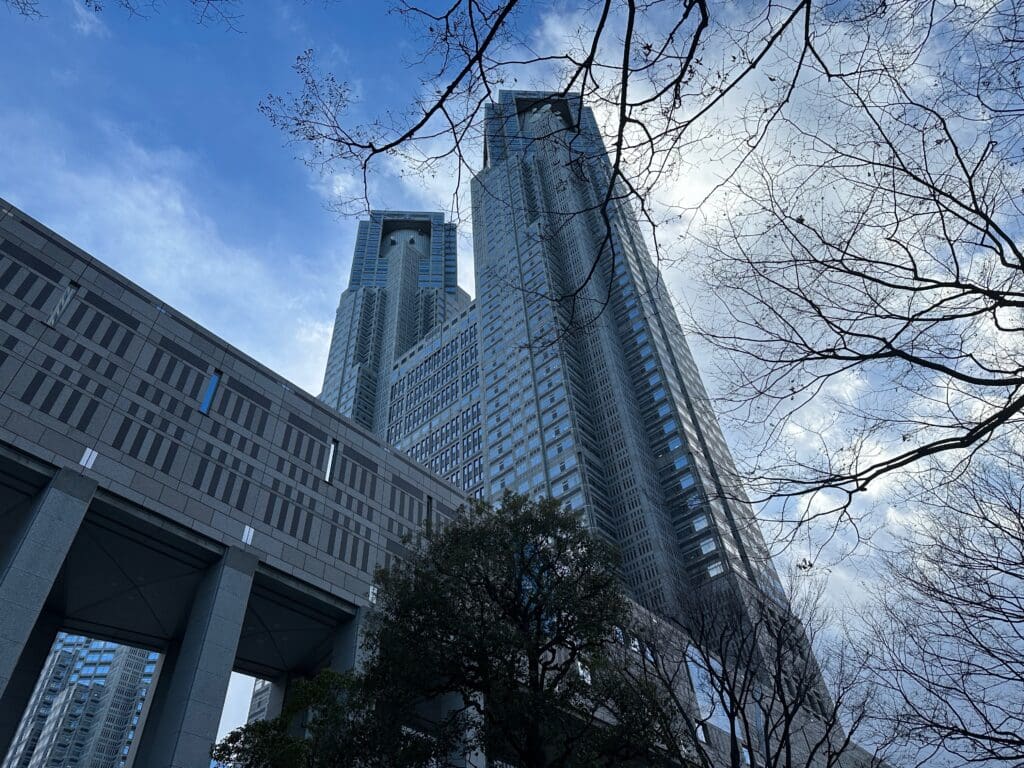
I recommend the Government Building’s observatories for a free view over Tokyo, especially if you’re staying in Shinjuku. Both are at 202 m, looking out from among the district’s tall buildings. Mount Fuji is visible to the west when the air is clear.
The twin towers of the Tokyo Metropolitan Government Building
The South Observatory usually opens from 9:30 to 22:00. The North Observatory normally closes at 17:30, extending to 22:00 when the south side is closed. Last entry is 30 minutes before closing. Both have regular closure days, so check the official schedule before going.
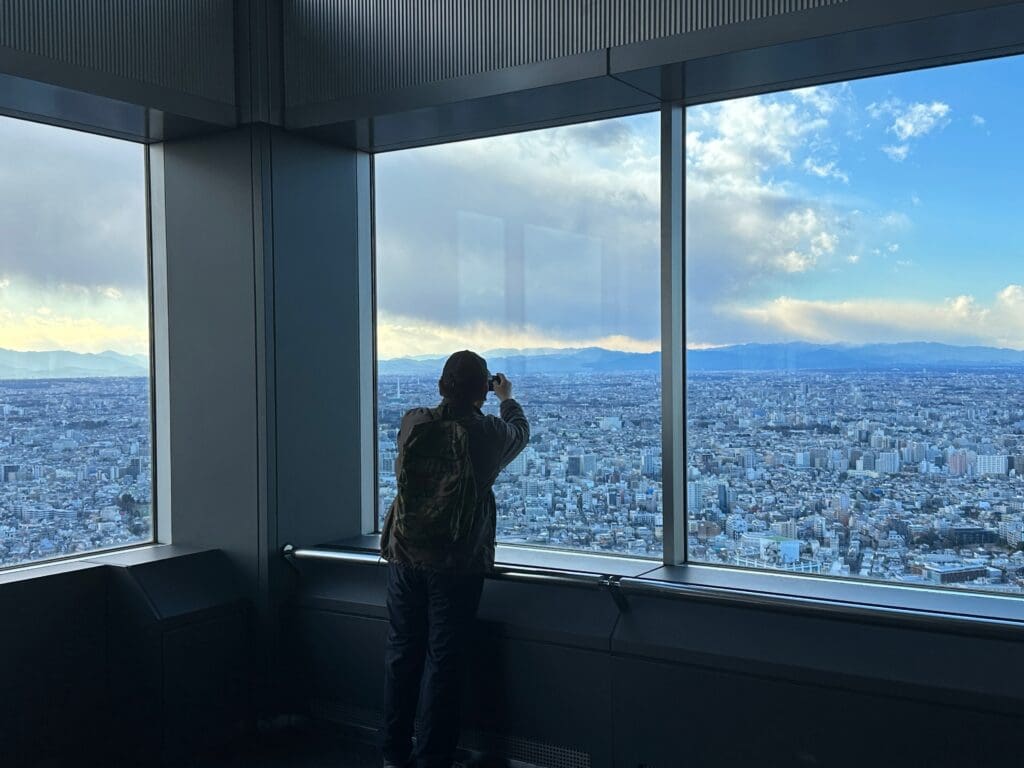
I’ve stopped here for about 20 minutes on clear winter days and seen Mount Fuji. Since admission is free and there’s no reservation to make, you can leave the visit until a day when visibility looks good. Late afternoon also gives you a chance to stay for sunset.
The observatory elevator leaves from the first floor of the main building. Allow time for a possible queue and bag check, even if you’re only planning a short visit, and keep in mind that tripods aren’t allowed.
Looking through the windows of the Tokyo Metropolitan Government Building observatory
Yebisu Garden Place Sky Lounge
If you’re spending the evening in Ebisu, I recommend stopping at Yebisu Garden Place Tower’s free 38th-floor Sky Lounge before dinner. Through its large windows, you can see Tokyo Tower beyond the lower buildings of the neighborhood. Shortly after sunset is a good time for photos, while there’s still some blue in the sky behind the illuminated tower.
Take the elevators for Top of Yebisu. The lounge usually opens from 11:00 to 23:30, although it’s worth checking the building’s notices for temporary closures. The viewing space is small, so you may have to wait for a window even when the rest of the building isn’t busy.
Shibuya Hikarie Sky Lobby
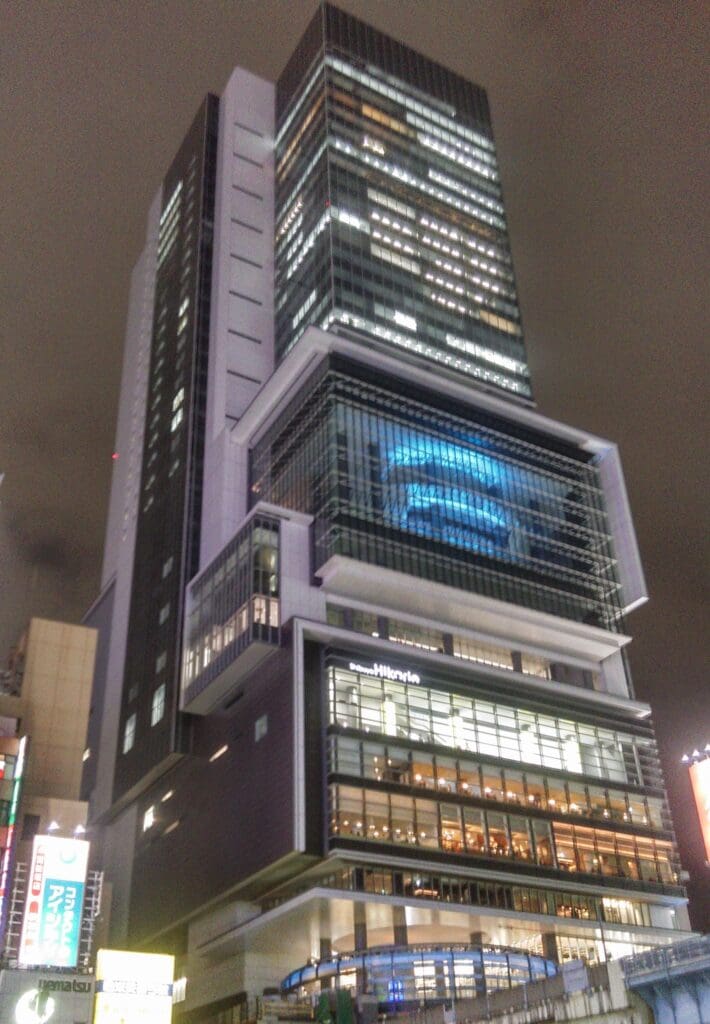
Hikarie’s 11th-floor Sky Lobby gives you a much lower view across Shibuya’s station area. The buildings, trains, and traffic are closer than they are from Shibuya Sky, which can be more interesting if you want to see the streets themselves.
I sometimes stop here to look at the weather before deciding whether to visit a higher observatory. You can visit without an observation-deck ticket, although people also use the lobby to reach the theater and event spaces. Leave room for them to pass and follow any signs restricting access.
The view from inside HikarieShibuya Hikarie at night
Asakusa Culture Tourist Information Center
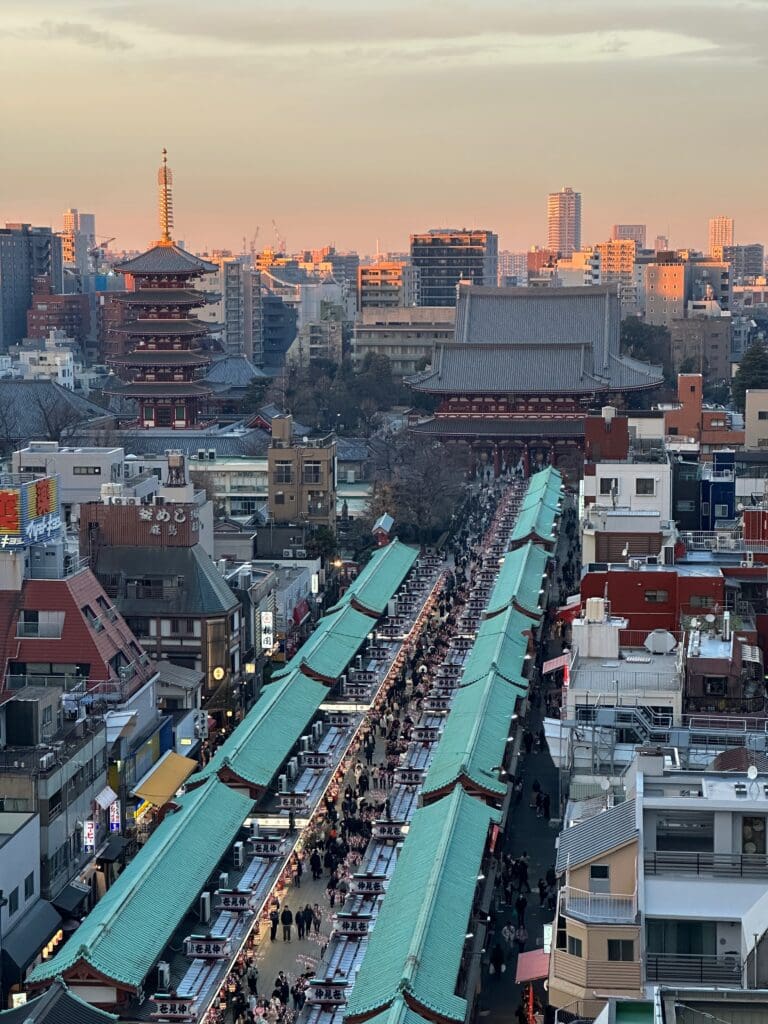
This is the building opposite Kaminarimon, the large entrance gate leading toward Sensoji Temple. Its free eighth-floor terrace looks over Nakamise shopping street and toward Skytree.
I usually stop by when I’m in Asakusa, and I’ve found the view from the adjoining cafe even better. It’s a good option if you’re ready for a break and happy to order a drink. Otherwise, you can visit the terrace on its own for free, normally from 9:00 to 22:00. The cafe closes earlier, so check its hours in the center’s visitor information if you want to sit down there.
Tower Hall Funabori and Carrot Tower
I wouldn’t cross Tokyo just for Tower Hall Funabori on a short trip, but it’s a good stop if you’re already in eastern Tokyo or staying along the Toei Shinjuku subway line. The free observatory looks across the lower buildings of Edogawa toward Skytree, so a zoom lens helps if you want photos of the more distant landmarks. It usually opens from 9:00 to 21:30, subject to weather interruptions.
For a day in Sangenjaya, a neighborhood west of Shibuya, you could stop at Carrot Tower’s 26th-floor observation lobby. There are cafe and restaurant areas on the floor, and the western view can include Mount Fuji. As with Funabori, I suggest visiting while you’re in the neighborhood rather than making a separate journey just for the view.
I used to bring visiting friends here after Tokyo Dome City. We’d spend about 15 minutes looking toward Shinjuku and Skytree through the sloping windows before continuing the day. It was an easy free stop to add to an afternoon, but it will need to wait until the renovation is finished.
Bars, Restaurants, and Hotel Rooms with Views
An observation deck gives you room to walk around and take photos, but a bar or restaurant can be more comfortable if you’d prefer to sit with a drink and watch the city. I suggest combining the two if you want to see Tokyo from more than one place. You’ll pay for food or drinks, and sometimes a seating charge, so this can cost more than another observatory ticket.
For a meal or drink with a particular view, book the seating as well as the venue. Some places offer a specific window or terrace category, while a general reservation may get you a table elsewhere in the room.
Bars and Lounges
For a drink with Tokyo Tower close to your table, I recommend Stellar Garden at The Prince Park Tower Tokyo. The bar’s position beside the tower makes it a good place to see it illuminated, and you can choose a seating plan that guarantees the view.
For cocktails outside, Andaz Tokyo’s Rooftop Bar has a partly open terrace on the 52nd floor, looking toward Tokyo Bay and Odaiba. It’s 20+ only, so this is an option for an evening with other adults. Terrace seating charges can apply depending on the season and arrival time, and I suggest checking the bar’s current terms when deciding when to go.
If you’d prefer afternoon tea indoors, consider Oriental Lounge at Mandarin Oriental Tokyo, on the 38th floor in Nihonbashi. I’ve seen Mount Fuji beyond the city from here on clear winter days, though visibility and the position of your table will affect what you see. The lounge’s menu and dress code will help you decide whether to make this a longer afternoon stop.
If you’ll be in Shibuya, Bellovisto at Cerulean Tower has views from the 40th floor. In Shinjuku, New York Bar at Park Hyatt Tokyo combines the skyline with live jazz. New York Bar is for guests aged 20 and above and takes walk-ins only, so you can’t reserve a table for a particular time. There’s also a cover charge depending on when you arrive.
For a lower outdoor view in Shibuya, CÉ LA VI has dining and terrace spaces where you can sit closer to the surrounding buildings. The restaurant, club lounge, and music terrace have different age and entry rules, so choose the space that suits the evening you have in mind.
If you’re near Skytree around lunchtime or in the evening, consider a meal on Solamachi’s restaurant floors, on levels 30 and 31. You can see the area from above without buying an observatory ticket, although the view depends on which restaurant and table you choose.
Near Tokyo Tower, you can visit Azabudai Hills’ skylobbies as a customer of Dining 33, Sky Room Cafe & Bar, or the associated patisserie. Access is limited to these customers and eligible building users, so plan to use one of the venues if you want to go up. The access information for the 33rd and 34th floors explains the arrangements.
Hotel Rooms with a View
For a night overlooking Tokyo Tower, I recommend comparing The Prince Park Tower Tokyo and Tokyo Prince Hotel. Both have rooms facing the tower, but the angle and how much you can see differ by room. If you’re paying extra for that view, choose a room category or plan that includes it, since a request alone doesn’t guarantee what you’ll see.
Park Hyatt Tokyo has high views from Shinjuku, while Andaz Tokyo Toranomon Hills has large windows looking over central Tokyo. These are also worth comparing if you want a night with a city view, but I suggest paying extra only if you’ll have time to enjoy the room. One night when you’ll be back early enough to watch the city light up could be enough.
For choosing a hotel for your whole stay, my Tokyo accommodation guide explains which areas I recommend and how they affect your journeys around the city.
Timing, Weather, and Photography Tips
Sunset or a Clear Morning?
For daylight, sunset, and night views in one visit, choose an entry time that lets you reach the viewing area while it’s still light. I also suggest leaving time afterward for the elevator journey down. A dinner reservation immediately after sunset can mean having to leave just as the city lights come on.
If Mount Fuji is your priority, look for a clear, cold day, especially from December to February when visibility from Tokyo is often better. Pleasant weather at street level doesn’t always mean you’ll see the mountain, so it’s worth keeping the day flexible. My guide to the best time to visit Japan covers the wider seasonal differences to consider when choosing your travel dates.
A clear morning is also a good choice for Skytree because daylight helps you distinguish the rivers and neighborhoods below. For night views, I recommend the lower perspective of Tokyo City View or Shibuya Sky. If your schedule allows it, consider a weekday outside holidays, though popular sunset slots can still be busy.
Tickets and Bad Weather
I suggest reserving the viewpoint you’re most excited about, then leaving a second visit for a day when you’re nearby and the weather looks good. That could be a free observatory, a rooftop drink, or dinner beside a window. You’ll have one visit to look forward to without committing to several tickets before you know the forecast.
Before paying, check how the seller handles changes, low visibility, and rooftop closures. The rules can differ for each situation, so a cloudy view and a closed roof may not give you the same options for changing or refunding your ticket.
For timed attractions more generally, my guide to what to book in advance for Japan explains how I decide which bookings to make first.
Taking Photos Through Glass
At indoor decks, lights and objects inside the room can show up in your photos after dark. Wearing dark clothes and moving the lens close to the window can help, and you can shade the edge with a hand or sleeve to block some reflections. Keep the flash off, and lower your screen brightness if you can see it reflected in the glass.
Shibuya Sky’s outdoor rooftop avoids those indoor reflections, though you’ll still need to follow its equipment rules. I suggest planning for handheld photos at most viewpoints. Sunshine 60 is an option if you want to use a folding tripod, provided you leave space for others and follow staff instructions when it’s busy.
If low cloud hides the view from the high decks, you could photograph the towers from street level instead. The streets of Asakusa and the banks of the Sumida River give you views toward Skytree, while the area around Shiba Park is good for Tokyo Tower. Roppongi and Ebisu give you other angles on Tokyo Tower if you’re already nearby.
Visiting with Children or a Wheelchair
With young children, I recommend choosing somewhere you can take a break without immediately traveling to another district. Sunshine 60 has indoor seating, and Skytree has shops, places to eat, and other attractions around its base. Allow for separate tickets if you want to add the aquarium or another attraction to the visit.
If you use a wheelchair, check the venue’s lift route and facilities before going so you know how to reach the viewing areas. At Shibuya Sky, wheelchair and stroller arrangements differ, and the accessibility and rooftop information explains what to check for each. Allow a little extra time on arrival if you’ll need staff to show you the route.
Hasegawa Eiga is the best sake tasting I’ve tried in Tokyo since I started working in the Japan travel industry in 2019. I loved the whole experience: the beautiful room, the food pairings, and especially the time with our host, Kyoko-san.
I joined through Wabunka, which offers private cultural experiences and stays in Japan, working directly with artisans, chefs, and other hosts. Everything is private for you and your group. I’ve worked with their team professionally, too, and have joined several of their experiences. I love how personal they feel, and this visit to Hasegawa Eiga in Roppongi is a good example of why I recommend them so often.
Some links on YavaJapan are affiliate links. If you book or buy through them, I may earn a small commission at no extra cost to you. It helps support the site, and I only link to places, stays, and experiences I genuinely think are worth recommending.
At a Glance
Location: Roppongi, central Tokyo, about a 5-minute walk from Roppongi Station
Duration: Around 1 hour
What you try: Five sake varieties with seasonal food pairings
Language and setting: An English-speaking host and a private tasting room
Best for: Couples, friends, and sake lovers, including beginners like me
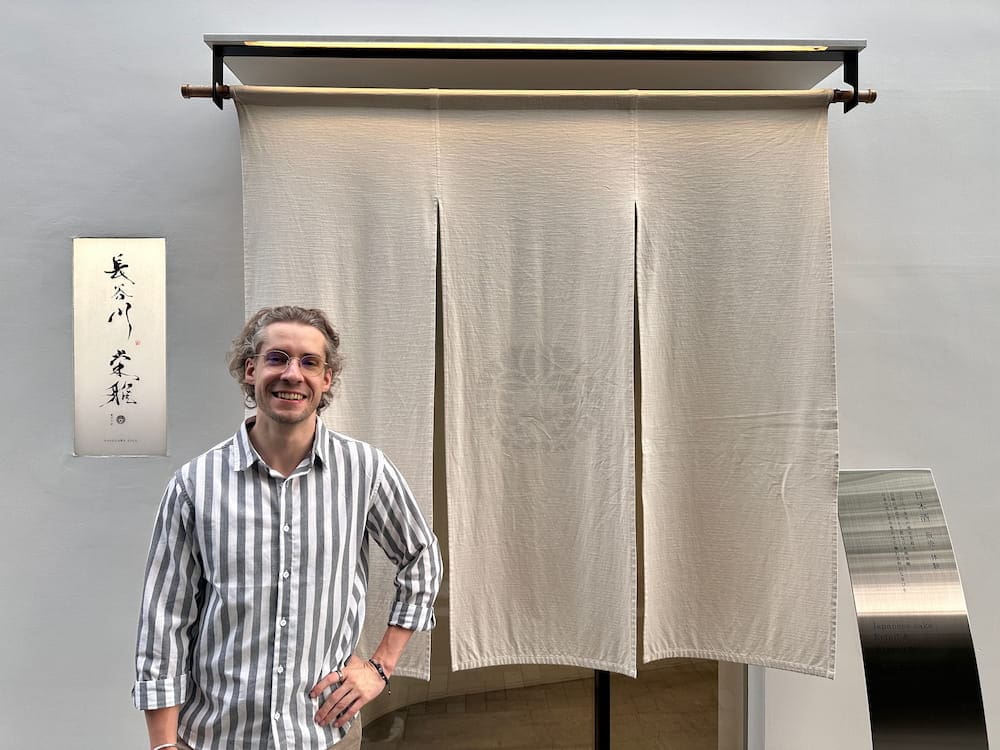
I liked the place before we’d even reached the tasting room. From outside, we could see white curved walls, with no obvious sign telling us what was inside. The entrance led into a short, curved corridor, so the lobby only came into view as we turned the corner. It was an unusual way to enter a shop, and made arriving feel quite special.
Hasegawa Eiga’s entrance
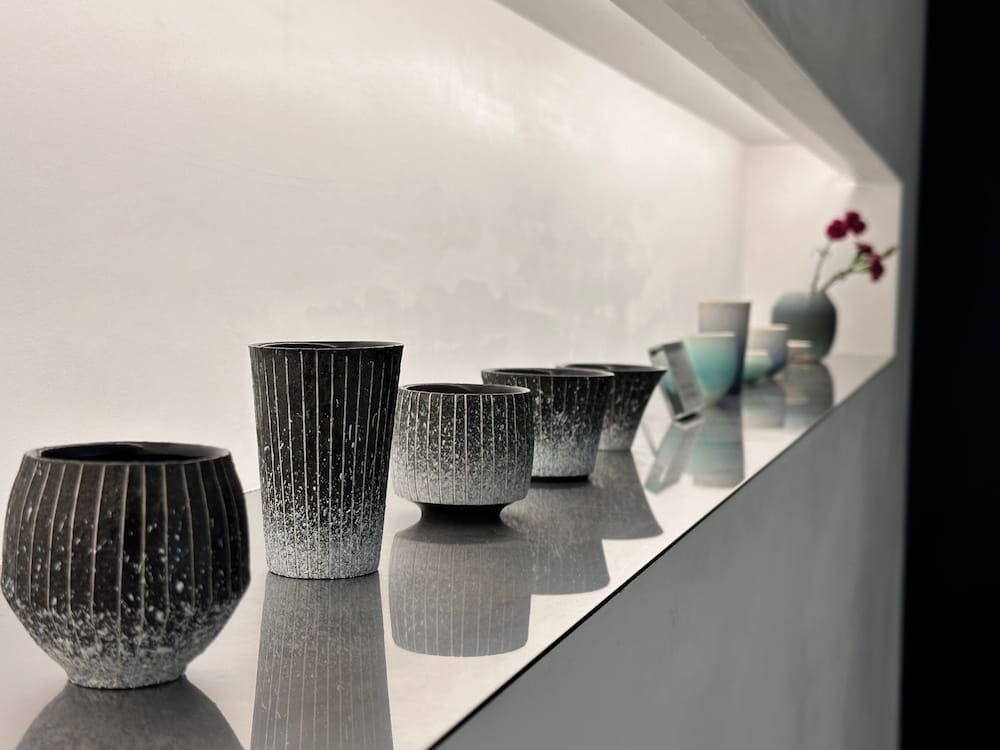
The lobby was small and beautifully designed. A thin stream of water ran down the wall behind the sake bottles, and I could hear it as soon as we walked in. Along another wall was a row of handmade ochoko (small sake cups). With the soft lighting and the ceramics on display, it reminded me of an art gallery. I loved how much care had gone into a space this small.
Kyoko-san was already there to welcome us with a smile. There was no check-in desk to find or group to wait for; she was expecting us, and we had her attention from the moment we arrived. I felt very well looked after, even before we’d tried any sake.
Handmade sake cups on display inside the venue
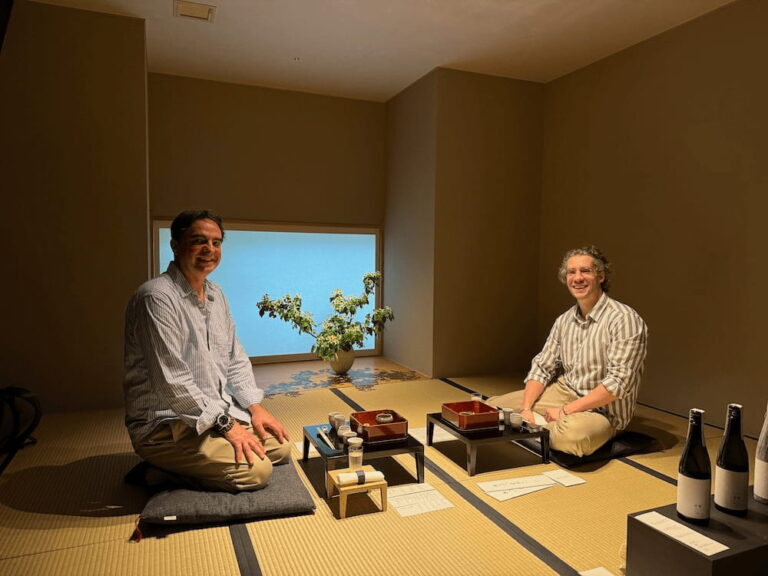
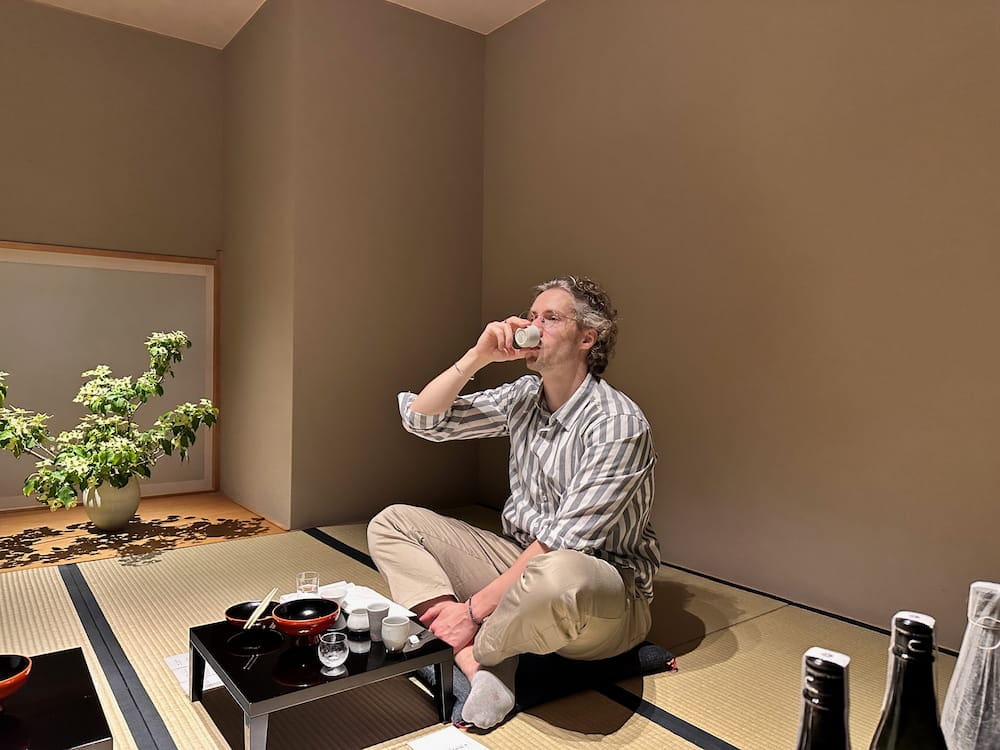
After showing us the bottles and cups, she led us into the tasting room. It had tatami (woven floor mats), seasonal flowers, and the same soft lighting as the lobby. I found it warm and welcoming, and having this little room to ourselves made the tasting feel very personal.
Tasting the Sake with Kyoko-san
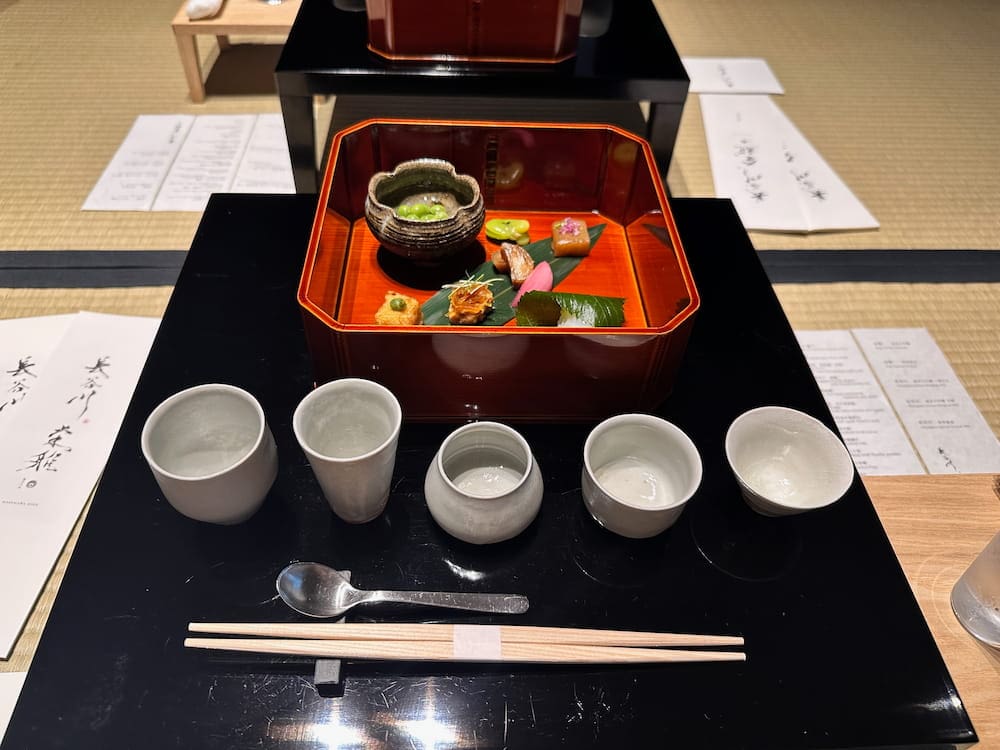
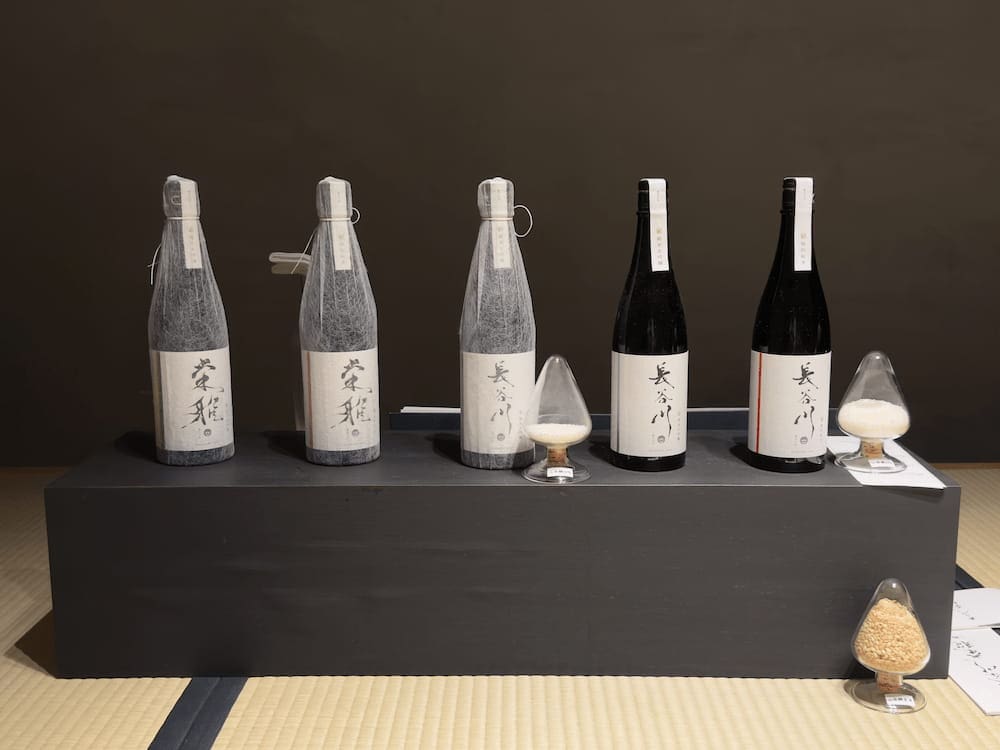
Our cups and food were already laid out when we sat down. We were going to try five varieties of Hasegawa Eiga sake, which comes from Yaegaki in Himeji, a city in western Japan. Each had food chosen to go with it, prepared by the chef at Ginza Wakyo, a Japanese restaurant in Ginza.
I was pleasantly surprised by how much food there was. We had about 10 different bites in total, which felt generous for a sake tasting. It wasn’t a full meal, but there was plenty to taste alongside the drinks. The menu changes with the seasons, so you may have different dishes from the ones in my photos.
The sake cups and food before we started
As we tasted each sake, Kyoko-san talked us through how it was brewed and why it went with the food we were eating. Her English really impressed me. She could explain the brewing in detail, using precise vocabulary, and still make it easy for someone like me to follow.
I loved listening to her. She clearly enjoyed talking about sake, and that enthusiasm made learning about it enjoyable, too. There was a lot of information, but the conversation stayed relaxed. I never felt as though I was sitting through a lecture or listening to a rehearsed presentation.
And the sake was fantastic. I enjoyed all five varieties, and trying them with the food while Kyoko-san explained the pairings was a lovely way to spend the hour.
The five sake varieties we tried
Finishing the Tasting
By the end, I was relaxed, a little tipsy, and very happy with the experience. We could buy bottles of the sake we’d tried, but there was no pressure to purchase anything. If you enjoy one in particular, taking a bottle home would be a nice reminder of the visit.
Kyoko-san left as much of an impression on me as the sake. We’d only spent about 1 hour together, yet saying goodbye felt almost like leaving a friend.
Is Hasegawa Eiga Worth It?
I strongly recommend it, especially for couples or a small group of friends who’d enjoy a private tasting. I felt like a VIP for the hour we were there, and I think it would be a lovely experience to share with a partner or friends who enjoy food and sake.
It’s an expensive experience, so it suits a trip where you’re happy to spend more on the food, the setting, and the time with the host. But a serious knowledge of sake certainly isn’t required. I was just curious, and Kyoko-san made it a wonderful introduction.
I enjoyed every sake we tried
I’ve had similarly lovely experiences through Wabunka, including making my own chopsticks at Mogami Kogei. In my opinion, they’re the best company for this kind of private cultural experience, and I always recommend trying at least one during a visit to Japan if the budget allows. If sake isn’t your thing, there are plenty of other cultural experiences in Japan to choose from.
Group size: Wabunka lists up to six guests, while the venue’s own information lists four. For five or six people, confirm with Wabunka before paying.
Age: Participants must be 20 or older.
Food and seating: Mention any allergies when booking, and plan a separate lunch or dinner. Low chairs were available during my visit, so ask about those if sitting on the floor is uncomfortable for you.
Confirmation and cancellation: Check whether your chosen date can be confirmed immediately or needs the host’s approval, and read the cancellation terms before paying.
I’ve never been good with my hands. I remember trying pottery as a teenager, and my creations looked like a baby had smashed some clay into random shapes. So when I decided to try kintsugi, the Japanese art of repairing broken pottery with lacquer and gold or silver powder, I was a little worried about what I’d manage to make.
The class was a 2-hour private workshop at Utsuwa Omusubi HANARE, in Tokyo’s Omotesando area. I’d heard that the careful, repetitive work of kintsugi could feel like active meditation, and I was curious to try it. Though at that point, I was still wondering whether I’d leave with a beautiful piece of pottery or a disaster on my hands.
Some links on YavaJapan are affiliate links. If you book or buy through them, I may earn a small commission at no extra cost to you. It helps support the site, and I only link to places, stays, and experiences I genuinely think are worth recommending.
Time and place: 2 hours in Tokyo’s Omotesando area
Format: A private class for your party, with an English-speaking host
Your souvenir: A piece of pottery you repair yourself and take home that day, ready to use after 2 weeks
Why I Tried Kintsugi with Wabunka
If you haven’t heard of Wabunka, I highly recommend checking them out. They offer private cultural experiences and stays in Japan, working directly with artisans, artists, chefs, and other specialists. The experiences are for you and your own party, with an interpreter joining when the host doesn’t speak English. You get to spend time with someone who knows their craft and ask all the questions you want.
For non-touristy cultural things to do in Japan, I think they have the best selection. I work with Wabunka regularly as part of my job in the Japan travel industry, and they invited me to this kintsugi workshop.
I’d recently moved into a new apartment and was thinking about upgrading my cheap IKEA tableware, so I jumped at the opportunity. Despite my doubts about my own skills, I was ready to give it a go.
I was already looking forward to the workshop when I saw it was in Omotesando. With its luxury shops, art galleries, and stylish buildings, it’s one of my favorite areas to explore in Tokyo.
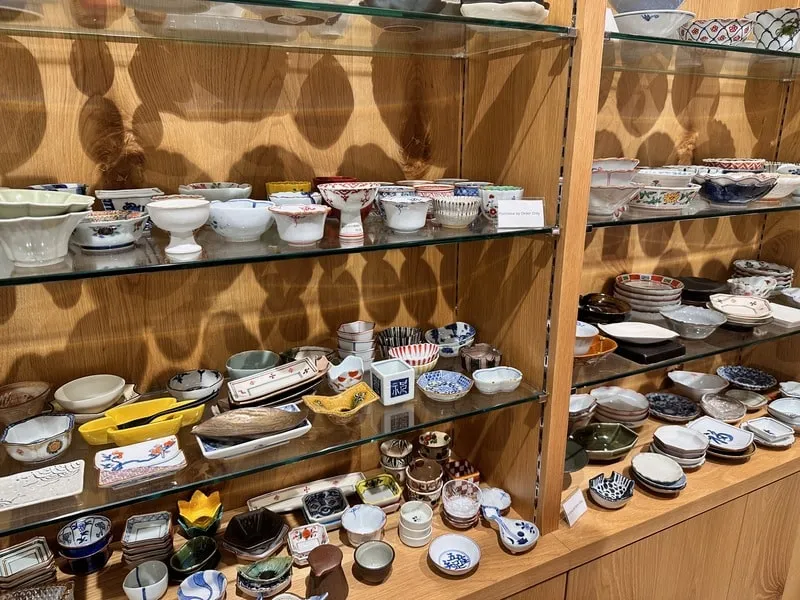
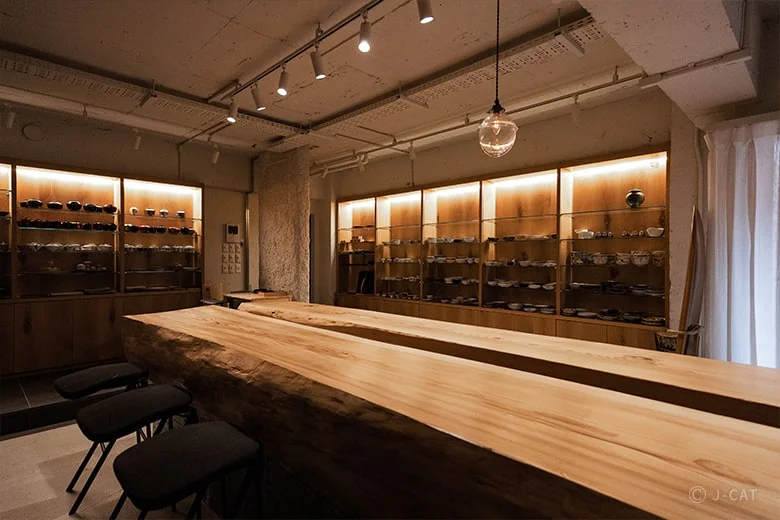
The class takes place at Utsuwa Omusubi HANARE, a beautiful gallery near the Utsuwa Omusubi pottery shop. The shop is run by a wholesaler founded in 1896. If you love ceramics, I recommend visiting it too. Being surrounded by pottery made the gallery such a lovely setting for learning how to repair our own pieces.
The shelves of Utsuwa Omusubi HANARE are filled with beautiful pottery
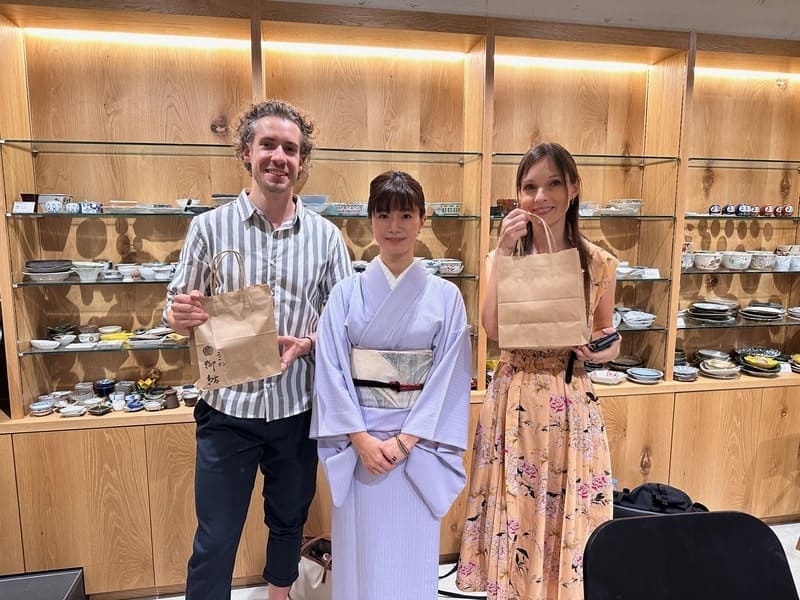
Our instructor, Aya-san, greeted us in a beautiful kimono and warmly showed us around. Looking at all the pottery on display, I hoped I’d manage to make something I could be equally proud of, despite my lack of skills.
We soon sat down at a gorgeous wooden table, honestly the nicest I’d ever seen, to choose the pottery we wanted to repair.
If you’re coming as a couple or family, I’d recommend choosing the same item in different sizes or colors. Aya-san explained that blue and red tableware is often paired for men and women, and the blue pieces in our selection were a little larger than the red ones.
I was there with a friend, so I chose the red cup I thought would be perfect for my after-lunch coffee.
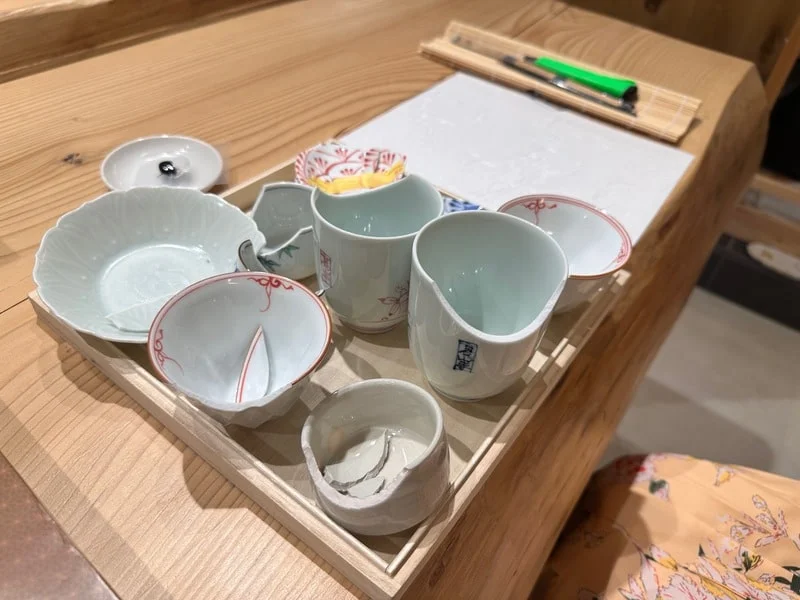
I could choose any of these pieces for the class
Gluing It Back Together
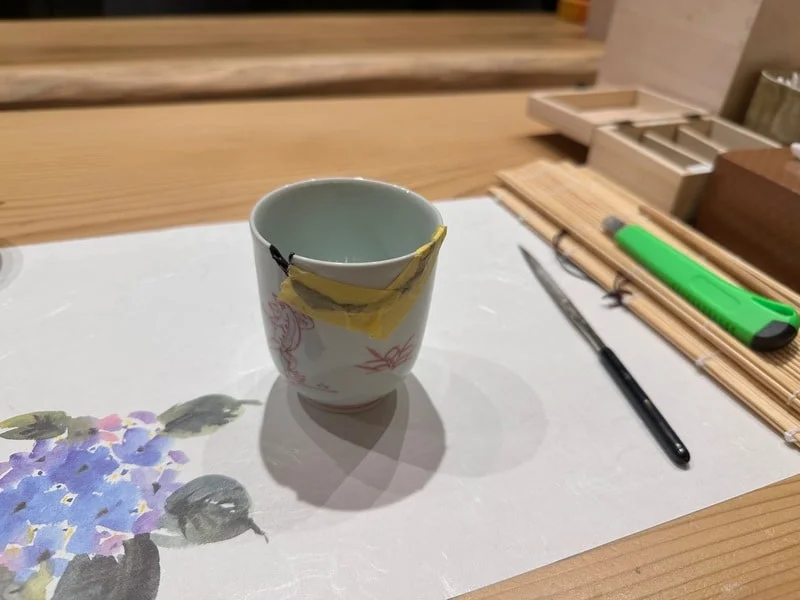
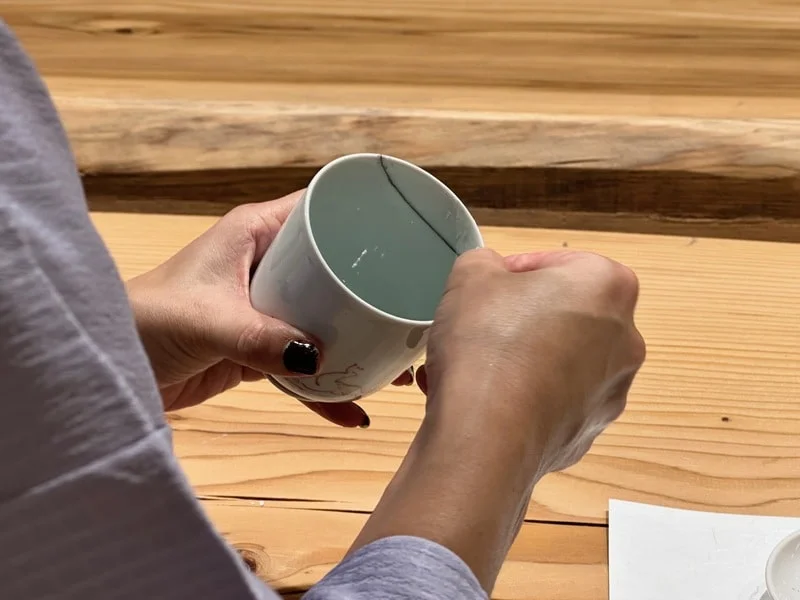
We started by sanding the broken edges under Aya-san’s gentle guidance. Then we mixed the glue ourselves, though she’d already measured everything out for us. I applied it to the broken area and pressed the pieces together.
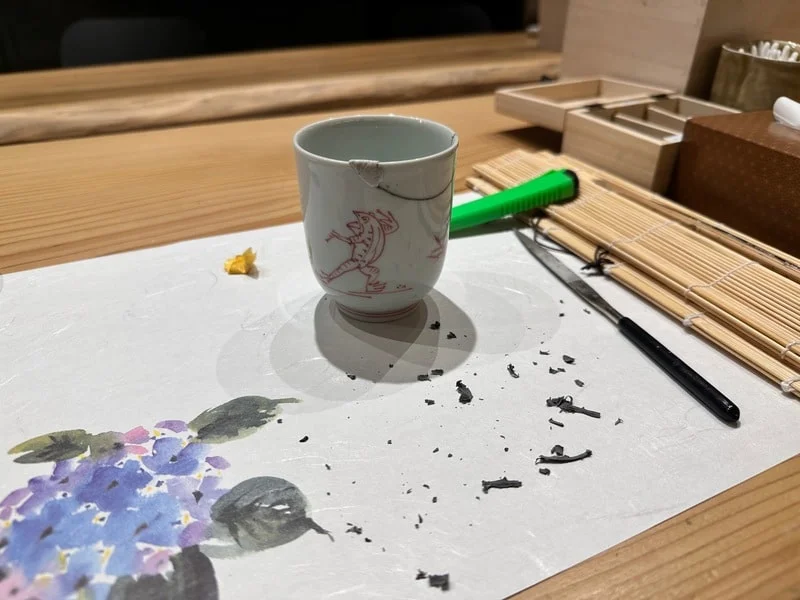
The glue is black
Once the glue had set, Aya-san showed us how to remove the excess with a small knife. She made it look so easy, but getting the pressure right was surprisingly difficult. After a few tries, and some help from her, I finally got it and managed to clean up the join.
Removing the excess glue wasn’t as easy as it looked
Filling the Gaps and Sanding
By then, I was wondering what happened when a piece was missing altogether. Gluing the fragments back together made sense, but how could we fill a hole where there was nothing left to join?
Aya-san showed us how to use putty to fill those gaps. At first, it left a rough little bump sticking out of the cup, which didn’t look much like it belonged there. She explained that we’d smooth it down with tiny pieces of sandpaper once it had hardened.
The chunky putty is clearly visible on the cup
While we waited about 15 minutes for it to set, Aya-san told us about the history of kintsugi, different techniques and lacquers, and the philosophy behind the craft. We talked about wabi-sabi, the appreciation of imperfection, which is closely associated with kintsugi. Repairing a damaged piece gives you a chance to see beauty in something you might otherwise throw away.
Then we began sanding the putty until it was level with the ceramic. This took the most time, but it was also when I understood what people meant by active meditation.
The movements were simple and repetitive, and I became completely absorbed in them. Every so often, I’d run my fingers over the cup to feel how much of the bump was left. With each pass of the sandpaper, it grew smaller, until I could no longer feel where the putty ended and the ceramic began. I hadn’t noticed the minutes passing, and it was so satisfying to feel that smooth surface at last.
Sanding the putty took the longest
Finishing Touches: The Lacquer and Gold
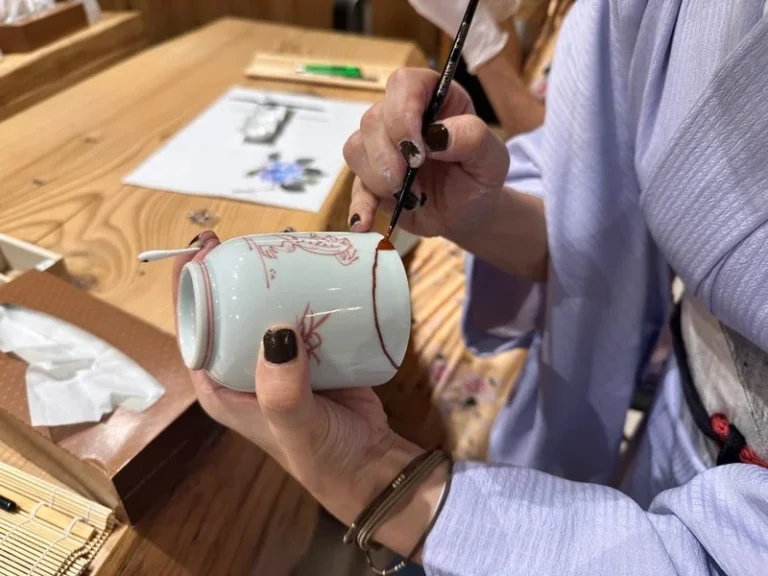
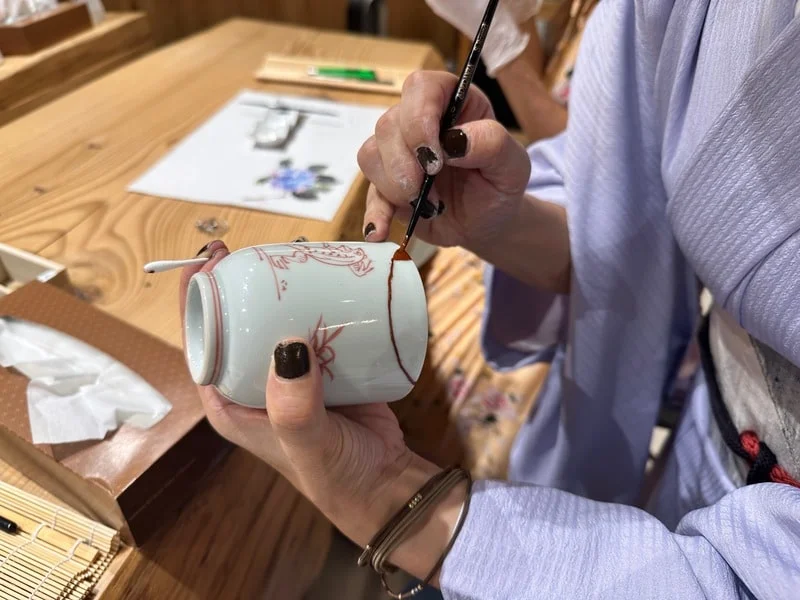
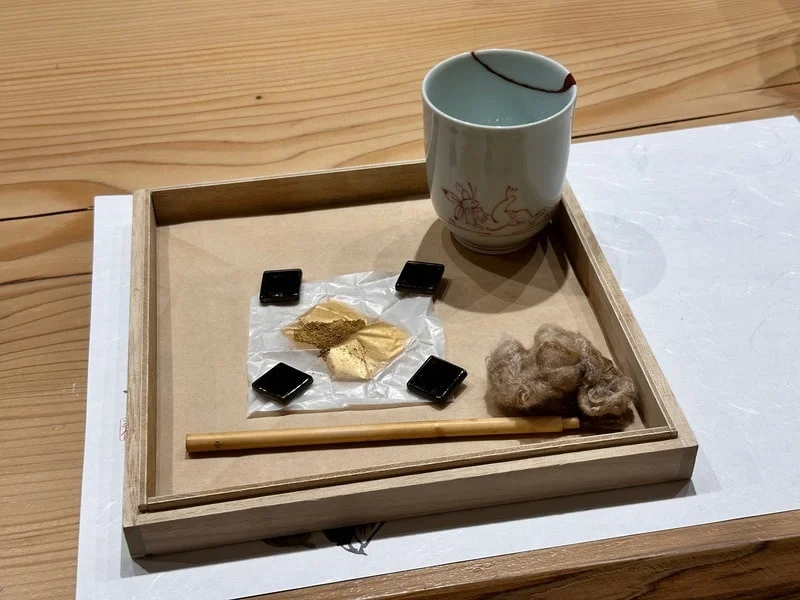
With the surface smooth, we were ready to cover the repairs with lacquer and add the gold. Using a fine brush, I carefully painted the cracks and putty with deep red lacquer, then wiped away the excess with damp cotton swabs.
The deep red lacquer before adding the gold
While we waited for the lacquer to be ready, Aya-san served us traditional Japanese sweets and hot green tea. We chatted about her experiences and the history of the shop, and she shared more tips for future projects.
For the final step, she offered us a choice of silver or gold powder. I went with gold, thinking it would look perfect with the red patterns on my cup.
The gold powder we used to cover the red lacquer
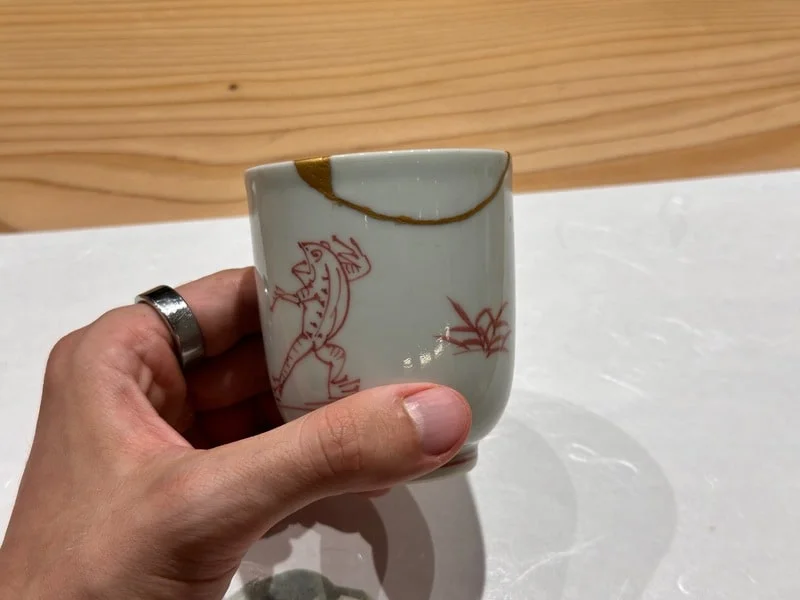
Applying the gold was simple, but incredibly satisfying. I dipped a small ball of wool into the powder and gently brushed it over the lacquer. The powder clung to the repaired areas, and watching the red lacquer gradually disappear beneath a shimmering layer of gold was mesmerizing. After all that careful work, I finally had my own finished piece of kintsugi in front of me.
I couldn’t wait to use this cup
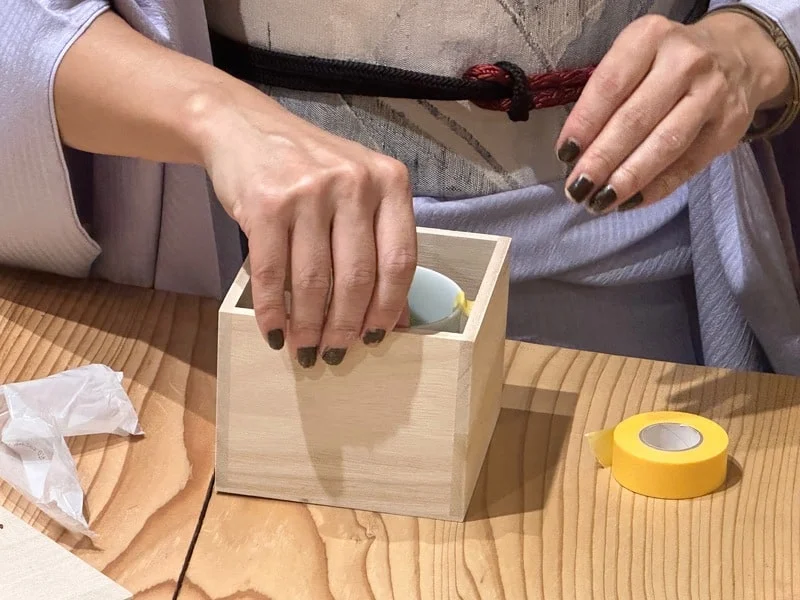
The 2 hours had flown by. Aya-san carefully packed our pieces in sturdy wooden boxes for us to take home. The box helps protect the cup in your suitcase, which is reassuring if, like me, you worry about bringing fragile ceramics home.
Aya-san carefully packed my finished cup
After saying our goodbyes, I proudly headed home, already thinking about where to display my new cup for everyone to see.
Why I Recommend This Workshop
I absolutely recommend this experience. Learning directly from Aya-san in such a beautiful setting made it a visit I’ll remember, and I loved leaving with something I’d repaired myself. The cup felt much more personal than a souvenir I’d simply bought in a shop.
The private class also gave us plenty of time with Aya-san. We could ask questions as we worked and get her help whenever we needed it. Considering how nervous I’d been about my abilities, I was delighted with what I’d managed to make.
Mission accomplished
The only problem is that now I want to replace all my plain IKEA plates with something to match my new cup.
This is an expensive workshop, but I think it’s worth paying more for the private lesson, Aya-san’s attention, and the beautiful setting.
Booking and Bringing Your Piece Home
You can choose a piece at the workshop or bring your own broken pottery. If you have something you’d love to repair, send a photo and its dimensions when booking so the host can check whether it’s suitable. The standard finish is silver, with gold available for an extra charge.
Although you take your piece home that day, wait 2 weeks before using it and follow the drying instructions you’re given. Afterward, wash it gently by hand and keep it out of the dishwasher and microwave. The class uses urushi (natural Japanese lacquer), which can irritate skin, so gloves are provided.
The workshop welcomes participants aged 12 and over, with an adult guardian required for under-18s. Groups can have up to eight people, and solo bookings carry a minimum charge for two. Check the price for your party and the meeting point when booking, as the HANARE gallery is separate from the pottery shop.
I’ve lived in Tokyo since 2019 and spent a lot of time in its different neighborhoods, so my recommendations depend as much on the kind of neighborhood you’d enjoy as on how easy it is to get around. I think some of the busiest areas are great for going out with friends, but I’d recommend somewhere with fewer crowds if you want to spend more time walking around near your hotel.
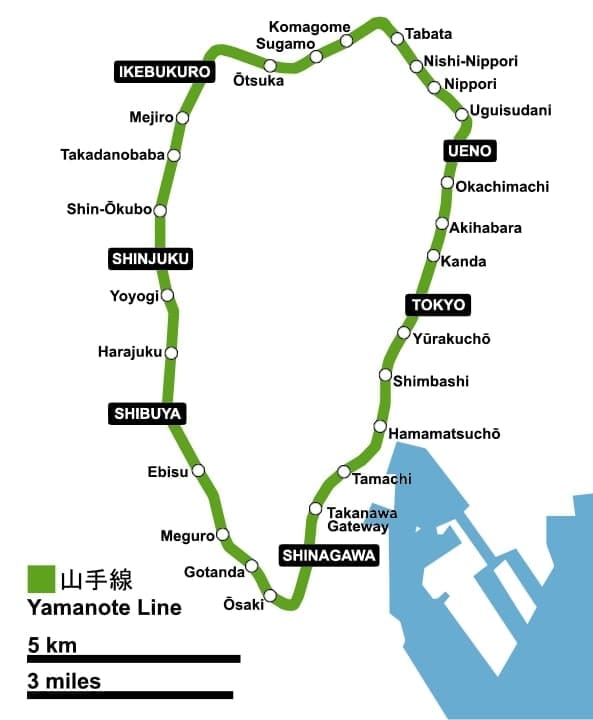
Whichever you prefer, staying near the Yamanote Line is an easy way to keep your journeys simple, since it connects many of the areas you’ll want to visit without changing trains. If a smaller central neighborhood appeals to you more, check its subway connections before ruling it out. With two or three lines nearby, it can be just as convenient.
Some links on YavaJapan are affiliate links. If you book or buy through them, I may earn a small commission at no extra cost to you. It helps support the site, and I only link to places, stays, and experiences I genuinely think are worth recommending.
At a Glance
Cafes, independent shops, and walks: Omotesando and Aoyama. Compare Tokyu Stay Aoyama Premier for a practical room with laundry facilities and The Aoyama Grand Hotel for a more expensive stay.
Smaller streets and a calmer central neighborhood: Kagurazaka for restaurants and cafes, or Yanaka and Nezu for older streets, small shops, and temples.
A lively stay near shops and restaurants: Shibuya. Shibuya Tokyu REI has compact rooms near the station; Cerulean Tower offers larger rooms high above the city.
Trains to other cities: Stay near Tokyo Station itself. Ginza is another good central option, but a Ginza hotel may still require a separate journey to the station.
Train connections and nights out: Shinjuku remains very convenient, especially for friends planning to go out. I prefer other areas if you want fewer crowds around your hotel.
Other options: Ueno and Ikebukuro have good transport and plenty of hotels. Asakusa suits a stay focused on its temple and surrounding streets, though I don’t recommend it for every first trip.
Tokyo Areas and Hotels Compared
Hotel prices vary a lot with your dates and the size of the room. I’ve included compact hotels, family apartments, and more expensive places with larger rooms so you can compare a few options in each area. The hotel suggestions are based on their locations and facilities, rather than my own stays.
Area
Why I Recommend It
Hotels to Compare
Omotesando and Aoyama
Cafes, small shops, and walks with your partner or friends
Use the map below to compare the Tokyo areas discussed in this guide:
How to Choose Where to Stay in Tokyo
On my first visit in 2017, I stayed in an Airbnb in Kosuge, outside central Tokyo, because it looked like a good deal. The trip was great, but getting back to the accommodation took too long. It was one of the main things I wished I’d chosen differently.
Since then, I’ve recommended staying centrally rather than saving a little on a room farther out. Before booking, look at how long it will take to reach the places you want to visit, including the walk to the station and any changes along the way. A cheaper room may still be worth it, but I wouldn’t recommend a long journey back every evening for a small saving.
Staying centrally can also mean choosing a smaller neighborhood. Kagurazaka and Nezu, for example, are inside the Yamanote loop and have good subway connections, with residential streets, cafes, and shops near the hotels. They’re worth considering if you’d rather stay somewhere less crowded than the areas around the biggest stations.
Start with the Yamanote Line, Then Compare Subway Connections
The JR Yamanote Line runs in a loop through Shinjuku, Shibuya, Tokyo Station, Ueno, Ikebukuro, and other major areas. I recommend it as a simple starting point when choosing where to stay, especially for a first visit. Many of its stops are places you’ll want to explore, so you can make several sightseeing trips without changing trains or figuring out different lines.
That said, a central neighborhood with two or three subway lines nearby can be equally convenient, or even better for the places on your itinerary. I suggest checking which lines serve the hotel and where they go before ruling out an area just because it isn’t on the Yamanote Line.
Before choosing a hotel, check the journey from the airport and to a few places you plan to visit. Allow some extra time inside the bigger stations, too. In Shinjuku or Tokyo Station, you may still have quite a walk to your platform after reaching the entrance.
Omotesando and Aoyama: Cafes, Fashion, and Small Streets
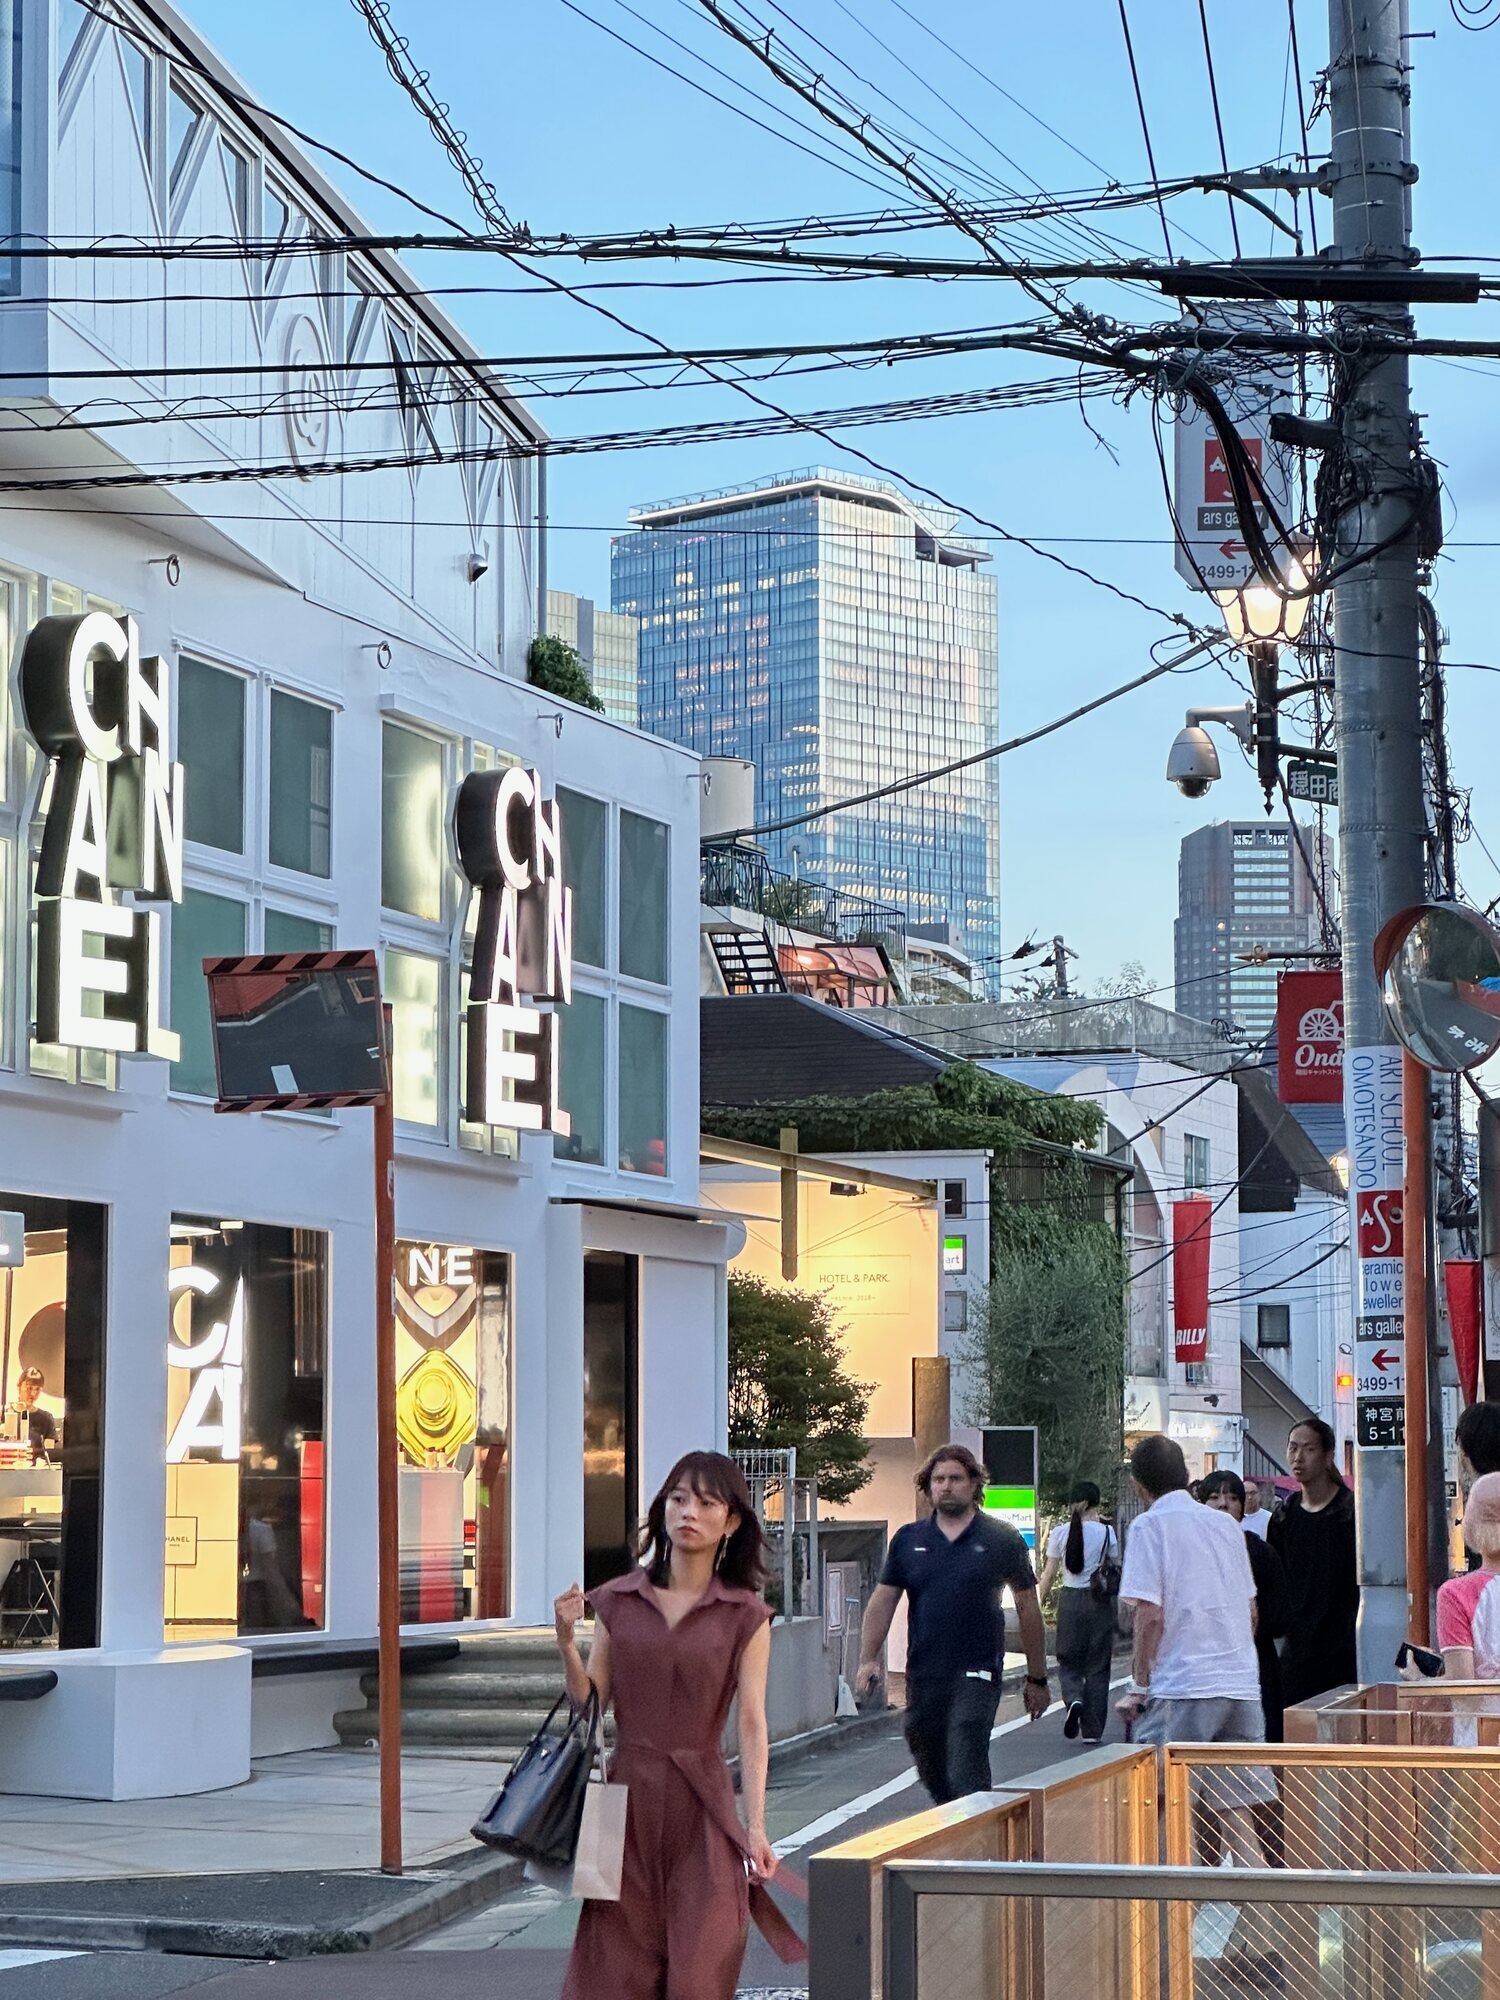
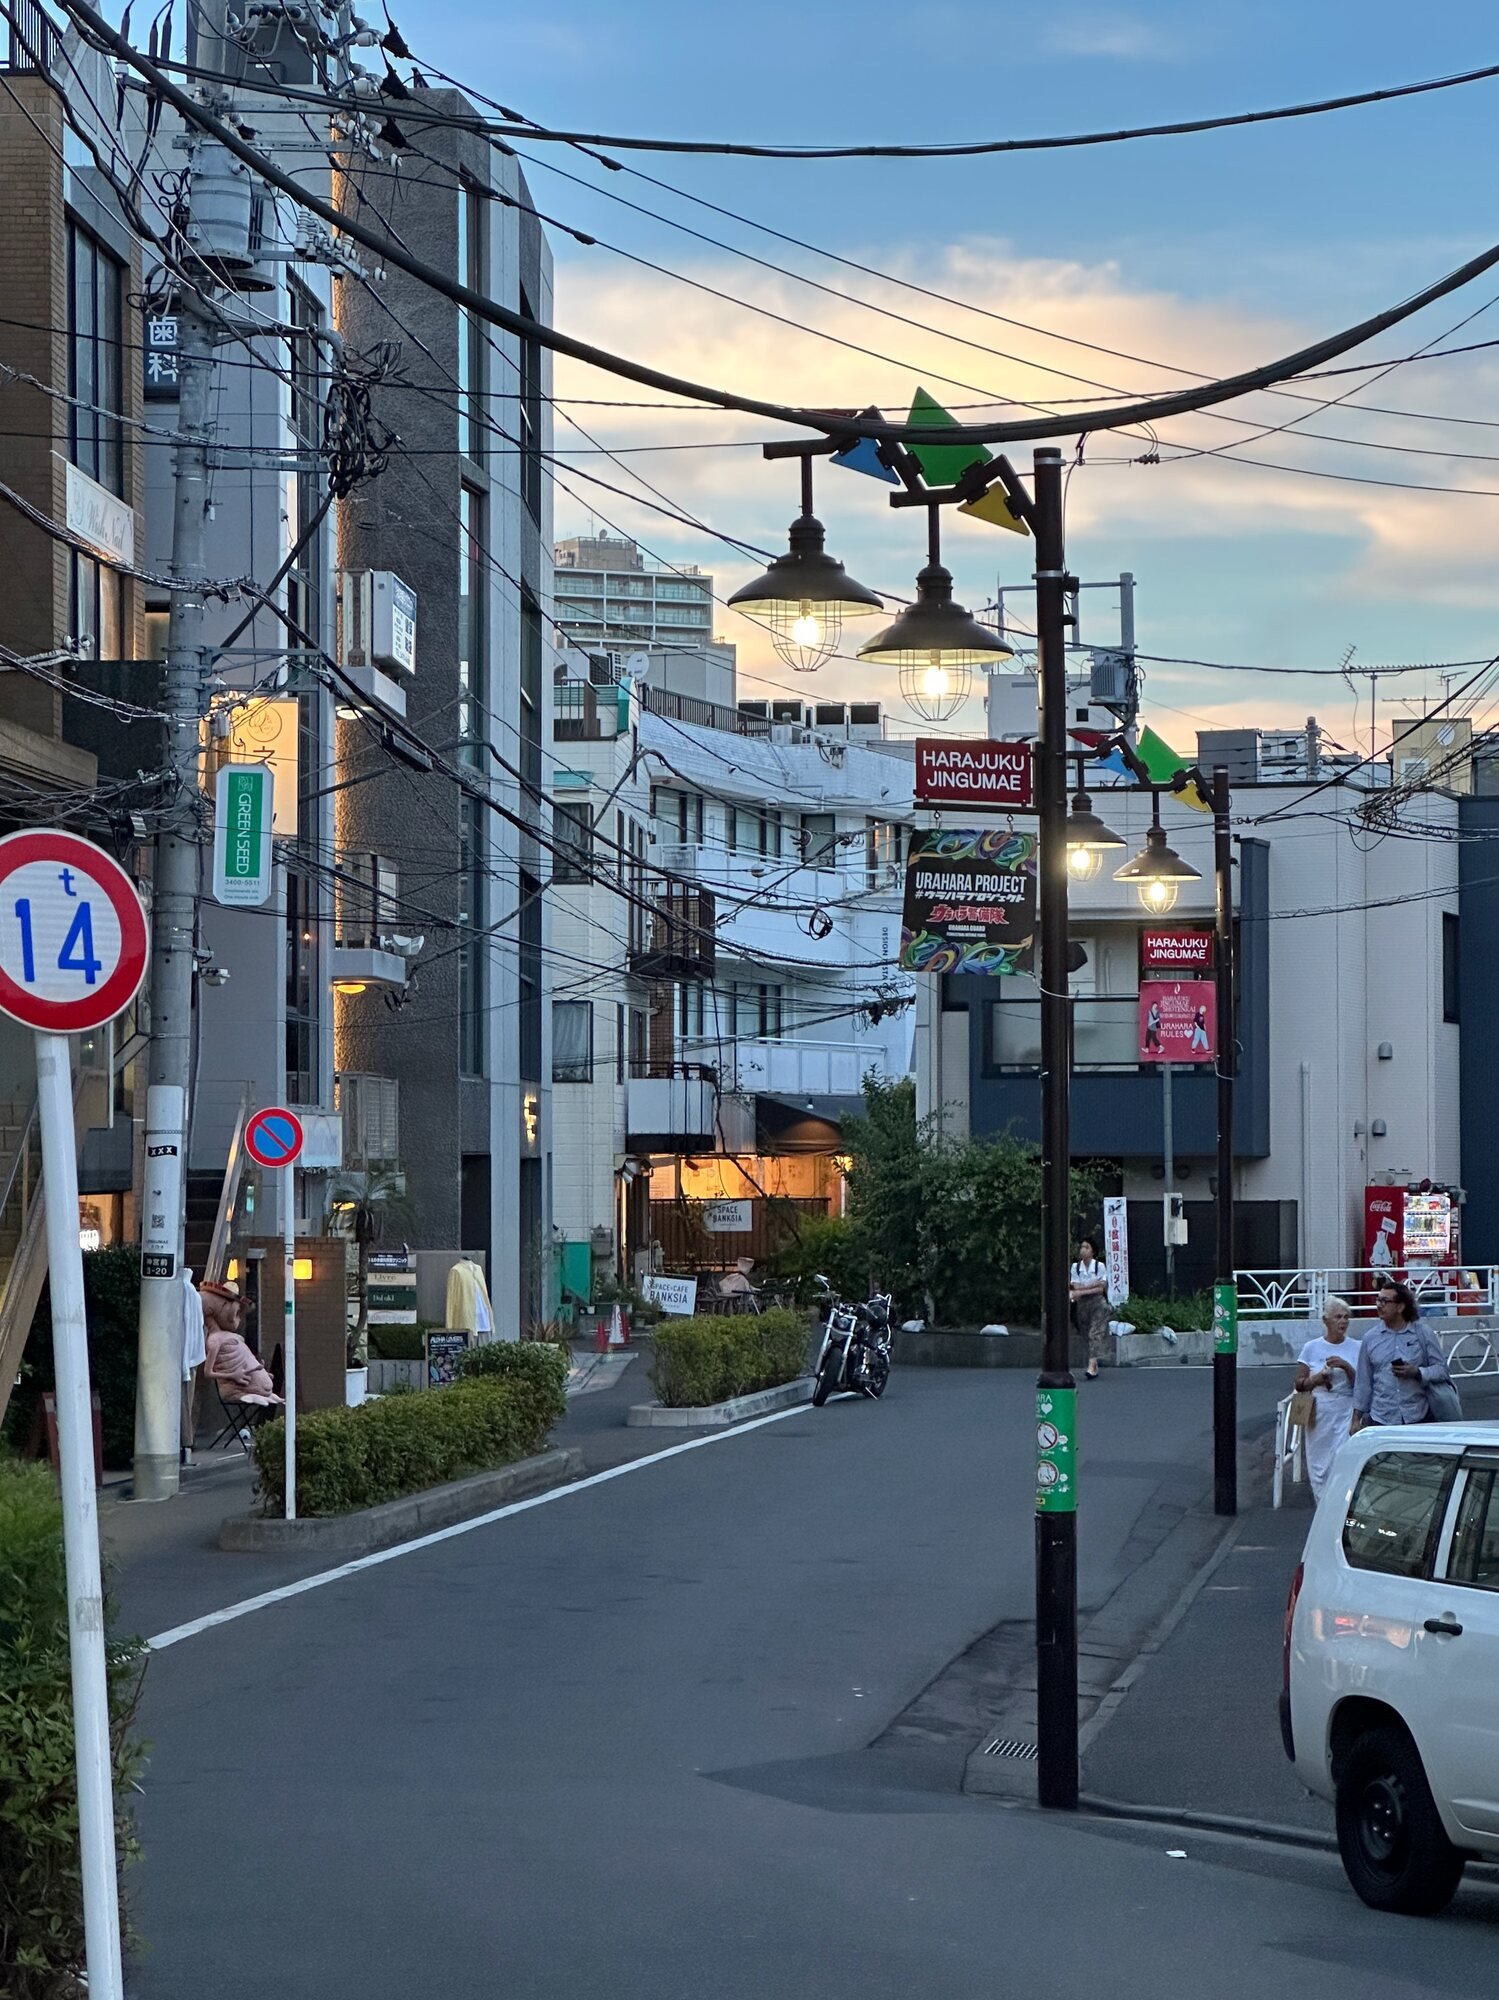
I recommend Omotesando if you enjoy cafes, fashion, and walking around small streets. It’s an affluent area, with designer stores along the main avenue and smaller boutiques and vintage shops toward Harajuku. I think it’s especially nice for couples or friends who want to start the day with a coffee, browse a few shops, and explore nearby before heading to other parts of Tokyo.
From here, it’s easy to explore western Tokyo. Shibuya is close, Shinjuku is easy to reach by train, and Harajuku and Yoyogi Park are toward the western end of Omotesando. You can use the Ginza, Hanzomon, and Chiyoda subway lines at Omotesando Station, or walk to Harajuku Station for the Yamanote Line.
The smaller streets are particularly nice to walk around, but the main avenue and the streets near Harajuku can get very crowded on weekends. Check where your hotel is within the area, too. Aoyama extends east of Omotesando, and both hotels below are closer to Gaienmae Station than to Harajuku or Yoyogi Park.
For families, I think it depends on what your children enjoy. Younger children may not get much out of the cafes and fashion shops, while older children who enjoy shopping could have a great time here.
Small shopping streets around Jingumae, near Omotesando and Harajuku.
Tokyu Stay Aoyama Premier
Tokyu Stay is worth considering for a longer stay, especially if you’d use a washer-dryer in your room. Some room categories also have a kitchenette. It’s close to Gaienmae Station and around an 8-minute walk from Omotesando Station, so you can stay in Aoyama without paying for one of its luxury hotels.
If you’re happy to spend more for a larger room, I suggest The Aoyama Grand. Even its Standard rooms are 32 m², which is quite spacious compared with many Tokyo doubles, and they have a mid-century design. Like Tokyu Stay, it’s near Gaienmae Station, around an 8-minute walk from Omotesando Station.
Shibuya is a good choice if you want restaurants, cafes, shops, and places to go out near your hotel. It’s also easy to get around from here, with JR trains and several subway and private railway lines at the station.
Harajuku, Omotesando, and Daikanyama are close enough to walk to, depending on where you’re staying and how much walking you want to do. You could browse shops around Harajuku, stop for coffee near Omotesando, and return to Shibuya for dinner without repeatedly crossing the city.
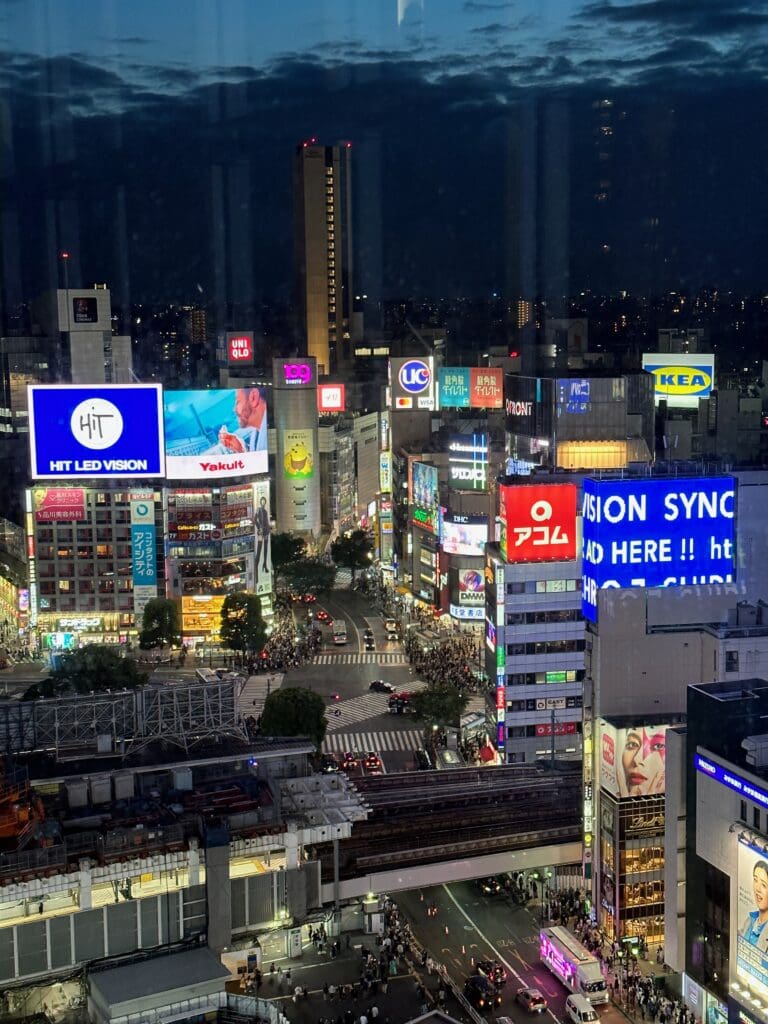
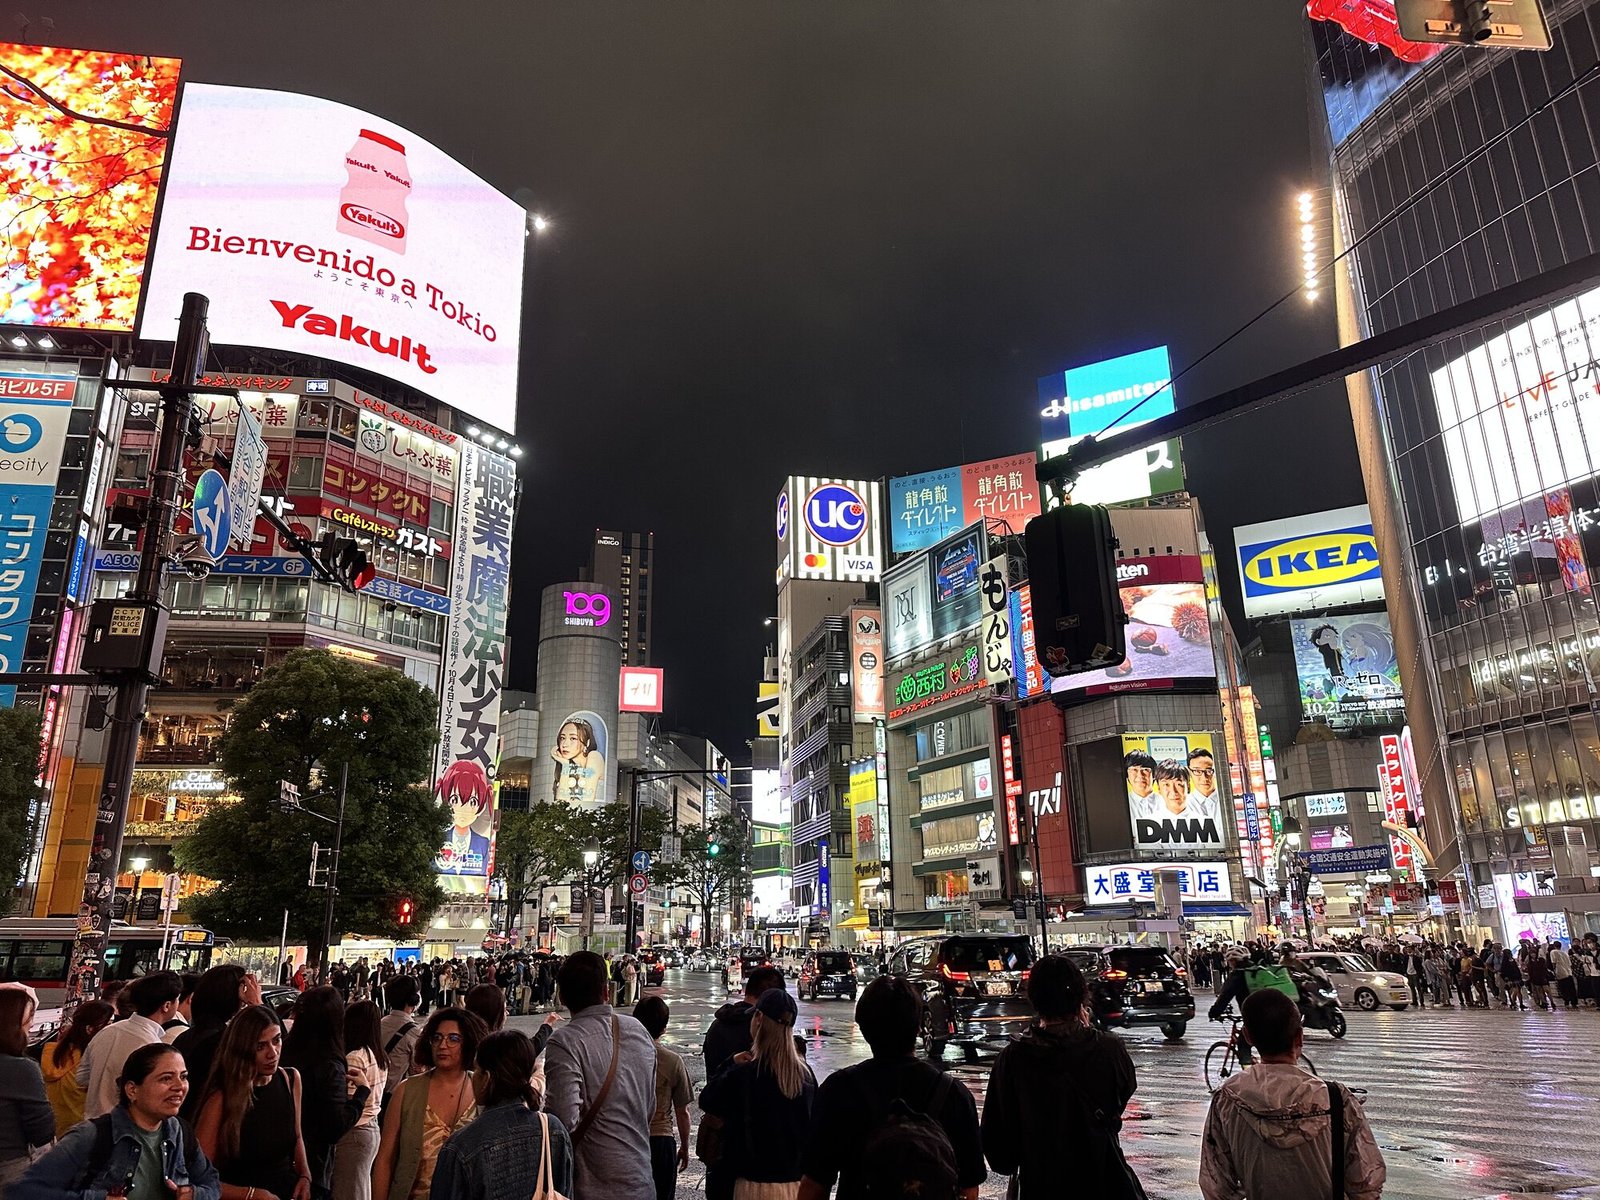
That said, the streets around Shibuya Station and the crossing are very busy. I think it’s a more enjoyable place to stay than Shinjuku, but I wouldn’t recommend it if you’re hoping for peace and quiet near your hotel. In that case, consider the smaller neighborhoods below.
Shibuya Crossing and the shops around the station at night.
Shibuya Tokyu REI Hotel
Shibuya Tokyu REI is worth comparing if you want to stay close to the station and the luxury hotels are beyond your budget. Its Standard Double is only 13.8 m², so it’s better suited to a short stay with light luggage, especially if you’ll spend most of the day out.
For more space, I suggest looking at Cerulean Tower. Its Standard Floor King rooms are around 34 m², on floors 19 to 30, with views over Tokyo. It’s a more expensive option, but you may appreciate the larger room if you’ll be spending several nights here. The view depends on the room you book.
Kagurazaka and Iidabashi: Restaurants and Quieter Side Streets
I recommend Kagurazaka if you want to stay centrally but prefer smaller streets with fewer crowds. There are Japanese and French restaurants, bakeries, cafes, and small shops, so you can spend an evening eating nearby and walking around without going back into a busy station area.
Getting around is convenient, too. Kagurazaka Station has the Tozai Line, Ushigome-Kagurazaka has the Oedo Line, and Iidabashi, down the hill, has JR Chuo-Sobu trains and several subway lines. Just keep in mind that the area is hilly and the main shopping street gets busy. For quieter surroundings, look at hotels on the residential streets away from it.
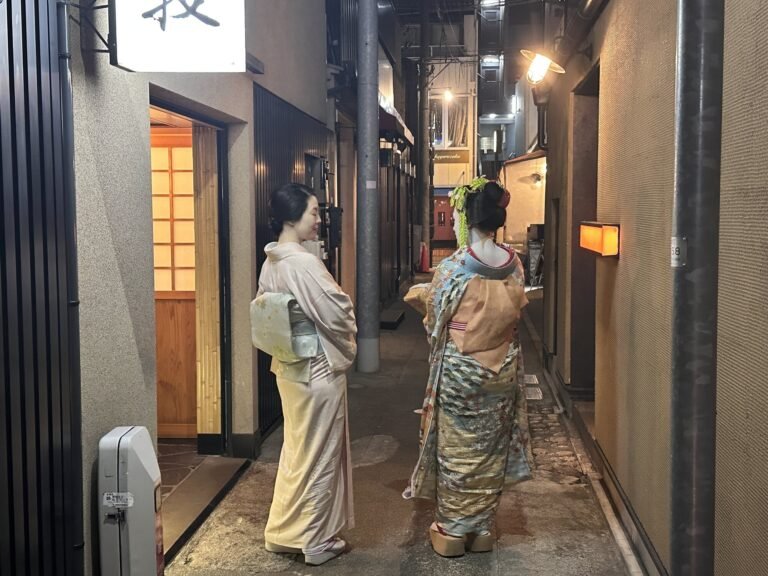
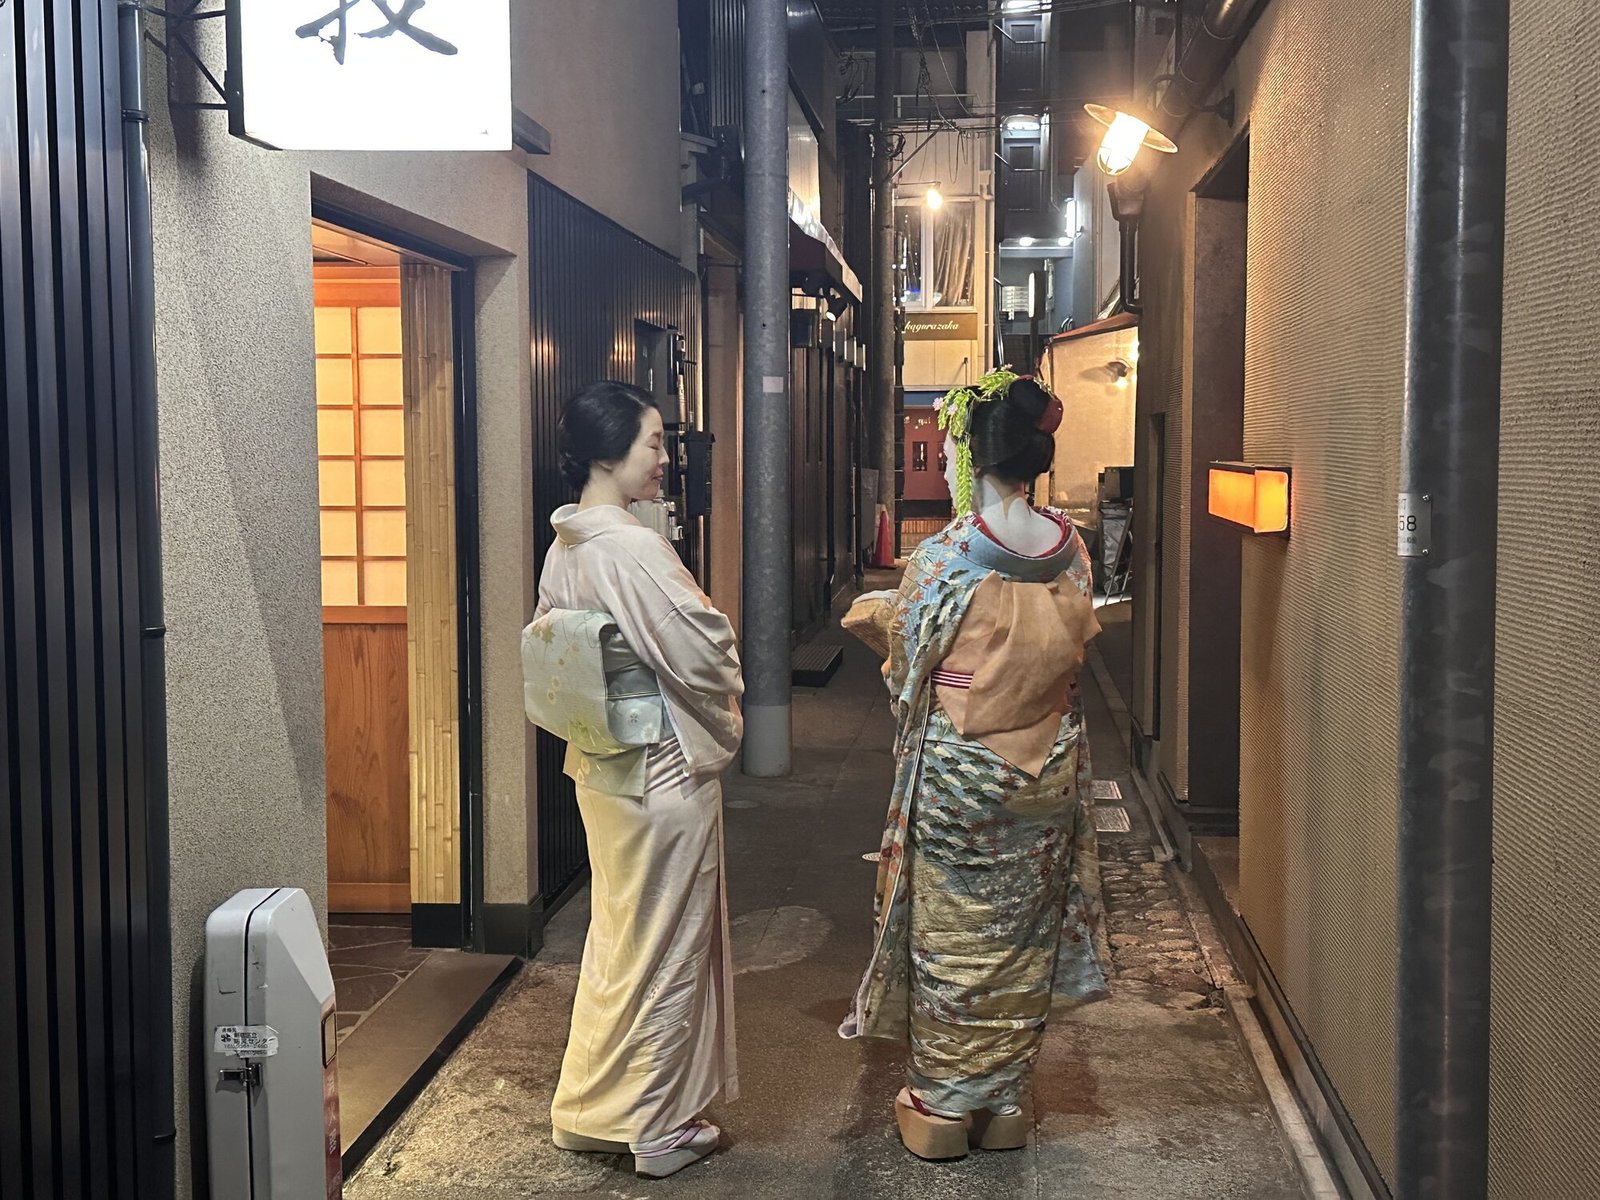
An alley outside Ryotei Maki in Kagurazaka.
Hotel Vintage Kagurazaka
Hotel Vintage is a good option if you’re traveling with friends and want to share a room. The 56 m² Executive Room sleeps up to six, using two queen beds and two daybed sofas, so make sure everyone is comfortable with that arrangement. It’s a small hotel on the northern side of Kagurazaka, near Kagurazaka and Edogawabashi subway stations.
For families who prefer a larger hotel with restaurants, I suggest Hotel Metropolitan Edmont near Iidabashi. You’ll have a walk to Kagurazaka’s smaller streets, but the 37 m² East Wing family room sleeps up to five people. If you’re booking for January 12, 2027, or later, look for the same room under its new name, Deluxe Twin – East Wing.
Yanaka and Nezu: Older Streets, Temples, and Small Shops
Yanaka and Nezu are good places to consider if you’d enjoy older residential streets, small shops, and temples around your hotel. They’re west of the railway between Ueno and Nippori, inside the Yamanote loop, with older wooden houses, cafes, and neighborhood shopping streets to explore. Ueno Park is nearby, too.
Yanaka Ginza, the best-known shopping street, attracts plenty of visitors, but you’ll find quieter streets away from it. Neighboring Sendagi is also popular with its residents, ranking 28th in the same SUUMO resident survey.
Nezu and Sendagi stations are on the Chiyoda Line, which also serves Omotesando and Meiji-jingumae near Harajuku. You can reach the Yamanote Line at Nippori, though the walk depends on your hotel. I especially recommend this area if you plan to spend time around Ueno and eastern Tokyo. If you want to go out often in Shibuya or Shinjuku, staying closer to those areas will make getting home easier.
Hotel Graphy Nezu
Graphy has a cafe and shared spaces where you can spend time outside your room. It’s worth comparing if you’re looking for a casual hotel, but pay attention to whether the room has its own bathroom. Some of the cheaper categories, including the Semi-Double with Shared Bathroom, use shared facilities. Larger rooms with private bathrooms are also available.
If you’d prefer a small Japanese inn, consider Sawanoya in Yanaka. It has 12 Japanese-style rooms, but only two have their own bath and toilet. For the others, the shared baths can be used privately. I recommend it if you’re comfortable using facilities outside your room and would enjoy a more traditional stay. When you send the reservation form, the inn checks availability before confirming your booking.
Tokyo Station and Ginza: Shopping and Easy Access to Trains
I recommend the areas around Tokyo Station and Ginza for families and anyone who wants department stores, restaurants, and good transport connections without staying near the main nightlife districts. With offices and large shops around you, the atmosphere is quite different from the smaller neighborhoods above.
For the most convenient access to the shinkansen (bullet train), stay close to Tokyo Station itself. That saves you a trip across the city with your bags when you leave, though you’ll still need time to find your platform inside the station.
Nearby Ginza is a good alternative if you’re mainly interested in shopping, restaurants, and exploring Tokyo by subway. Ginza Station has the Ginza, Marunouchi, and Hibiya lines, and JR Yurakucho Station is nearby. Just check the hotel’s location if you also want easy access to Tokyo Station, as you may need a subway ride or taxi with your luggage. Ginza’s main shopping streets can get crowded during the day, too.
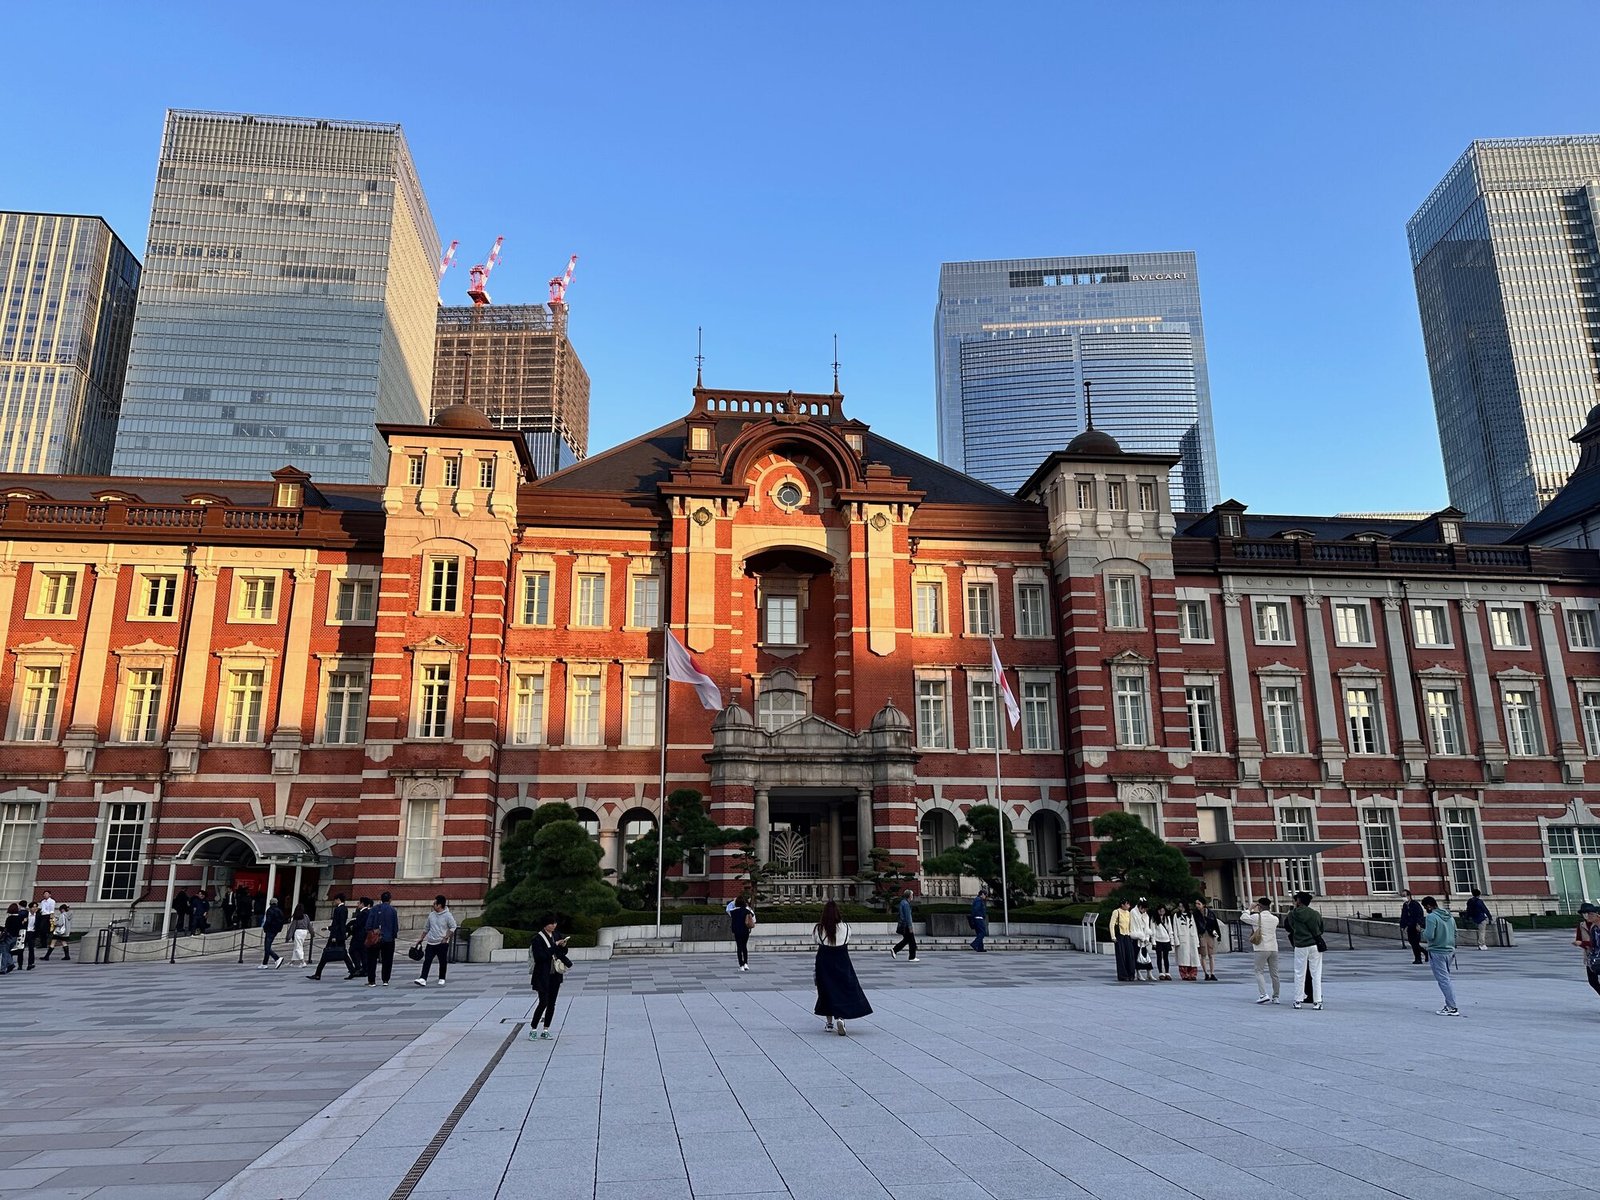
Tokyo Station’s Marunouchi entrance.
Hotel Ryumeikan Tokyo
Ryumeikan is around a 3-minute walk from Tokyo Station’s Yaesu North Exit. I recommend considering it if you want a short walk with your luggage but would rather spend less than at The Tokyo Station Hotel. There are several room types, so check the bed size and floor space for the rate you’re looking at.
The Tokyo Station Hotel is a luxury hotel inside the historic Marunouchi station building, with European-style rooms. I think it’s a lovely option for a special occasion if you’d enjoy spending time in the hotel itself. It costs considerably more than a standard hotel nearby, so I wouldn’t recommend it just for a shorter walk to your train.
MUJI Hotel is a good choice if you enjoy the brand’s simple design and want to stay in Ginza. It’s in the same building as the MUJI store. Room sizes differ considerably: Type A is 14 to 15 m², while Type C is 24 to 25 m². For two people spending several nights, I suggest comparing the larger categories before booking the lowest rate.
Shinjuku: Excellent Access and Nights Out with Friends
I find Shinjuku too touristy and crowded to recommend it to everyone, particularly around the main nightlife streets. If you want somewhere pleasant for a morning coffee or an evening walk without so many people around, I recommend one of the other neighborhoods above.
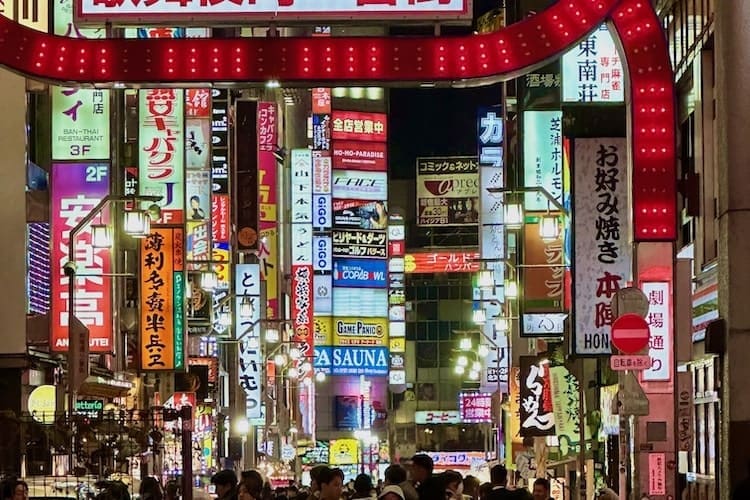
For a group of friends who want to go out drinking and experience Tokyo’s busiest nightlife, though, Shinjuku is probably the best choice. Kabukicho, northeast of the station, has bars, restaurants, neon signs, and plenty going on late into the evening. Staying nearby lets you enjoy that without planning the night around a train home.
The Godzilla head above the Toho building in Kabukicho
Even if you aren’t interested in nightlife, Shinjuku is still worth considering for its transport connections. I think it’s probably the best-connected area in Tokyo, with JR trains, subway lines, and the Odakyu and Keio railways taking you around the city and farther west.
If you choose Shinjuku, I suggest the west or south side of the station. You’ll keep the restaurants and trains within reach while staying away from the middle of Kabukicho. West Shinjuku has more offices and large hotels, along with the Tokyo Metropolitan Government Building and its observation decks.
One of the Tokyo Metropolitan Government Building’s observation decks
Hotel Sunroute Plaza Shinjuku
Sunroute Plaza is around a 3-minute walk from the south exit, so you can stay close to Shinjuku Station without being in the middle of Kabukicho. The Economy Double is 15.7 m². If two of you are traveling with large suitcases, I suggest looking at the larger doubles or twins.
Blossom is also close to the south exit and is worth comparing with Sunroute if you’d prefer a larger twin room. Its twin rooms have a separate washing area beside the bathtub, which is useful if you want a bath after a day of walking. Check the category before booking, as the Standard Double is smaller at 18 m².
I suggest Ueno if you want to visit museums, spend time in the park, and explore northeastern Tokyo. You’ll have JR trains and the Ginza and Hibiya subway lines, plus plenty of shops and places to eat around the station.
You may find a better room for your budget here than in Shibuya or Omotesando, though that depends on your dates. The streets around the station and Ameyoko shopping area are busy. If you want more residential surroundings, compare nearby Nezu instead.
Mitsui Garden Hotel Ueno
Mitsui Garden is around a 2-minute walk from JR Ueno Station’s Asakusa Exit, with subway connections nearby as well. If you want a hotel close to the trains and are traveling with children, take a look at its panda-themed rooms as well as the standard options.
For a family or group of four, I recommend looking at MIMARU. The 39 m² Family Apartment has two single beds and a bunk bed, so everyone has their own bed, along with a kitchen and dining space. Compare its price with booking two rooms elsewhere, especially if you’d prefer to stay together.
Ikebukuro has plenty of restaurants and shops, including anime and manga stores, with direct trains to Shinjuku and Shibuya on the Yamanote Line. Other lines take you to northern and western Tokyo. If you find a hotel you prefer here, it’s a convenient alternative to staying in either of those two areas.
It’s another large, busy station area, so I wouldn’t choose it just to avoid crowds. Check which side of the station your hotel is on and the route from the exit you’ll use.
The view across Tokyo from Sunshine 60 in Ikebukuro.
Hotel Resol Ikebukuro
Resol is close to Higashi-Ikebukuro subway station and around a 6-minute walk from JR Ikebukuro. Its 14 m² Moderetto room has one 140 cm bed, so it’s quite compact for two people. If you’re traveling with a friend or want separate beds, I suggest the larger 21 m² twin.
Metropolitan is a larger hotel on the west side of the station. It’s worth checking if there are three of you and you’d prefer to share: the Superior Twin with Extra Bed is 27 m² and sleeps three. You can stay together and still have a short walk to the station.
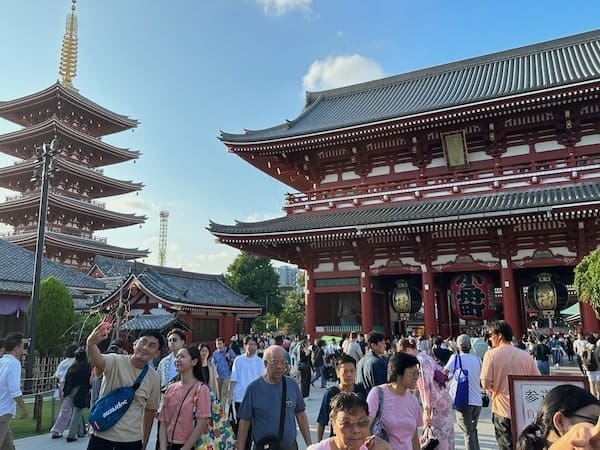
I think Asakusa gets recommended too often as the best place to stay on a first Tokyo trip. Senso-ji, the large Buddhist temple at the center of the area, and the older shopping streets are good reasons to spend time here. But the area is also very touristy during the day, and you’ll have longer journeys if most of your plans are around Shinjuku, Shibuya, and Harajuku.
Senso-ji Temple in Asakusa
Asakusa does have useful transport. The Ginza Line runs directly to Ueno, Ginza, and Shibuya, and there are Toei Asakusa Line and Tobu trains as well. I recommend staying here when you want to spend time in the neighborhood, or when much of your sightseeing is in eastern Tokyo. Being close to Senso-ji for one visit wouldn’t be enough for me to choose it for the whole stay.
The Gate Hotel Kaminarimon
I suggest The Gate Hotel if you want to stay near Senso-ji and would enjoy a drink with a view when you get back. There’s a rooftop terrace for guests overlooking Tokyo Skytree, along with a restaurant and bar upstairs. It could be especially nice for a couple spending a few nights in Asakusa.
Asakusa Tobu has triple and four-person rooms, so it’s another option for families or friends who want to stay together. Look for the Deluxe Triple or Deluxe Fourth rooms when booking. There are also doubles and twins if there are just two of you.
Once you’ve narrowed down the area, check the walk from the station, the room size, and the number of beds. A small room can be fine when you’ll be out all day, but two people sharing a narrow bed with large suitcases may prefer to spend more for extra space.
If you’ll arrive late from the airport, check the transfer for that time of night before booking. And if you plan to go out late, staying near the restaurants or bars you want to visit makes the journey home easier.
For most visits, I suggest keeping one hotel for your time in Tokyo. You can explore other neighborhoods during the day without packing and checking in again. If you’d also enjoy a more elaborate ryokan (traditional Japanese inn) stay with dinner and bathing, consider a separate night elsewhere on your route. My guide to staying in a ryokan in Japan explains the different kinds of stay.
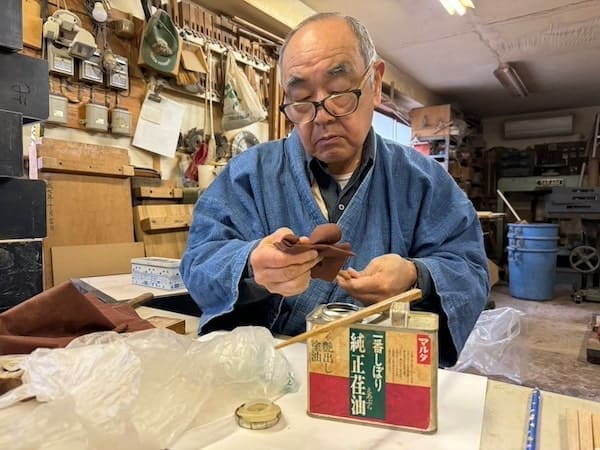
I visited Mogami Kogei, a woodworking workshop in Tokyo’s Kuramae neighborhood, to learn how to make my own chopsticks with its owner, Yutaka Mogami. Wabunka, which arranges private cultural experiences and stays in Japan, had invited me to join a session with my group. We’d also have an interpreter with us, so I was looking forward to seeing Mogami-san’s work and getting to talk with him.
I loved the experience. Mogami-san was so welcoming, and making chopsticks together gave us time to chat about his craft, his family, and life in the workshop. I’ve tried dozens of cultural activities since moving to Japan in 2019, and this is my top recommendation for a private chopstick-making experience in Tokyo. It costs considerably more than a simpler class, but if you’re hoping to meet a craftsman and spend time learning from him, I think it’s well worth considering.
Some links on YavaJapan are affiliate links. If you book or buy through them, I may earn a small commission at no extra cost to you. It helps support the site, and I only link to places, stays, and experiences I genuinely think are worth recommending.
At a Glance
Best for: People interested in Japanese woodworking who want time with the craftsman and a private activity for their own group.
Duration and group size: 1 hour 30 minutes, for one to six guests.
Language: An English-speaking guide is included in the Wabunka experience.
What you take home: Your handmade chopsticks and a paulownia wood box.
After meeting our guide, we went to Mogami-san’s workshop, where he began by showing us the storefront and some of his creations. I really enjoyed having this time with him before we started making anything. He was welcoming us into his own workplace, and the visit felt personal from the beginning.
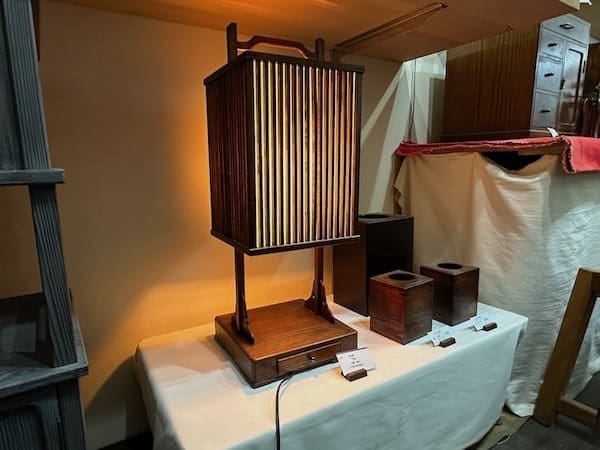
His craft is Edo sashimono, a traditional form of woodworking in which pieces fit together through carefully made joints rather than nails. Seeing his creations up close was impressive, especially knowing how they were put together. Our chopsticks would be a much simpler project, of course, but I was happy we got to see some of his other work too.
A lamp made using Edo sashimono techniques
Farther inside, the workshop was small and full of wood and tools. I loved how lived-in it was. Being surrounded by the things he used for his work made the invitation to learn there feel quite special, and we had time to take it all in. I never felt that we were being hurried along to the next stage.
I think i just found the ultimate souvenir to bring back from Japan😳 Mogami-san was such a kind soul, honestly the experience is as much talking and learning from him as it is about making chopsticks 😌 Mogami-san’s English is not bad but limited so we had an (amazing) guide with us translating and helping us discuss with the master ✌️ Honestly it was the best workshop I’ve done so far in Japan, really impressed👌 If you want to do it when you’re in Tokyo you need to book ahead inline, the website name is Wabunka #japantravel#tokyotravel#handwork#woodworking#chopsticks#japanthingstodo
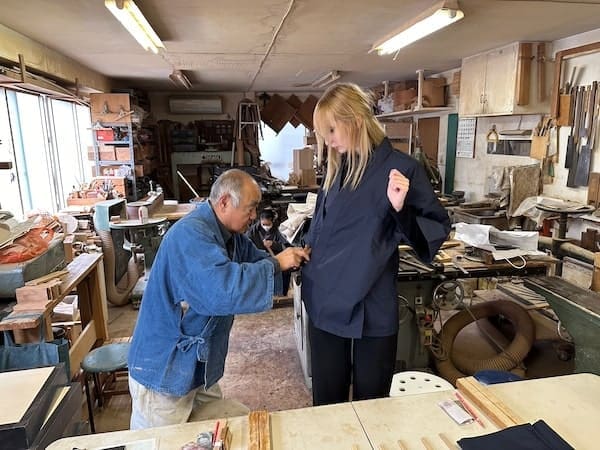
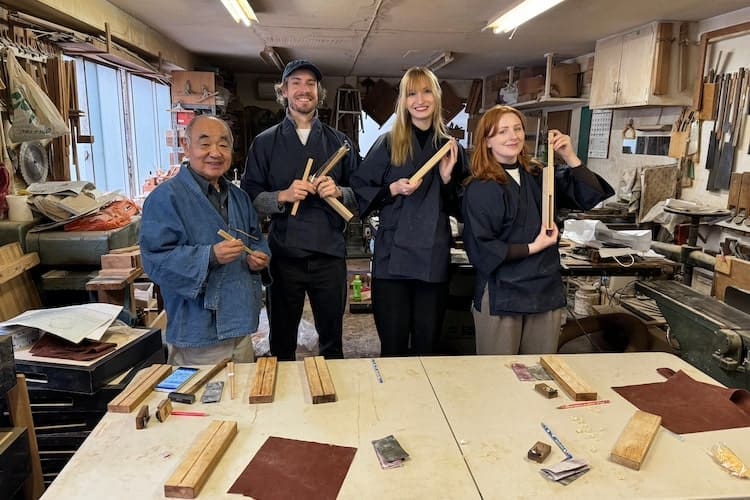
Before we started, Mogami-san offered us traditional workwear, which I was very happy to put on. I certainly looked more capable in it than I turned out to be. At this point, though, I was still convinced that making a pair of chopsticks would be fairly easy.
We all got to wear traditional workwear
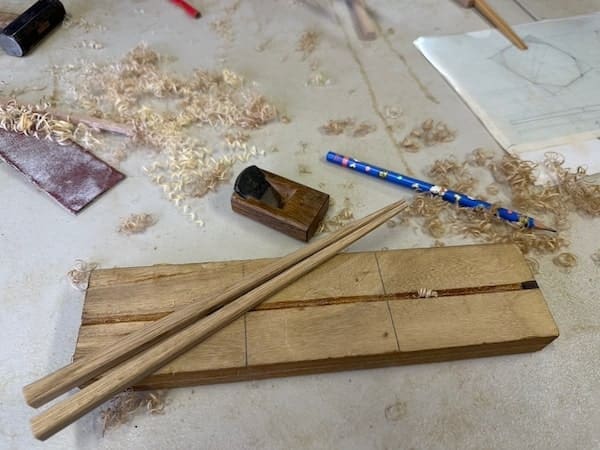
We each chose our wood and began shaving down the corners little by little. Mogami-san and the interpreter explained what to do, so I understood the steps. Getting my hands to do them properly was another story. Keeping the shape even took much more concentration than I’d expected, and I made several mistakes along the way.
Fortunately, Mogami-san was patient with me. He stepped in when I needed help and corrected what I’d done, rescuing my chopsticks more than once. I was grateful for that, because left entirely to my own skills, I’m not sure the result would have been something I’d want to show anyone.
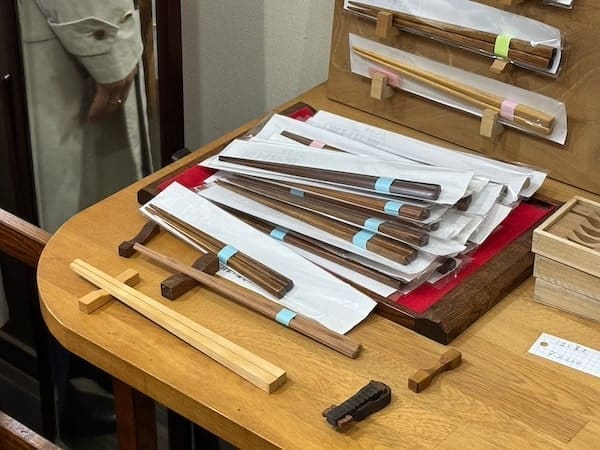
I still had a lot of fun doing it. There was enough to concentrate on that making the chopsticks felt satisfying, and enough help that my mistakes didn’t spoil the experience. Once we’d finished shaping them, we sanded the wood smooth, ready for the final finish. By then, I had a lot more respect for the care needed to make such a small everyday object.
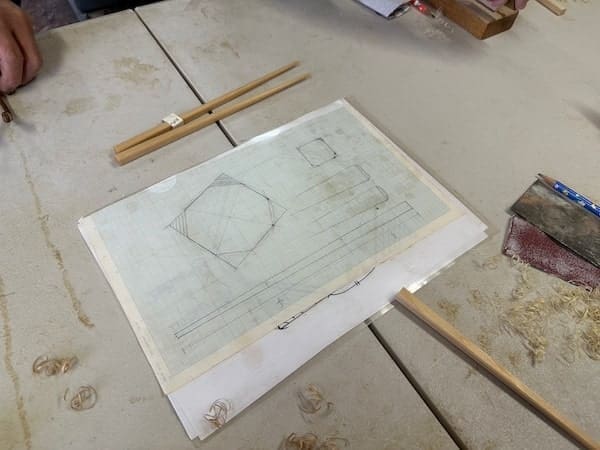
Visual explanations of the chopstick-making process
Talking with Mogami-san
As we worked, we also got to know Mogami-san. We talked about his craft, his family, the workshop, and the woodworking industry, and I honestly enjoyed those conversations as much as making the chopsticks. He was such a kind person to spend time with. Being able to ask him about his life and work made the visit much more personal than I’d expected from a chopstick-making class.
Our interpreter was a huge help throughout. As well as explaining the instructions, they helped us understand Mogami-san’s replies and ask follow-up questions. I was really glad we could have those conversations properly. We had the privacy of our own group and someone helping us communicate, so there was plenty of opportunity to learn about the person teaching us.
For another look at the workshop and its craft, you can watch this video:
Finishing the Chopsticks
I was surprised by how good the chopsticks looked once the finish went on. They looked so much better than they had a few minutes earlier, and after needing all that help, I was very pleased with the result.
Mogami-san applying the finish to the chopsticks
I was proud to hold up my finished pair, even if Mogami-san deserved a good share of the credit. I’d made something I could take home and use, with his help whenever I needed it. I really appreciated that balance: we got to do the work ourselves, and he made sure we left with chopsticks we were happy with.
Is Mogami Kogei Worth the Price?
For me, this is worth paying more for. I came away delighted with my chopsticks, but also very happy to have met Mogami-san and spent time in his workshop. His patience, the conversations, and the chance to see his work all contributed to how much I enjoyed the visit. It’s an experience I’d happily recommend to someone who wants that time with a craftsman.
I think it would be particularly lovely for a couple on a honeymoon or anniversary, or for friends who want to make something together. Older children and teenagers who enjoy making things could have a good time too. And if you’re a beginner who’s worried about making a mess of it, I needed plenty of help and still left very pleased with what I’d made.
The price difference is substantial, though. If you mainly want to try making chopsticks and bring home a souvenir, I recommend comparing the cheaper classes in my guide to making your own chopsticks in Japan. A shorter class could be a better choice if you’d prefer to spread your budget across several activities.
On the other hand, if you already do a lot of woodworking, you may find the chopsticks fairly simple to make. Meeting Mogami-san and seeing his work could still be a pleasure, but I recommend this as a visit and an introduction to the craft rather than an advanced lesson.
Posing proudly with our finished chopsticks
Booking and Visiting Mogami Kogei
You can book the private experience through Wabunka. They work with artisans and other hosts to arrange cultural experiences for international visitors, and this session is for your group only, with an English-speaking guide included. That’s the arrangement I joined and would recommend if you want to be able to talk with the craftsman as we did.
The session takes 1 hour 30 minutes. Mogami Kogei is at 4-37-10 Kuramae, about a 5-minute walk from Kuramae Station, so allow time for the journey as well. Your confirmation will explain where to meet.
My visit was with Yutaka Mogami. Your instructor may be Yutaka or his son, Ryo, and the chopstick-making now takes place in a separate room from the workshop. The experience includes a visit to the showroom.
The current class finishes the chopsticks with oil, and the Wabunka plan includes a paulownia wood box to take them home in. Box engraving costs extra and needs to be arranged at least 10 days in advance.
I suggest booking early if you only have one possible date, although the minimum notice is 2 days. You’ll be able to check the total price and cancellation terms before paying.
For a family visit, guests under 18 must come with an adult guardian over 18. Check with Wabunka about younger children’s eligibility before booking. The venue isn’t accessible for disabled visitors, so anyone who needs accessible facilities should discuss their requirements with Wabunka.
Samurai Restaurant Tokyo is worth it if you’re looking for a loud, ridiculous show in Shinjuku. I’ve visited both the old Robot Restaurant and Samurai Restaurant, and I still think it’s one of the most entertaining things you can do in Tokyo. The exaggerated fights, elaborate costumes, and flashing lights are a lot of fun, especially with the performers so close to you in the small venue.
I recommend it for an evening out with your partner or friends if you all enjoy that kind of over-the-top entertainment. Despite the name, you’re booking a show with food or drinks included. The performance is the reason to go, so I suggest choosing somewhere else if you’re hoping for a calm dinner or a traditional performance.
Some links on YavaJapan are affiliate links. If you book or buy through them, I may earn a small commission at no extra cost to you. It helps support the site, and I only link to places, stays, and experiences I genuinely think are worth recommending.
At a Glance
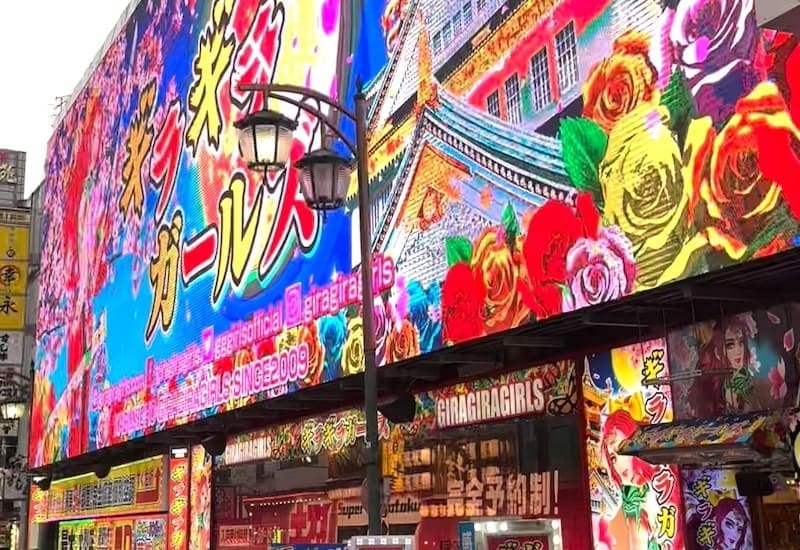
Location: Kabukicho, the entertainment district in Shinjuku, Tokyo. Entry is through Gira Gira Girls at 1-7-7 Kabukicho.
Show times: 10:50, 14:00, and 16:30 on operating days, subject to availability in the booking calendar.
Duration: 1 hour 40 minutes from the scheduled start to finish. Allow about 2 hours including arrival.
Official advertised prices: From ¥8,000/person for the morning show and ¥10,000/person for later shows, including food or two drinks.
Age and ID: 18+ only, with proof of age required. Alcohol is served only to guests aged 20+.
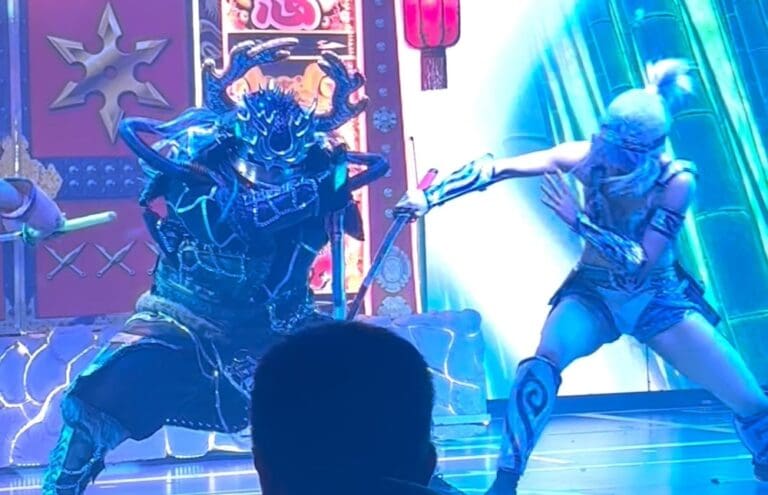
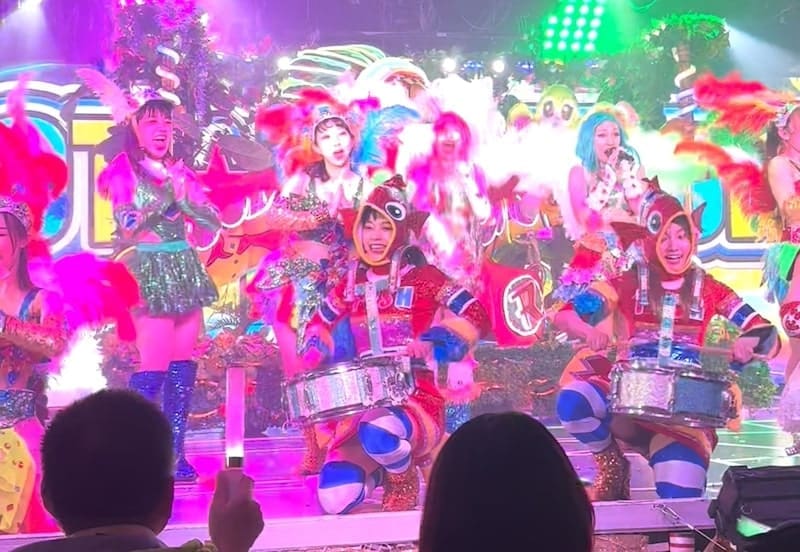
When I visited, I was so close to the performers that I felt in the middle of the show. The fights were overacted, the costumes were wild, and there was loud music and bright lighting throughout. With so much happening in a small space, it was much more fun than it would have been from the back of a large theater.
The costumes are a big part of the show.
It’s very touristy, and I enjoyed how ridiculous it was. The noise and flashing lights won’t suit everyone, though. If either tends to bother you, I suggest skipping it.
The samurai theme is used for entertainment, so this isn’t a performance I’d recommend for learning about samurai history or traditional arts. If that’s what you’re looking for, my guide to traditional experiences in Japan covers workshops and performances with more cultural explanation.
My video gives you a better idea of the costumes, space, and performances before you decide whether to go:
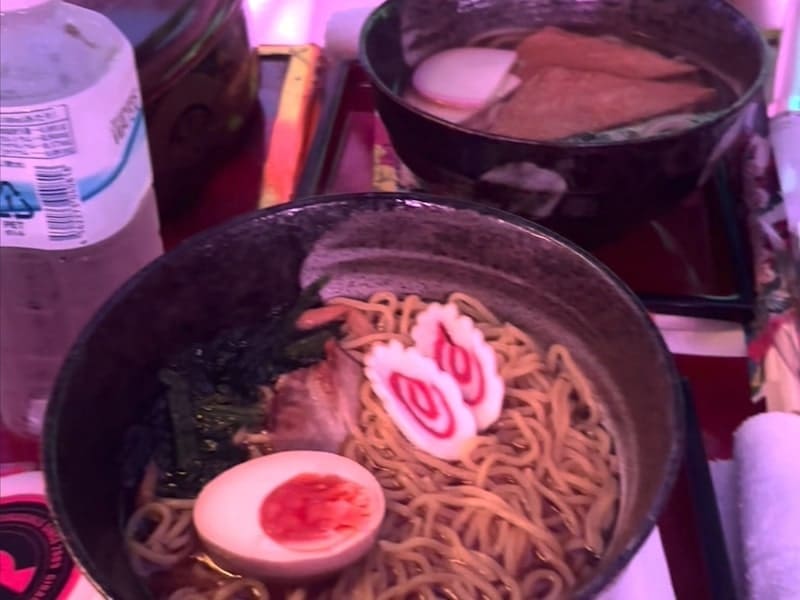
I was pleasantly surprised by the ramen when I visited. It was pretty good, although the performance is what makes the visit worthwhile. If there’s a particular Japanese meal you’re looking forward to, I suggest having it elsewhere in Shinjuku and choosing the drinks option for the show. You can have a drink while watching, then go out for dinner afterward.
The ramen I had during my visit was pretty good.
If you’d prefer to eat during the show, you can choose a beef bowl, an appetizer set, a boxed sushi meal, ramen, or udon (thick wheat noodles) when booking directly. Each meal comes with bottled water. You’ll choose either a meal or two drinks when booking, and you can’t change that choice once it’s confirmed.
The options differ with other sellers. Klook’s package includes a beef meal and one drink, while Rakuten and GetYourGuide include two drinks, with nonalcoholic choices available. If you have allergies or dietary requirements, ask the seller before paying, because Klook can’t guarantee a suitable meal.
Bring some cash if you’d like extra food or drinks during the show. Those purchases, along with souvenirs, are cash-only at the venue.
Tickets: Where I Recommend Booking
For a ticket with two drinks, I suggest comparing Rakuten Travel Experiences with GetYourGuide for the same date and performance. If Rakuten has a good discount for the same package, I’d take the saving. When prices are close, I prefer GetYourGuide for its easier booking process.
GetYourGuide also currently offers a full refund if you cancel at least 24 hours in advance, which gives you some flexibility if your Tokyo plans change. Confirm the deadline for your selected ticket before paying, because cancellation conditions vary between sellers and options.
If you’d prefer a meal, compare Klook with booking directly. The table below shows what each package includes, so you can compare the total cost for the food or drinks you actually want.
Food selection is fixed once confirmed. No refunds for personal reasons.
Prices, Show Times, and Arrival
The morning show usually costs less, with an advertised price from ¥8,000 per person compared with prices from ¥10,000 for the later performances. These prices include admission plus food or two drinks, and the final amount depends on the ticket you choose.
Show
Doors Open
Performance
Advertised Price
Morning
10:30
10:50-12:30
From ¥8,000/person
Afternoon
13:30
14:00-15:40
From ¥10,000/person
Late afternoon
16:00
16:30-18:10
From ¥10,000/person
If your budget allows it, I recommend the 16:30 show. The music, lights, and drinks suit the start of an evening out, and you’ll finish at 18:10 with time for dinner in Shinjuku. The morning performance is a good alternative if the saving is more useful to you.
Each scheduled performance lasts 1 hour 40 minutes, including breaks. Allow about 2 hours at the venue, plus time to find your way out of Shinjuku Station if this is your first visit. Your ticket will give you an arrival time, which is earlier than the performance itself.
You can check the show schedule and choose a date in the reservation calendar before arranging the rest of your day. Availability varies, and all three performances may not run every day.
Age Limit and Entry Rules
Everyone in your group must be 18 or older, even if younger guests would be accompanied by an adult. Samurai Restaurant shares the Gira Gira Girls venue, and its age restriction applies even though the Samurai show itself contains no adult content.
You’ll need your booking confirmation and ID showing your age, such as a passport, because entry can be refused without proof of age. Alcohol is only served to guests aged 20 or older, and anyone who is visibly drunk may be refused entry.
It’s worth allowing extra time to get there. Depending on your ticket’s conditions, arriving late could mean waiting for a break before being seated or having your reservation canceled. If you’re booking directly, keep in mind that refunds and changes aren’t available for personal reasons.
What Happened to Robot Restaurant?
The old Robot Restaurant closed during the pandemic, and Samurai Restaurant is its successor. The performance and venue arrangements have changed, but it still has the loud music, exaggerated fights, and elaborate costumes that made the earlier show popular.
If you’ve been searching for Robot Restaurant tickets, look for Samurai Restaurant or Samurai Restaurant Time when booking your visit. The entrance is through Gira Gira Girls, which you can see in my photo from summer 2023.
The GiraGiraGirls entrance when I visited in summer 2023.
Finding the Venue and Spending the Evening in Shinjuku
You’ll find the venue at B1, 1-7-7 Kabukicho, Shinjuku-ku, Tokyo, with entry through Gira Gira Girls. Use the venue’s map and your ticket’s check-in instructions to find it, as the photo above shows the entrance during my earlier visit.
After the show, I suggest staying in Shinjuku for the evening. You could have dinner, visit Kabukicho Tower, or go for drinks in Golden Gai’s small bars. If you’d rather walk around and see where you end up, you can explore Kabukicho and browse Don Quijote, the discount shop, later in the evening.
If you expect to spend several evenings around here, my guide to where to stay in Tokyo explains when Shinjuku is a good place to stay.
I hate arriving tired after a long flight and still having to work out how to get to the hotel. At Haneda, the trains stop shortly after midnight, so I recommend deciding how you’ll reach your hotel before you fly, including what you’ll do if your flight is delayed.
An airport bus is my usual preference when it stops near the hotel. I use them regularly because I can put my suitcase in the luggage compartment and avoid changing trains. They can also be useful after a late flight: night buses to Shinjuku and Ikebukuro, two Tokyo areas with plenty of hotels, leave Haneda until 2:20.
If you expect to arrive too late for a bus or train to your hotel, I suggest budgeting for a taxi or booking a car with a driver before you fly. And if you haven’t booked your first night yet, consider an airport hotel so you can sleep before traveling into Tokyo the next morning.
Some links on YavaJapan are affiliate links. If you book or buy through them, I may earn a small commission at no extra cost to you. It helps support the site, and I only link to places, stays, and experiences I genuinely think are worth recommending.
At a Glance
Arriving after 22:00: Allow time for immigration and your bags, and decide what you’ll do if you miss the last train or bus.
Cheapest way into Tokyo: Take a train if you can still catch every train needed to reach your hotel.
Staying in Shinjuku or Ikebukuro: Check the night buses. They leave Terminal 3 until 2:20 and cost ¥2,800 per adult.
Going straight to your hotel: Take a taxi or book a car with a driver, especially if you’re sharing the cost or carrying several suitcases.
Sleeping at the airport:The Royal Park Hotel Tokyo Haneda is in Terminal 3. Book the regular hotel, rather than the separate Transit hotel.
Checking in after midnight: You normally need to book the previous night’s stay and tell the hotel you’ll arrive late.
Will You Have Time to Catch a Train or Bus?
If your international flight arrives after 22:00, I suggest checking what you’ll do if you miss the last train or bus. This is especially useful if you need to change trains to reach your hotel. For a flight arriving at 23:00 or later, I recommend deciding before you fly whether you’ll take a night bus, pay for a taxi, or stay near the airport.
You’ll need time to get off the plane, walk through the terminal, pass immigration, collect your bags, and go through customs. I suggest allowing 1 to 2 hours after your flight’s scheduled arrival before taking a train or bus. You might get through faster, but queues or a delayed flight can also make it take longer. Have another way to reach the hotel if you miss the train or bus you planned to take.
Check which terminal your flight uses too. International flights arrive at Terminal 2 or Terminal 3, and trains and buses leave each terminal at different times. Most of the times below are for Terminal 3. If you’re arriving at Terminal 2, check the times from there.
Comparing the Transport Options
The table below gives you an idea of the times and prices from Terminal 3. Check the timetable for your travel date, especially if you’re planning to take the last train or bus.
Transport
When It Leaves Terminal 3
Adult Price
What to Check
Tokyo Monorail to Hamamatsucho
Last train at 0:10
¥520/person
Can you walk to your hotel or catch another train from Hamamatsucho?
Keikyu train to Shinagawa
Last train to Shinagawa at 0:08
¥330/person
Can you catch another train, or will you need a taxi from Shinagawa?
Regular Airport Limousine Bus
Varies by route; last regular Shinjuku bus at 23:40
Shinjuku: ¥1,400/person
How far is the bus stop from your hotel?
Night bus to Shinjuku and Ikebukuro
0:20, 1:00, 1:40, 2:20
¥2,800/person
Can you walk to your hotel from one of its stops?
Taxi from the airport
Available overnight
Depends on your hotel and road tolls
Ask the driver about the price before leaving
Car booked in advance
The pickup time you arrange
Check the total when booking
Will everyone and their bags fit in the car?
The train prices are for adult paper tickets from the airport to Hamamatsucho or Shinagawa. Any train or taxi you take after that costs extra.
Taking a Train
Trains are usually the cheapest way into Tokyo while they’re running. The Tokyo Monorail takes you to Hamamatsucho Station, and Keikyu trains can take you to Shinagawa Station. At either station, you can change to trains run by JR (Japan Railways), including the Yamanote Line, which stops in several major Tokyo neighborhoods.
I recommend checking the whole journey to your hotel in Google Maps:
Enter your hotel’s name and select directions.
Set your arrival terminal at Haneda as the starting point, then choose public transport.
Set the date and time to when you expect to be ready to leave the airport, allowing time for immigration and your bags.
Open the suggested route. Check when each train leaves and how much time you have to walk between platforms.
Try a later departure time as well, so you know what to do if you’re delayed.
For a train after midnight, select the following day’s date. If your flight arrives on October 10 and you want the train at 0:08, that train leaves on October 11.
If the train times work for your hotel, buy a ticket at the airport station or use a Suica or PASMO transport card. These are prepaid cards you can use to pay for train journeys.
You can also take a train to Shinagawa or Hamamatsucho and get a taxi from there. This can cost less than a taxi from the airport if the station is on the way to your hotel. With several people and large suitcases, though, I suggest comparing the total cost with a taxi straight to the hotel. You may prefer to pay a little more to avoid moving the bags again.
Taking an Airport Bus
Airport Limousine Buses are normal coaches with space for suitcases underneath. If a bus stops close to your hotel, you can sit down for the journey and avoid carrying your luggage through train stations.
The last regular bus from Terminal 3 to Shinjuku leaves at 23:40. Tickets cost ¥1,400 per adult and ¥700 per child. Buses to other areas may finish earlier, and the last bus may make fewer hotel stops than buses during the day. Check your exact stop in the official bus timetable.
You can buy a ticket at the airport or book online. If you book in advance, check whether you can change the ticket if your flight is delayed.
There are four night buses from Terminal 3, leaving at 0:20, 1:00, 1:40, and 2:20. They cost ¥2,800 per adult and ¥1,400 per child.
All four stop on the west side of Shinjuku Station, at Shinjuku Expressway Bus Terminal, and at Ikebukuro Station East Exit. The last three also stop at Higashi-Shinjuku Station. You can see when each bus reaches these stops in the night bus timetable.
If you’re arriving at Terminal 2, you can board the first of these buses there at 0:05. It then stops at Terminal 1 at 0:10, before leaving Terminal 3 at 0:20. The other three buses leave from Terminal 3 only.
I recommend the night bus if your hotel is within walking distance of a stop. Shinjuku covers a large area, so check the walk to your hotel’s address before buying a ticket. If you’ll need a taxi from the bus stop, add that cost when comparing the bus with a taxi from the airport.
Buy your ticket before boarding, then follow the signs at the airport to the correct bus stop.
A taxi can take you straight to your hotel at any time of night. Follow the signs to the official taxi stand and show the driver your hotel’s name and address. You may have to wait in a queue, particularly when several flights arrive together.
For some parts of Tokyo, you can pay a fixed fare, which is a set price for the journey. At night, for example, it costs ¥10,000 to the Shibuya district or ¥10,700 to the Shinjuku district. That’s the price for the whole car. Before leaving, ask the driver whether you can use a fixed fare for your hotel.
You’ll also pay road tolls, the fees for using the expressway. These are added to the fixed fare.
Taxis cost more at night, from 22:00 to 5:00. If the taxi uses a meter to calculate the price, the night charge adds 20%. The fixed night prices above already include that extra charge. You can check the fixed-fare taxi information before your trip, then take one from the airport taxi stand without booking.
A taxi can be worth the extra money when you’re sharing the cost. Three adult night-bus tickets cost ¥8,400, so compare that with the price of a taxi straight to your hotel. Check that everyone and their suitcases can fit in one car.
Booking a Car with a Driver
A private airport transfer is a car with a driver that you book before arriving. I suggest this if you need a larger vehicle or prefer to have the pickup arranged before you fly.
When booking, check how many people and bags the car can carry, where you’ll meet the driver, and whether the total includes night charges and road tolls. Some services include a driver meeting you inside the terminal, while others ask you to go to a pickup point.
Also check how long the driver will wait and what happens if your flight is delayed. You’ll need enough time to get through immigration and collect your bags before meeting them.
If you haven’t booked your first night, compare an airport hotel with the cost of a Tokyo hotel plus a late-night taxi. Staying near the airport lets you sleep before traveling into the city.
You’ll have to move your bags again the next day, though. If you’ve already booked several nights at the same Tokyo hotel, going straight there may be easier. For choosing an area for the rest of your stay, see my guide to where to stay in Tokyo.
The Royal Park Hotel in Terminal 3
The Royal Park Hotel Tokyo Haneda has an entrance on the third floor of Terminal 3, in the departures lobby. After collecting your bags and going through customs, you can go to the hotel without taking a bus or train.
Book the regular hotel, and tell the staff how late you’ll arrive. There’s also a hotel called Royal Park Hotel Tokyo Haneda Transit, but that’s inside the international departures area. You can’t use the Transit hotel when you’re arriving in Japan and leaving the airport.
First Cabin Haneda Terminal 1 has individual sleeping cabins instead of standard hotel rooms. If you arrive at Terminal 3, you’ll need to get to Terminal 1 before checking in.
The hotel has a night entrance near bus stop 8 on the first-floor arrivals level. Staff can meet you there when the terminal is closed. Contact First Cabin to arrange your arrival, and check the buses and trains between terminals. If they’ve stopped running, you’ll need a taxi to Terminal 1.
Hotel Mystays Haneda is near Anamori-inari Station, outside the airport. It has a bus between the airport and hotel, but check the hotel’s transport information to see whether you can catch it after your flight.
If you’ll arrive after the last hotel bus, budget for a taxi. Include that in the cost of staying here, and confirm that the hotel can check you in at your expected arrival time.
If you want a room as soon as you arrive after midnight, you normally need to book the previous night’s stay. For example, to check in at 1:30 on October 11, book the night of October 10 and tell the hotel you’ll arrive late. A booking starting on October 11 usually only lets you into the room that afternoon.
Send the hotel your flight details and expected arrival time. If you’re delayed, contact it again so the staff know you’re still coming.
If you prefer to wait for the morning trains, Terminal 3 stays open all night. You’re allowed to stay there overnight if you’ve arrived on an international flight or will be taking one. The public areas of Terminals 1 and 2 close overnight. Waiting at Terminal 3 can save money, but I recommend booking a room if you need proper sleep after a long flight.
I also suggest leaving the next morning free. After a short night, breakfast and the trip to your Tokyo hotel may be enough. When planning the rest of your Japan trip, book tours or activities for later in the day so you have time to rest.
Driving a tiny kart through Tokyo in a costume is a fairly unusual way to see the city. If that’s what appeals to you about doing Mario Kart in Japan, you can still book it. The activity is street go-karting on public roads, with a guide leading the group through normal traffic. It has no official connection to Nintendo.
I recommend Shibuya after dark if you’re looking forward to the bright signs and busy streets, or Asakusa during the day if you want to combine the ride with exploring that part of Tokyo. Both can be fun if you enjoy driving, though I’d suggest a different activity if city traffic makes you nervous.
Before choosing a route, check your driving documents. You need to be at least 18 and hold a license accepted in Japan, which often means arranging an International Driving Permit before you leave home. Getting that sorted early gives you time to choose the tour you actually want.
Some links on YavaJapan are affiliate links. If you book or buy through them, I may earn a small commission at no extra cost to you. It helps support the site, and I only link to places, stays, and experiences I genuinely think are worth recommending.
Children and passengers: Street Kart uses single-seat karts. Each participant drives, so this won’t suit a family with younger children.
Cost and booking: Compare the total for your date and departure time, including any insurance upgrade. Allow for permit or translation costs too.
Which Tokyo Go-Karting Route Should You Choose?
The neighborhood name gives you a starting point, but tours often pass through several areas. I suggest choosing the places you want to drive past, then checking the route and shop address together. Two tours described as Asakusa can have different meeting points and itineraries.
Area
Approximate Tour Length
Why Choose It?
My Suggested Time
Booking
Akihabara
1-1.5 hrs
Combine karting with Tokyo’s anime and gaming district
Allow extra time for the journey to the shop and check-in. These durations describe the linked tours, and traffic can affect how long you’re on the road.
Akihabara
If you’re already planning to spend time in Tokyo’s anime, electronics, and gaming shops, Akihabara is a natural place to add a kart tour. The linked Street Kart route also passes Tokyo Station and Ginza, so you’ll see other parts of central Tokyo along the way.
I recommend going around dusk, when the signs are lit but there’s still some daylight. Aim roughly for 16:00 to 17:00 in winter or 18:00 to 19:00 in summer, adjusting for sunset on your date. A daytime tour is still a reasonable choice if it fits your plans better.
I usually recommend Asakusa during the day. You can visit Senso-ji, the large Buddhist temple, and walk through the surrounding shopping streets before or after the ride. Karting gives you a drive through the area, while exploring on foot lets you stop and look around.
The linked Monkey Kart tours cover parts of eastern Tokyo around Asakusa, Skytree, and Akihabara. Compare the route and meeting point on Klook and Viator, since the packages may differ.
For the busy crossings, bright signs, and crowds that people often picture when they think of Tokyo, I recommend Shibuya. The route includes Shibuya Crossing, Harajuku, and Omotesando.
I strongly recommend a night tour here. Shibuya changes considerably when the signs light up, and that’s a big part of the appeal of driving through it. Around 17:00 in winter or 19:00 in summer is a useful starting point when comparing slots, though sunset varies through the season.
Book in advance if you want a particular evening departure. You can spend the afternoon around Harajuku or Shibuya, then have dinner after the ride.
Choose Tokyo Bay if you want Rainbow Bridge and Tokyo Tower to be part of the ride. This is a longer outing than the shorter central Tokyo tours, with stretches through the waterfront and an industrial area as well as the landmarks.
I recommend early evening or night, when you can see the bridge and tower illuminated. The drive across the bridge is also more exposed than driving between buildings, which is worth considering if you’re already unsure about being in a small kart in traffic.
Check the departure address carefully. Street Kart’s Tokyo Bay shop is in Shin-Kiba, so you’ll need to allow time to reach it from central Tokyo.
What License Do You Need for Street Go-Karting in Japan?
The country that issued your license determines which documents you need. Your nationality alone doesn’t tell you whether you can drive. Check the requirements before booking, especially if your license was issued somewhere other than where you currently live.
A Japanese Driver’s License
A valid Japanese license covering ordinary cars is accepted. A motorcycle-only or moped license isn’t enough for Street Kart’s vehicles.
Licenses from Switzerland, Germany, France, Belgium, Monaco, or Taiwan
For a short visit, bring your original license, an authorized Japanese translation, and your passport. The Japan Automobile Federation’s translation guidance explains the requirements and how to apply.
A translation from an ordinary translation service may not qualify. Arrange one through JAF or another authority accepted for your license, and allow time for it to be issued.
An International Driving Permit
For many other visitors, the required document is an International Driving Permit under the 1949 Geneva Convention, usually shortened to IDP. It must come from an authorized issuer, cover cars, and be valid for your visit. Japan doesn’t accept the 1968 Vienna Convention version.
Arrange the permit before traveling, and bring it with your original domestic license and passport. For a U.S.-issued license, AAA’s IDP application is one way to do this.
Some countries can’t issue a permit Japan accepts. If yours isn’t covered, a translated license by itself won’t make you eligible. Use the Tokyo police’s IDP guidance and the operator’s document check to confirm your situation before paying.
Bring the Physical Documents
For a visitor using a foreign license, pack:
Your original passport
Your original domestic driver’s license
Your original IDP or the required authorized Japanese translation
Phone photos and digital permits won’t replace the required physical documents. Street Kart can refuse participation without a refund if you arrive without them.
If you’re living in Japan, have recently left and re-entered, or plan to use U.S. military status under the Status of Forces Agreement, check the additional rules in Street Kart’s license guide. Those situations need more than the short-visit checklist above.
I suggest asking the operator to check your documents in advance if anything is unclear. Street Kart’s booking guidance explains how to send them for review. You still need the originals on the day.
How Much Does Street Go-Karting Cost?
The price changes with the route, departure time, booking platform, and any extras you select. I suggest comparing a shorter city tour with the longer Tokyo Bay ride before deciding how much to spend. Promotions can change which one costs less, so compare the actual departures you’re considering.
I usually recommend checking Viator or Klook, because it’s straightforward to compare the tour details and cancellation terms. Prices can also be lower than booking directly, though it’s worth comparing the same date and package on the operator’s website.
Kart rental, a guide, and costume rental are common inclusions. Photos, camera rental, and insurance upgrades vary. Add the cost of arranging your IDP or license translation if you still need one, and budget for getting to the shop yourself.
Can Children Join or Ride as Passengers?
Street go-karting is generally an 18+ activity, even if you can legally drive at a younger age at home. Street Kart’s karts seat one person, so a child or a friend without a valid license can’t share yours.
For a family with younger children, I suggest choosing an activity where everyone can take part. An Asakusa rickshaw ride may suit you better, with seating arrangements checked for your children’s ages. A cycling tour needs its own age and bicycle-size checks, so it isn’t a replacement for every family.
Booking, Insurance, and Cancellation
Once you’ve confirmed your documents, book the route and departure you want. I recommend reserving early if your group needs to ride together or if you want an evening tour on a specific day.
Check these details before paying:
Meeting point and arrival time: Use the shop address on your confirmation. Street Kart asks you to arrive 30 minutes early.
Route and duration: Confirm which landmarks are included and allow time after the tour before your next reservation.
Group arrangements: Book together and check whether a larger party will be split between guides.
Cancellation deadline: Read the terms for the exact booking channel and package.
Weather and extras: Check the rain policy, photo arrangements, and any additional insurance charge.
Insurance and Damage Charges
Street Kart includes basic insurance, but its standard plan has a ¥50,000 deductible per vehicle for kart damage. That means you may have to pay that amount yourself if the kart is damaged. An optional plan offers broader coverage, so compare the details in the Street Kart FAQ.
Other operators can use different policies. Check the amount you could owe, the exclusions, and whether your own travel insurance covers this activity before choosing a package.
Cancellation and Rain
The cancellation deadline can differ even for the same operator. For example, the linked Shibuya tour on Viator currently allows cancellation up to 24 hours before the experience for a full refund. Street Kart’s direct booking guidance uses a 7-day deadline. Follow the terms attached to your reservation.
Rain doesn’t necessarily mean the tour will be canceled. Some tours still operate in wet weather. Check what happens if the operator cancels and what happens if you decide you no longer want to drive. Contact the operator if the forecast is poor, rather than missing the departure and expecting a refund.
If you’re still arranging the rest of your trip, my guide to common Japan travel mistakes covers other booking and timing problems to avoid.
What Is the Ride Like?
You’ll have a briefing before leaving the shop, then follow the guide in a group. You drive on the left, stop at traffic lights, and share the road with cars, taxis, buses, and other traffic. There’s no racing. The costume makes it look playful, but you’re responsible for driving a vehicle on public roads.
I think it suits people who already enjoy driving and are comfortable paying attention to traffic in an unfamiliar city. If that sounds stressful, sightseeing as a passenger will probably be more enjoyable.
What to Wear and Bring
Wear flat, closed-toe shoes and clothes that let you sit and use the pedals comfortably. Avoid heels, sandals, and long, loose skirts. Costume rental is common, but wearing one is optional.
You’ll be outdoors throughout the drive, so dress for the temperature and wind. Winter evenings can be cold, and summer rides leave you exposed to the heat. If you’re still choosing your travel dates, my best time to visit Japan guide covers the broader seasonal differences.
Keep your phone put away while driving. Ask how the guide handles photos, and check whether an approved hands-free camera mount is available if you want video. Follow the guide’s instructions about when photography is allowed.
Can You Go Street Karting Outside Tokyo?
Osaka
If you’re already visiting Osaka, a kart tour around Namba is another option. The linked tour passes Dotonbori, Namba, and Tsutenkaku, the tower in the Shinsekai area. I recommend an evening departure if you want the illuminated signs and busy shopping streets.
Osaka routes vary by operator. If there’s a particular landmark you want to see, check that it’s included. The castle in the photo below isn’t part of the linked Namba tour’s published itinerary.
Street go-karting near Osaka Castle; routes vary by tour
Okinawa
The Okinawa option is worth considering if you’re already visiting the islands and want to go karting there. Tours run around Naha, Okinawa’s main city, with different routes depending on the package.
I recommend keeping this as an activity within an Okinawa stay. The flight and extra travel time would be a lot to add to a Tokyo or Osaka trip just for karting.
I think it can be worth booking if the drive itself sounds fun to you. You get to pass through familiar Tokyo streets from a very unusual seat, often wearing a costume alongside friends. Enjoying that novelty is a good reason to go.
It’s harder to recommend if you’re nervous in traffic, traveling with young children, or mainly hoping for a relaxing sightseeing tour. You’ll need to concentrate on driving, and the route won’t give you time to explore each place you pass.
I wouldn’t put karting on everyone’s Japan itinerary. If you’re excited about it and your documents are ready, choose the route you most want to drive. If you’re unsure, there are plenty of other ways to spend that time and money.
Why Is It Called Mario Kart, and What Do Locals Think?
The name comes from earlier tours that used Mario-related branding and costumes. Nintendo sued the company known as MariCar and won a case over unfair competition involving that branding and character costumes. Street Kart now makes clear that it has no affiliation with Nintendo and doesn’t provide Mario costumes.
As for local opinion, I can give you my own perspective from living in Tokyo: I rarely notice the karts unless they’re right in front of me. They aren’t a constant part of my daily life here.
That experience won’t be the same for someone living beside a shop or a busy route. Shibuya Ward has received concerns from residents and introduced requirements for operators to notify the ward and explain new businesses to nearby residents. Noise and how groups behave on the road are real concerns, even if they haven’t affected me personally.
If you join a tour, keep the noise down, follow traffic rules, and leave photography to the arrangements made by the guide. You’ll be sharing streets that people use to get to work and go about their day.
Alternatives to Street Go-Karting
If you’d enjoy seeing Tokyo with a guide but prefer to leave the driving to someone else, consider an Asakusa rickshaw ride. You’ll sit in a two-wheeled carriage pulled by your guide and see the neighborhood without handling a vehicle yourself.
A Tokyo cycling tour is another way to explore outdoors. It avoids the driving-permit requirement, though you still need to be comfortable cycling and meet the tour’s participation requirements.
For views from above, a Tokyo helicopter tour is a much more expensive alternative. Check the flight duration, departure location, and weather policy when comparing it with other activities.